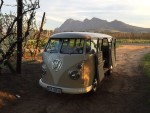
Now you have your own Pride and joy...
Sure you will NOW start spending money to make it your own..
Enjoy...


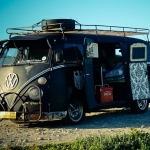
Lots of time with a very small screw driver and scouring pad. As the old tinting was in a very bad condition it wasn’t that difficult to get it all off. I just had to use the tiny screw driver in all the grooves to clear the remains.Dawie wrote:Nice...
How did you remove the old "peeling off" colouring on the inside?
Almost, besides the interior. With my Baywindow being a camper I was able to do the interior myself, but wanting it like this I had to make use of an upholsterer.Bushpig wrote:Really a good looking ride, and congrats on doing it yourself.The costing is interesting and a nice reference. Looking forward to seeing it on the road.