A few pics of a new project

Give details and pictures of your ACVW projects here.
User avatar
Tony Z
Donor
Donor
Posts: 14994
Joined: Wed Sep 14, 2005 8:33 am
What model do you have?: 2.3L 69; 1302; P/Van
Location: Klipheuwel (near Durbanville), Cape Town or working at sea
Has thanked: 191 times
Been thanked: 487 times
South Africa

A few pics of a new project

Post by Tony Z »

I thought I'll throw a few pics together of something small I have ongoing right now.
I'll put it together in the relevant thread when the time comes...

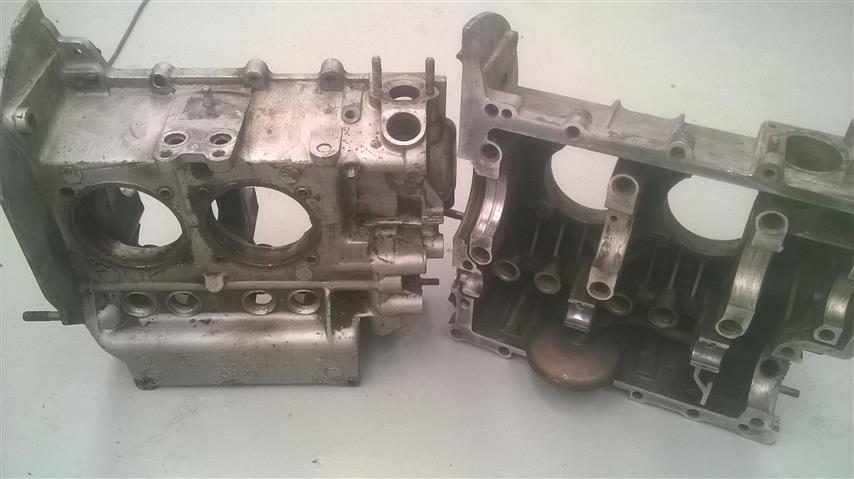
Take case and give it a preliminary wash
Image

strip case so it fits on the mill
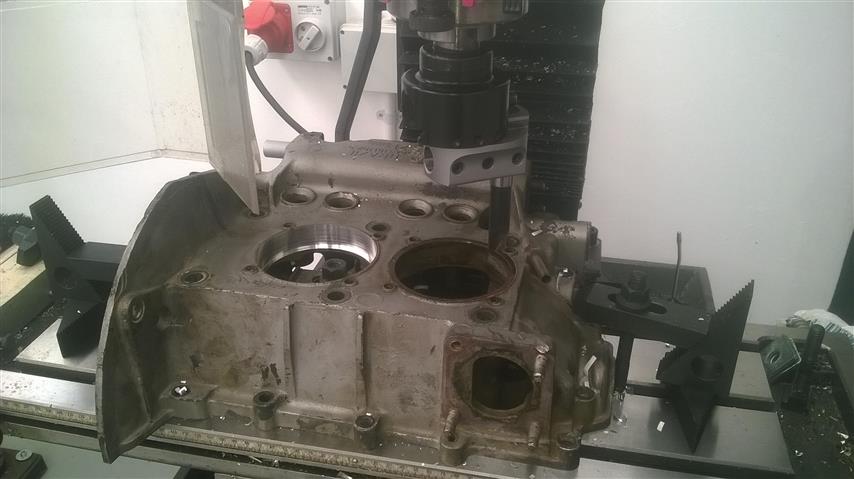
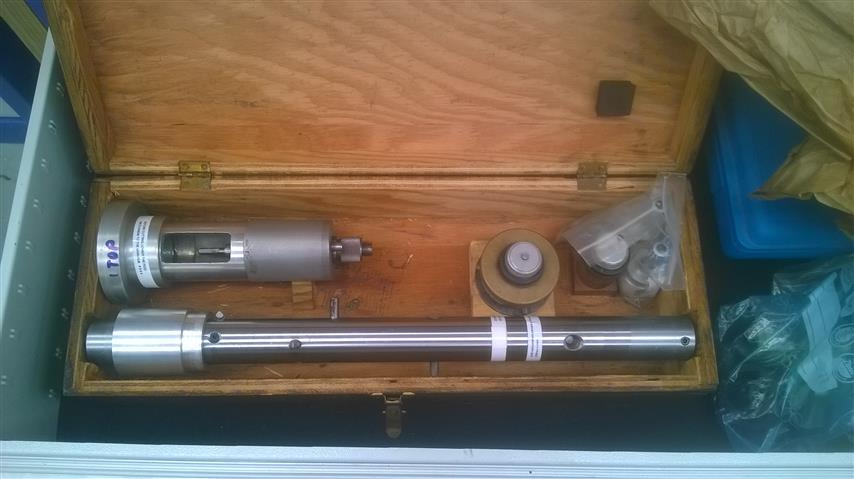
Image

put case on mill
Image

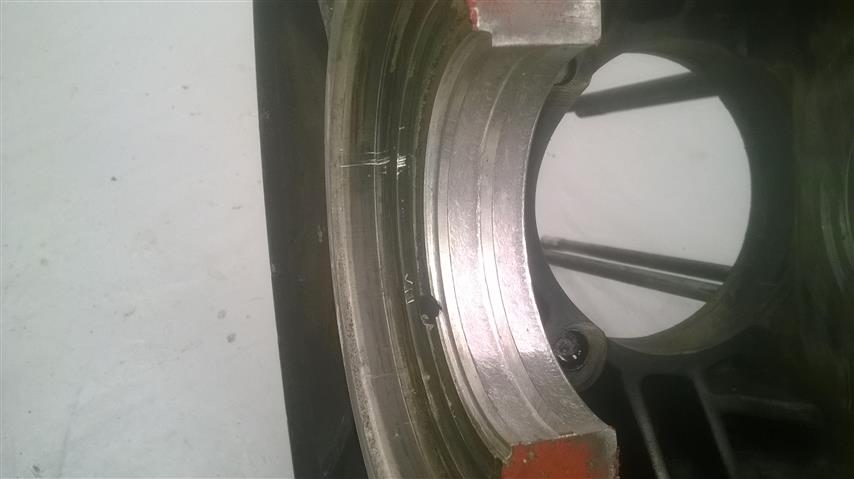
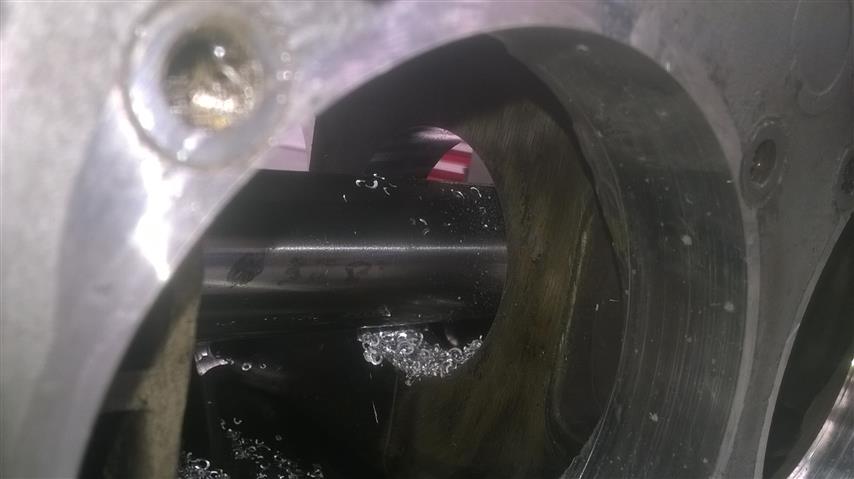
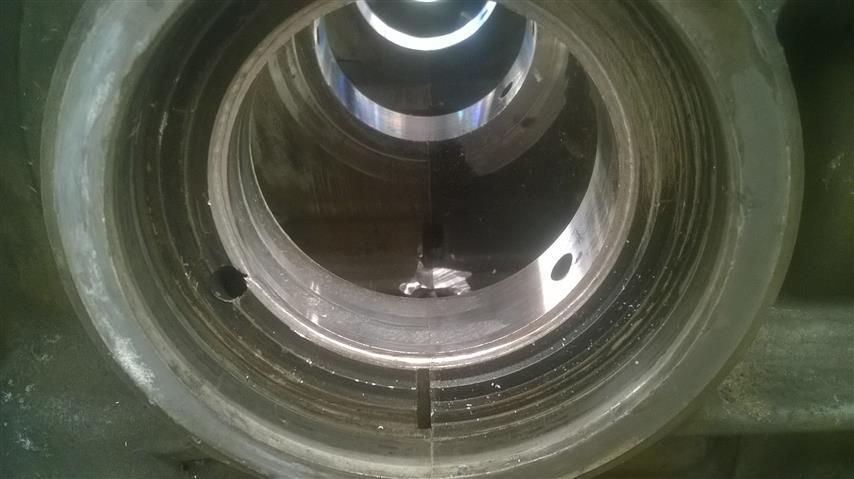
clock up and cut case
Image

put heads on mill and clock up
Image

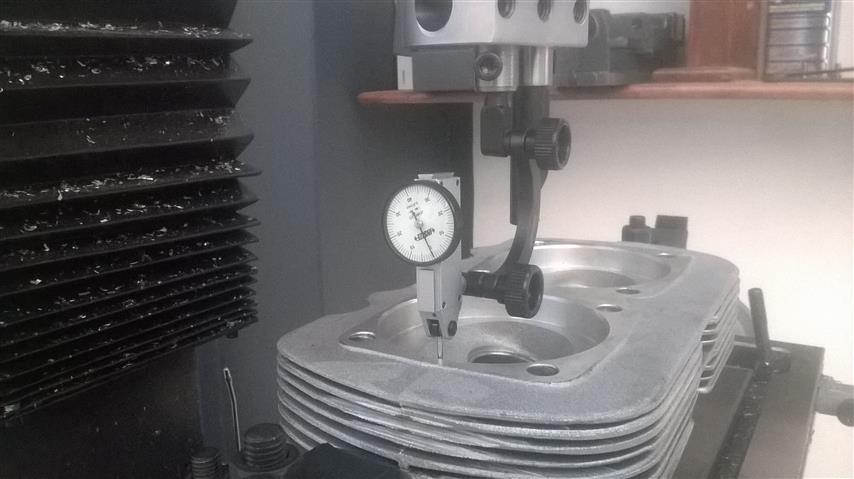
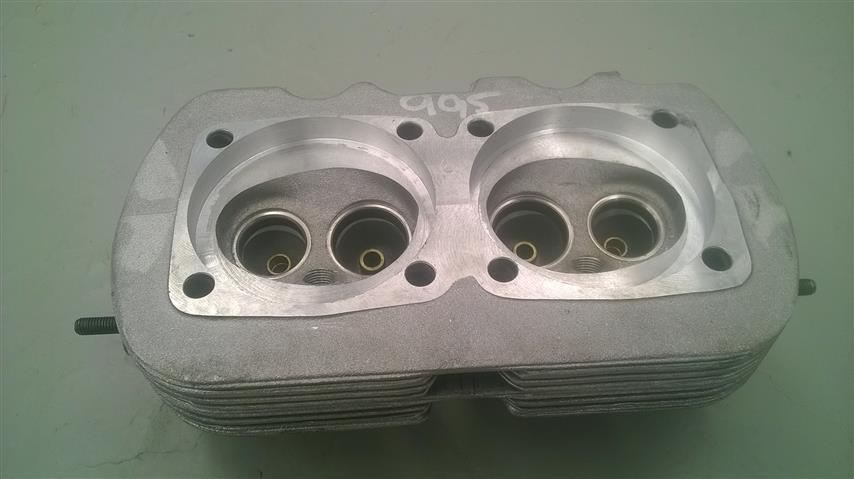
cut heads for 90.5mm cylinders
Image


User avatar
Tony Z
Donor
Donor
Posts: 14994
Joined: Wed Sep 14, 2005 8:33 am
What model do you have?: 2.3L 69; 1302; P/Van
Location: Klipheuwel (near Durbanville), Cape Town or working at sea
Has thanked: 191 times
Been thanked: 487 times
South Africa

Re: A few pics of a new project

Post by Tony Z »

then when doing a few smaller touches I noticed that the thrust face looks a bit more worn than I first thought...
Image

turns out it is already past its minimum size of 20mm. It measures 19.8mm already.
So, will have to see how I go from here.
As of now, thats where I am with this project.
User avatar
retrovan
Donor
Donor
Posts: 8709
Joined: Mon Feb 07, 2011 8:51 pm
What model do you have?: 52T1,68FB,72Bay,75FL
Location: Eich! no, in Jefferys Bay
Has thanked: 421 times
Been thanked: 539 times
Contact:
Netherlands

Re: A few pics of a new project

Post by retrovan »

You have the machinery, Why not fit an insert and set it back to Zero.

Should the rest of the case be OK, this should be Simple to do.

Specially for the Big Z

Hope you come right.

Herman
1952 Split Beetle 1835cc
1968 Fastback 2Lt.type4
1972 Low Light Bay Panel Van 2Lt type 4
1975 Fleetline Panel Van 1914cc
2020 MeFusco Beetle Truck 2Lt type 4
1972 FT Hahn SP 1776 cc
User avatar
Tony Z
Donor
Donor
Posts: 14994
Joined: Wed Sep 14, 2005 8:33 am
What model do you have?: 2.3L 69; 1302; P/Van
Location: Klipheuwel (near Durbanville), Cape Town or working at sea
Has thanked: 191 times
Been thanked: 487 times
South Africa

Re: A few pics of a new project

Post by Tony Z »

that is exactly my plan Herman.
User avatar
Wentzel
Donor
Donor
Posts: 983
Joined: Thu Oct 11, 2007 12:10 pm
What model do you have?: T1 1977,76
Location: Witbank
Has thanked: 6 times
Been thanked: 13 times

Re: A few pics of a new project

Post by Wentzel »

Looking good Tony. Having all the tools and know how for this must be great.

What is the plans for the engine?
Oxyboxer Project

Never Ending Beetle Project viewtopic.php?f=23&t=35724
Lolette Spyder Project http://www.aircooledvwsa.co.za/viewtopi ... 23&t=32175
User avatar
acpaterson
Carburettor
Posts: 1960
Joined: Sat Jan 05, 2013 6:50 pm
What model do you have?: Winston, a 74 Bay
Location: Parklands, Cape Town
Has thanked: 80 times
Been thanked: 131 times
Contact:
South Africa

Re: A few pics of a new project

Post by acpaterson »

Looking good Tony.
User avatar
johanb
Flywheel
Posts: 566
Joined: Fri Nov 21, 2008 8:34 am
What model do you have?: '64 Bus
Location: St Henenabay
Has thanked: 1 time
Been thanked: 3 times
South Africa

Re: A few pics of a new project

Post by johanb »

All the best with your project meneer
User avatar
Tony Z
Donor
Donor
Posts: 14994
Joined: Wed Sep 14, 2005 8:33 am
What model do you have?: 2.3L 69; 1302; P/Van
Location: Klipheuwel (near Durbanville), Cape Town or working at sea
Has thanked: 191 times
Been thanked: 487 times
South Africa

Re: A few pics of a new project

Post by Tony Z »

Thanks guys. I'll reveal more as the project progresses - its still a long way from done.
User avatar
Tony Z
Donor
Donor
Posts: 14994
Joined: Wed Sep 14, 2005 8:33 am
What model do you have?: 2.3L 69; 1302; P/Van
Location: Klipheuwel (near Durbanville), Cape Town or working at sea
Has thanked: 191 times
Been thanked: 487 times
South Africa

Re: A few pics of a new project

Post by Tony Z »

Managed to get a bit done today. Not all went according to plan, but its all par for the course.

Put all the case bolts back in excluding the head studs.
Then bolted the case together and torqued it down.

Out with my line bore tools
Image

The case is cut for standard mains, but I can see the #1 (thrust) bearing will need more than a 0,5mm cut.
But instead of moving straight to a 1mm cut, I went for the 0.5mm cut first so that I have a good seating point to cut the thrust face.
I am not fond of the way the thrust cutter marks the journal, so it should to be done before the line bore. Anyway, my logic was to give it a bigger, rounder seating area by boring to 0.5mm then doing the thrust cut and then reboring to 1mm which should be final size.

0.5mm line bore
Image
Image

Thrust block inserted and cutting of the thrust face
Image
Image
You might notice that the thrust face isnt 100% cleaned up. That is due to the amount of wear of the face. I cant cut it further as I have no secure way of locating the thrust cutter and keeping it level if it doesnt rest against the case from the inside. But it does cut a larger diameter than the previous cut, so it is still nicely cleaned up enough to support the bearing.

1mm cut - unfortunately, this still didnt clean up the bearing journal
Image

So, on to a 1.5mm cut. This cleaned it up nicely.
Image

O yes, nearly forgot. @Wentzel gave me a tip to use a Golf 1100 ring as a spacer. I bought myself a ring pack for a 20thou oversize 1100 golf and this fits nicely. Before you guys go on about price, this ring pack was just under R150. For that price I couldnt say no.
here it is fitted loose using the top compression ring
Image
User avatar
retrovan
Donor
Donor
Posts: 8709
Joined: Mon Feb 07, 2011 8:51 pm
What model do you have?: 52T1,68FB,72Bay,75FL
Location: Eich! no, in Jefferys Bay
Has thanked: 421 times
Been thanked: 539 times
Contact:
Netherlands

Re: A few pics of a new project

Post by retrovan »

Good work there Sir,

Will be running in no time.. I'm sure

Herman
1952 Split Beetle 1835cc
1968 Fastback 2Lt.type4
1972 Low Light Bay Panel Van 2Lt type 4
1975 Fleetline Panel Van 1914cc
2020 MeFusco Beetle Truck 2Lt type 4
1972 FT Hahn SP 1776 cc
User avatar
Tony Z
Donor
Donor
Posts: 14994
Joined: Wed Sep 14, 2005 8:33 am
What model do you have?: 2.3L 69; 1302; P/Van
Location: Klipheuwel (near Durbanville), Cape Town or working at sea
Has thanked: 191 times
Been thanked: 487 times
South Africa

Re: A few pics of a new project

Post by Tony Z »

yea, its coming together nicely. But there is still plenty to do
User avatar
Wentzel
Donor
Donor
Posts: 983
Joined: Thu Oct 11, 2007 12:10 pm
What model do you have?: T1 1977,76
Location: Witbank
Has thanked: 6 times
Been thanked: 13 times

Re: A few pics of a new project

Post by Wentzel »

Glad to help Tony but as I said I got the tip on the forum also. If I remember it came from Armand.

From what I read/heard even vw used spacers on that main sometimes when rebuilding.
Oxyboxer Project

Never Ending Beetle Project viewtopic.php?f=23&t=35724
Lolette Spyder Project http://www.aircooledvwsa.co.za/viewtopi ... 23&t=32175
User avatar
Tony Z
Donor
Donor
Posts: 14994
Joined: Wed Sep 14, 2005 8:33 am
What model do you have?: 2.3L 69; 1302; P/Van
Location: Klipheuwel (near Durbanville), Cape Town or working at sea
Has thanked: 191 times
Been thanked: 487 times
South Africa

Re: A few pics of a new project

Post by Tony Z »

Not much more progress made.
Wasted a few hours driving to all the spares shops who usually have bearings and spent ages phoning around to the guys who might have bearings. Needless to say that the size I need isnt available in SA from any of the local guys. So, I've got a set on its way from USA.

The only other thing I have managed to do is to 8-dowel the flywheel.

Take a normal flywheel in good condition
Image

Put it in the milling machine, clamp it down and drill it out for another 4 dowel pins. This helps in keeping it in place when the engine is capable of producing a bit more hp.
Final result
Image

As the new holes are made to an exact size, it is best to do a pilot hole and then ream the hole to the correct size needed.
And to ensure that the drill and reamer run properly true, dont even consider using a drill chuck. This is where you pull out the collet set to ensure that it all runs properly true.
Image
Image
User avatar
Tony Z
Donor
Donor
Posts: 14994
Joined: Wed Sep 14, 2005 8:33 am
What model do you have?: 2.3L 69; 1302; P/Van
Location: Klipheuwel (near Durbanville), Cape Town or working at sea
Has thanked: 191 times
Been thanked: 487 times
South Africa

Re: A few pics of a new project

Post by Tony Z »

And for those asking, I have decided that this engine does not need the flywheel lightened, so it is staying stock weight.
User avatar
retrovan
Donor
Donor
Posts: 8709
Joined: Mon Feb 07, 2011 8:51 pm
What model do you have?: 52T1,68FB,72Bay,75FL
Location: Eich! no, in Jefferys Bay
Has thanked: 421 times
Been thanked: 539 times
Contact:
Netherlands

Re: A few pics of a new project

Post by retrovan »

Whoow... Thats a lot of weight of you mine....... :lol:

Nice work as always Sir.

Always regret having sold my machining shop with all the great "Toys" in it.

Oh well, at least now I can share your Joy as you go along.

Thanks

Herman
1952 Split Beetle 1835cc
1968 Fastback 2Lt.type4
1972 Low Light Bay Panel Van 2Lt type 4
1975 Fleetline Panel Van 1914cc
2020 MeFusco Beetle Truck 2Lt type 4
1972 FT Hahn SP 1776 cc
Post Reply