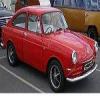
I've decided to share my experience of partially restoring a 1977 VW Beetle that I got from a neighbour who was about to cut the car in pieces and sell it as scrap metal.
2 months later I've made some progress with the help of our dear friend Google and various DIY videos out there on the internet.
Bear in mind that this is my first attempt at Spray painting and panel work, my attempts were courtesy of online videos of spray techniques and paint selection.
I have a fair amount of mechanical knowledge and have up until now relied solely on panelbeaters to do the bodywork on my cars.
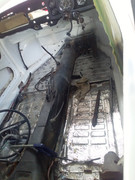
I started out with the mechanical part of the car, there were quite a few parts missing and it had been standing under a shed for the better part of 12 years. My thoughts were that if it started and at least drove It would warrant the repairs.
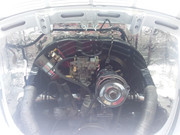
It was fitted with a vertex magneto and I assume twin carbs that were missing due to the 2 intake manifolds on either side, so not knowing how long it stood without carbs necessitated removing the engine and stripping the heads to check.
I partially rebuilt the engine, heads were sent to the engineers, new rings, cleaned the bores, and assembled with a new carb, distributor and alternator. I installed the engine and with the vertex still on the car started by me noticing the magneto and starter with a 1tr fuel cell attached to the pump.
My next step was to fumigate the car before stripping it due to me finding a few black widow spiders nesting in the engine compartment.
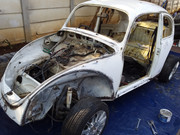
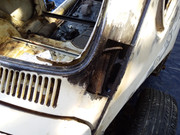
Took me 2 days to get to this stage. Because most of the rubber was so perished it was relatively easy to just remove the bolts and not be too concerned about damaging rubber or bteaking clips etc.
Grinding the surface rust and wire brushing with deoxidene
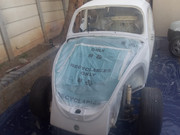
First coat of primer to treated areas to determine where dents and waves are on the panels.
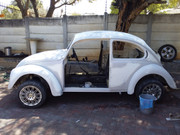
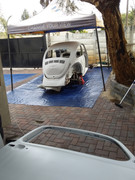
I decided to paint the shell and all the loose panels separately, firstly due to space and secondly if I messed up it would just be on one panel. Bear in mind the only painting I done prior to this was from a spray on can.
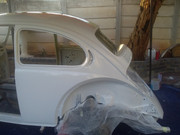
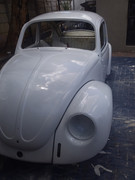
I was quite pleased at how my painting turned out. I'm sure this is not the correct shade of white I polished the petrol tank flap and took that with me but when I started painting it seemed more grey over the original white.
The paint I used was Midomix. Which came in a kit containing 4ltr paint, 2ltr hardener, 5 litre 600 thinners and some strainer, mixing cups etc.
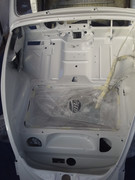
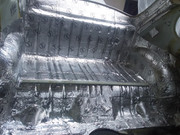
From my past experience driving beetles I decided to quite the cabin a bit while the car was stripped and also to insulate the engine heat from entering the cabin. I'm not sure how correct this is so I'm hoping someone points me to what I'm doing wrong.
In the engine compartment I've used 2 layers of STP sound deadening pads with a thin layer of pink aerolite in between on the firewall.
The rear section also got a double layer of STP sound deadening pads without the aerolite in between.
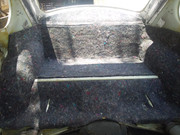
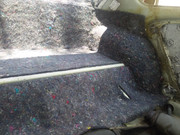
I then used an automotive self adhesive Underfellt which I cut out from the original brown smelly stuff I removed
This is as far as I got with 2 boxes of STP.
I will continue by doing the centre tunnel and roof the same as I've done the back.