So here goes, i did not call this a resto project, as it isn't, it is just converting my bus in the overlanding vehicle i need it to be.
This might take long, just be patient, but here is the progress thus far:
New Tires.
Reconditioned Rims, Alucoated to industrial spec
Alternator reconditioned
Changed the regulator to electronic one
Covered the front seats
old
New
Installed a back seat, but has to still be moved to the front, as I want to build a bed/seat at the back.
Sanded, and painted the floor pan
80% done with rewiring the car WIP
Tried fixing the speedo and clock....
Tried making the new fuel sender unit work
Sanded and sprayed the top part of the dash
New fuel hoses and clamps + new T piece
New fuel pump
Service + new Bougi Cords
Took pop top tent off, to have a new one made, not yet done....
Replaced all gaskets on carbs, partially synced carbs
Had the normal houseglass (HORROR) removed, and replaced with sliding windows, but have to have it redone, as for R600 the people did a VERY bad job of it.
'72 Bus Build AKA the Adventurous Dutchman
-
Dappermuis
- Oil Stain
- Posts: 111
- Joined: Thu Sep 02, 2010 7:01 pm
- What model do you have?: None
- Location: Wellington Western Cape
'72 Bus Build AKA the Adventurous Dutchman
You do not have the required permissions to view the files attached to this post.
-
fig
- Bus Driver
- Posts: 12214
- Joined: Fri Jan 20, 2006 10:08 pm
- What model do you have?: Type 2
- Facebook: https://www.facebook.com/groups/258896479219/
- Location: Where life is cheap and death is free
- Has thanked: 287 times
- Been thanked: 322 times
- Contact:

Re: '72 Bus Build AKA the Adventurous Dutchman
1978 Executive buses in SA had a rear seat that folded flat to make a bed over the engine compartment. These are not easy to find, but may be just what you need.
fig
Kaapse Kombi Kult
"Whether you think you can or whether you think you can't, you're right." -- Henry Ford
Kaapse Kombi Kult
"Whether you think you can or whether you think you can't, you're right." -- Henry Ford
-
Dappermuis
- Oil Stain
- Posts: 111
- Joined: Thu Sep 02, 2010 7:01 pm
- What model do you have?: None
- Location: Wellington Western Cape
Re: '72 Bus Build AKA the Adventurous Dutchman
My Parents had a newer microbus, and as far as I can remember it also had some kind of folding back seat, are the newer microbusses wider than the old Bay?
-
Dappermuis
- Oil Stain
- Posts: 111
- Joined: Thu Sep 02, 2010 7:01 pm
- What model do you have?: None
- Location: Wellington Western Cape
Re: '72 Bus Build AKA the Adventurous Dutchman
So this morning, as e got out of my house, i looked under the bus and saw...... an oil leak!!!
It seems to be a LOT of oil, that is most likely why the clutch is slipping on high revs....
I need to take out the engine, I want to do the Pilot bearing, that main seal, release bearing, and see if the clutch is still within spec.
Can I get these main seals from Midas/Autozone, or are there better quality ones available?
-
sean
- Transmission
- Posts: 2403
- Joined: Sun Aug 03, 2008 8:51 pm
- What model do you have?: Bays & Splits
- Location: Somerset West
- Has thanked: 63 times
- Been thanked: 227 times
Re: '72 Bus Build AKA the Adventurous Dutchman
The VW agents still stock pilot bearings, seals and release bearing for the type 4 motor. Bearing Man should also be able to assist you with all you need. There are different grades of oil seals available. Take the best type available.
-
Dappermuis
- Oil Stain
- Posts: 111
- Joined: Thu Sep 02, 2010 7:01 pm
- What model do you have?: None
- Location: Wellington Western Cape
Re: '72 Bus Build AKA the Adventurous Dutchman
This bothered me so much today, that I drove home in my lunch time, and checked, it is gearbox oil leaking from somewhere, i think between the box and the bellhousing. I cleaned this thoroughly before i sealed the bellhousing to the box...
Looks like I will have to take the engine out again
Looks like I will have to take the engine out again
-
Dappermuis
- Oil Stain
- Posts: 111
- Joined: Thu Sep 02, 2010 7:01 pm
- What model do you have?: None
- Location: Wellington Western Cape
Re: '72 Bus Build AKA the Adventurous Dutchman
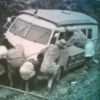
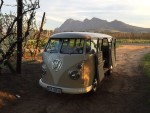
Some more pics of The Dutchman, Road trippin''
Fort West, Pretoria.
This little bird just came and sat on the window frame... one of my friends put a finger out, and it hopped onto her finger???
Rust De winter Camping
Fort West, Pretoria.
This little bird just came and sat on the window frame... one of my friends put a finger out, and it hopped onto her finger???
Rust De winter Camping
You do not have the required permissions to view the files attached to this post.
-
Golfmad
- Valve
- Posts: 1084
- Joined: Tue Feb 03, 2009 6:59 pm
- What model do you have?: niks
- Location: Pretoria - Moot
- Has thanked: 4 times
- Been thanked: 9 times
Re: '72 Bus Build AKA the Adventurous Dutchman
Looks like ya'll had a ball with the camper !!! Thats what I wanna do when my bus is finished, just wish I had more time and more money !

-
Dappermuis
- Oil Stain
- Posts: 111
- Joined: Thu Sep 02, 2010 7:01 pm
- What model do you have?: None
- Location: Wellington Western Cape
Re: '72 Bus Build AKA the Adventurous Dutchman
Ok, update time:
In December my brother and I spent a whole day polishing the bus with P1 compound and then after that with wax, to get it shiny again, and the result was beautiful.
One week after that, one late night.... I washed the bus with Prepsol,,, to get some mud off after a road trip ... So, back to the dull, faded red.
Two nights ago, i got hold of some wax, and waxed the whole car, and it made a HUGE difference, but I still need to do another coat or two.
Last night I spent my evening trying to source a short on the wiring for the indicators, and the hazards, and discovered that the problem lay with the front left indicator. As my bus has double filament globes in the front indicator, one acting as a park light, and the other as an indicator, it has three wires coming out of the housing. Brown Black and red. Somehow when I did the wiring, I swapped the brown and the black, basically connecting the indicator wire, straight to the earth wire.
With this now sorted I continued to finding the reason for the brake lights not working, and got hold of the black wire, that goes to the back, that was not connected, so this is also sorted now.
My next step was to fix all the light bulbs in the cluster, so I got hold of some loose coloured wires, and started working on a solution.
I still need to get my fuel gauge working, I have a universal sender unit, but will have to calibrate it again, or there is a loose wire?
Need do fix my VDO clock, no idea how, or where?
Still need to have the speedo fixed... It was working, but one night I was busy working on it, cluster removed, glass removed, and it started raining, so I went to fetch my girlfriend from work, as I did not want her to ride her scooter in the rain, loaded the scooter in the bus, and just as I wanted to warn her about the fragile parts in the walk through, she put her handbag directly on the speedo, breaking the needle. I got a needle from another old car, but it seems to be too stiff? The needle only goes to 30mph, and by then I am doing about 92kmh GPS speed, The needle also does not go all the way down.
Other than that, I need to pull a wire from the engine bay, to the cluster for oil pressure, and then all is done.
There might be a bad earth on the cluster, because when the lights are on, and i indicate to one side, the other side's indicator also goes on, but very dim.
I will try and sort this out tonight
Here are some pics of the work in progress of the cluster. I got some connector plugs, so that I can easily disconnect the whole cluster, if need to.
The connector
The clothtape
In December my brother and I spent a whole day polishing the bus with P1 compound and then after that with wax, to get it shiny again, and the result was beautiful.
One week after that, one late night.... I washed the bus with Prepsol,,, to get some mud off after a road trip
Two nights ago, i got hold of some wax, and waxed the whole car, and it made a HUGE difference, but I still need to do another coat or two.
Last night I spent my evening trying to source a short on the wiring for the indicators, and the hazards, and discovered that the problem lay with the front left indicator. As my bus has double filament globes in the front indicator, one acting as a park light, and the other as an indicator, it has three wires coming out of the housing. Brown Black and red. Somehow when I did the wiring, I swapped the brown and the black, basically connecting the indicator wire, straight to the earth wire.
With this now sorted I continued to finding the reason for the brake lights not working, and got hold of the black wire, that goes to the back, that was not connected, so this is also sorted now.
My next step was to fix all the light bulbs in the cluster, so I got hold of some loose coloured wires, and started working on a solution.
I still need to get my fuel gauge working, I have a universal sender unit, but will have to calibrate it again, or there is a loose wire?
Need do fix my VDO clock, no idea how, or where?
Still need to have the speedo fixed... It was working, but one night I was busy working on it, cluster removed, glass removed, and it started raining, so I went to fetch my girlfriend from work, as I did not want her to ride her scooter in the rain, loaded the scooter in the bus, and just as I wanted to warn her about the fragile parts in the walk through, she put her handbag directly on the speedo, breaking the needle. I got a needle from another old car, but it seems to be too stiff? The needle only goes to 30mph, and by then I am doing about 92kmh GPS speed, The needle also does not go all the way down.
Other than that, I need to pull a wire from the engine bay, to the cluster for oil pressure, and then all is done.
There might be a bad earth on the cluster, because when the lights are on, and i indicate to one side, the other side's indicator also goes on, but very dim.
I will try and sort this out tonight
Here are some pics of the work in progress of the cluster. I got some connector plugs, so that I can easily disconnect the whole cluster, if need to.
The connector
The clothtape
You do not have the required permissions to view the files attached to this post.
-
sean
- Transmission
- Posts: 2403
- Joined: Sun Aug 03, 2008 8:51 pm
- What model do you have?: Bays & Splits
- Location: Somerset West
- Has thanked: 63 times
- Been thanked: 227 times
Re: '72 Bus Build AKA the Adventurous Dutchman
I have got a spare speedo if you need one but it is in km/h. Let me know if you are interested.
-
Dappermuis
- Oil Stain
- Posts: 111
- Joined: Thu Sep 02, 2010 7:01 pm
- What model do you have?: None
- Location: Wellington Western Cape
Re: '72 Bus Build AKA the Adventurous Dutchman
Thanks for the offer, I will let you know, I just want to see if I can get this one fixed, I kind of like the MPH idea...
-
Dappermuis
- Oil Stain
- Posts: 111
- Joined: Thu Sep 02, 2010 7:01 pm
- What model do you have?: None
- Location: Wellington Western Cape
-
Dappermuis
- Oil Stain
- Posts: 111
- Joined: Thu Sep 02, 2010 7:01 pm
- What model do you have?: None
- Location: Wellington Western Cape
Re: '72 Bus Build AKA the Adventurous Dutchman
Also checked out the play on the steering... It is bad news, I assume, the shaft that comes out of the box, where the drop arm attaches, has play, a lot. you can move it in and out of the box
Can this be tightened?
-
Dappermuis
- Oil Stain
- Posts: 111
- Joined: Thu Sep 02, 2010 7:01 pm
- What model do you have?: None
- Location: Wellington Western Cape
Re: '72 Bus Build AKA the Adventurous Dutchman
So
I spent my day doing little bits and pieces on the bus
First of all looked for all potential spots where the pop top could leaked, and closed that down.
Fixed this baby
I cleaned up all the wiring and piping in the engine bay, put the old foam seal back until I source a new one
I still want to powder coat all the tin, but taking that out will be a mission again
You do not have the required permissions to view the files attached to this post.