You will be completely safe with the nylock nuts but I would add a bit of Loctite tread lock to the bolts
But thats just me
Herman
Betty the Oval - Donovan D - ex-MINCE
-
retrovan
- Donor

- Posts: 8710
- Joined: Mon Feb 07, 2011 8:51 pm
- What model do you have?: 52T1,68FB,72Bay,75FL
- Location: Eich! no, in Jefferys Bay
- Has thanked: 421 times
- Been thanked: 541 times
- Contact:

Re: Betty the Oval - Donovan D - ex-MINCE
1952 Split Beetle 1835cc
1968 Fastback 2Lt.type4
1972 Low Light Bay Panel Van 2Lt type 4
1975 Fleetline Panel Van 1914cc
2020 MeFusco Beetle Truck 2Lt type 4
1972 FT Hahn SP 1776 cc
1968 Fastback 2Lt.type4
1972 Low Light Bay Panel Van 2Lt type 4
1975 Fleetline Panel Van 1914cc
2020 MeFusco Beetle Truck 2Lt type 4
1972 FT Hahn SP 1776 cc
-
Tony Z

- Donor
- Posts: 15008
- Joined: Wed Sep 14, 2005 8:33 am
- What model do you have?: 2.3L 69; 1302; P/Van
- Location: Klipheuwel (near Durbanville), Cape Town or working at sea
- Has thanked: 192 times
- Been thanked: 488 times

Re: Betty the Oval - Donovan D - ex-MINCE
or you could drill a new hole in the bolt for the new location of the pin
ANGRRR
http://www.aircooledvwsa.co.za/viewtopi ... 23&t=14775
1302S
http://www.aircooledvwsa.co.za/viewtopi ... 23&t=33521
Panel Van
http://www.aircooledvwsa.co.za/viewtopic.php?p=288723
http://www.aircooledvwsa.co.za/viewtopi ... 23&t=14775
1302S
http://www.aircooledvwsa.co.za/viewtopi ... 23&t=33521
Panel Van
http://www.aircooledvwsa.co.za/viewtopic.php?p=288723
vader wrote: The Force is strong with you young Sith Lord Z!
-
Donovan D

- Donor
- Posts: 2231
- Joined: Sun Jun 01, 2008 6:27 pm
- What model do you have?: 67 Panel
- Facebook: http://www.facebook.com/profile.php?id=536371512
- Location: Brackenfell
- Has thanked: 148 times
- Been thanked: 73 times
Re: Betty the Oval - Donovan D - ex-MINCE
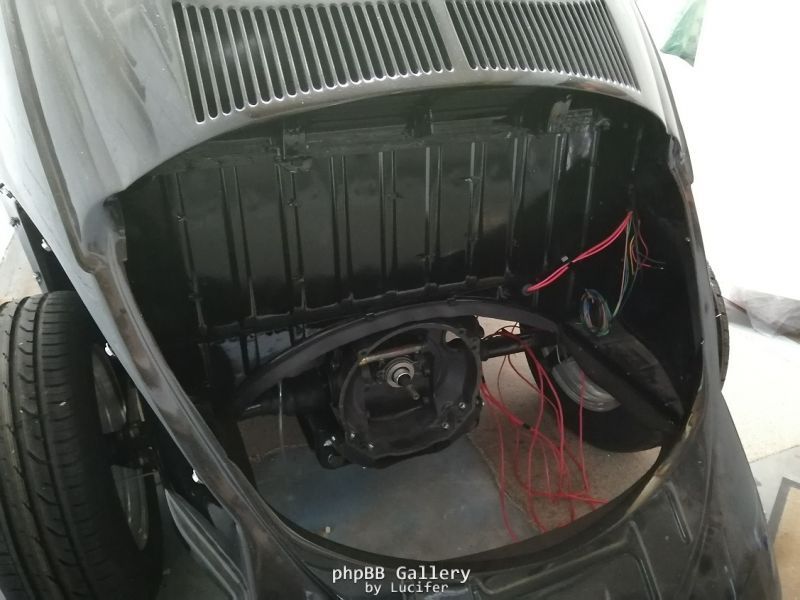
Still goofing around with the wiring and steering parts.
Here is a video of the dual indicators. The semiphores work of a rotary switch that replaced the choke able unit.
Then while figuring out the hooter on the car and checking the wires for the indicator switch, I noticed my steering column is bent and comes in contact with the outer shaft.
The wiring is almost complete, still a bit of tidying up to do in the front and then just have to do the rear.
---------- 67 Panelvan -----------
---------- 56 Oval ----------
---------- 56 Oval ----------
-
Donovan D
- Donor
- Posts: 2231
- Joined: Sun Jun 01, 2008 6:27 pm
- What model do you have?: 67 Panel
- Facebook: http://www.facebook.com/profile.php?id=536371512
- Location: Brackenfell
- Has thanked: 148 times
- Been thanked: 73 times
Re: Betty the Oval - Donovan D - ex-MINCE
Been finishing up the rear of the wiring. Bit confused as to which wire goes to which end of the bulb(high and low).
Im using the US spec wiring which includes the indicators.
When an indicator is on at the rear and the brake is applied, should the brake light on that side override the indicator or should the indicator still be on and the opposite brake light go on ? I read something like this on thesamba. Im guessing the brake lights should override the indicators ?
The brake light should be connected to the high beam on the bulb.
Does the indicator go on high or low side, and Im guessing the lights will go on low ?
---------- 67 Panelvan -----------
---------- 56 Oval ----------
---------- 56 Oval ----------
-
retrovan
- Donor
- Posts: 8710
- Joined: Mon Feb 07, 2011 8:51 pm
- What model do you have?: 52T1,68FB,72Bay,75FL
- Location: Eich! no, in Jefferys Bay
- Has thanked: 421 times
- Been thanked: 541 times
- Contact:
Re: Betty the Oval - Donovan D - ex-MINCE
Your brake light goes to the high beam of the back light. and your park to the low.
Your indicator wire does not go to the rear light but goes through a relay which opens the brake light lead and closes the indicator lead.
The relay is feed from the live of the indicator switch. that is why you need two indicator relays, one for each side.
On braking & indicating, your brake light supply is interrupted and the indicator live is introduced.
Not sure if my explanation is clear, but do have a drawing of this on my 1952 thread.
you can also PM me if you like.
Herman
1952 Split Beetle 1835cc
1968 Fastback 2Lt.type4
1972 Low Light Bay Panel Van 2Lt type 4
1975 Fleetline Panel Van 1914cc
2020 MeFusco Beetle Truck 2Lt type 4
1972 FT Hahn SP 1776 cc
1968 Fastback 2Lt.type4
1972 Low Light Bay Panel Van 2Lt type 4
1975 Fleetline Panel Van 1914cc
2020 MeFusco Beetle Truck 2Lt type 4
1972 FT Hahn SP 1776 cc
-
Donovan D
- Donor
- Posts: 2231
- Joined: Sun Jun 01, 2008 6:27 pm
- What model do you have?: 67 Panel
- Facebook: http://www.facebook.com/profile.php?id=536371512
- Location: Brackenfell
- Has thanked: 148 times
- Been thanked: 73 times
Re: Betty the Oval - Donovan D - ex-MINCE
retrovan wrote: Wed Jan 08, 2020 9:20 am Your brake light goes to the high beam of the back light. and your park to the low.
Your indicator wire does not go to the rear light but goes through a relay which opens the brake light lead and closes the indicator lead.
The relay is feed from the live of the indicator switch. that is why you need two indicator relays, one for each side.
On braking & indicating, your brake light supply is interrupted and the indicator live is introduced.
Not sure if my explanation is clear, but do have a drawing of this on my 1952 thread.
you can also PM me if you like.
Herman
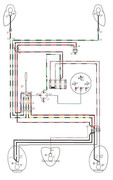
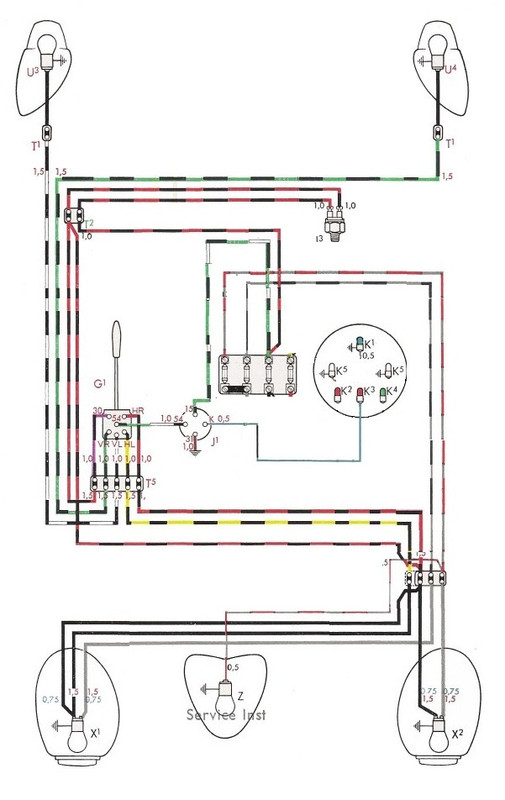
Im using the 56 US diagram for the wiring
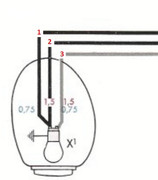
Indicators simplified:
---------- 67 Panelvan -----------
---------- 56 Oval ----------
---------- 56 Oval ----------
-
retrovan
- Donor
- Posts: 8710
- Joined: Mon Feb 07, 2011 8:51 pm
- What model do you have?: 52T1,68FB,72Bay,75FL
- Location: Eich! no, in Jefferys Bay
- Has thanked: 421 times
- Been thanked: 541 times
- Contact:
Re: Betty the Oval - Donovan D - ex-MINCE
The problem with that system is its not allowed in SA.
Your indicator must interrupt that side Brake, and go back to brake when the indicator is switched off.
So the indicator is the more dominant and not the brake.
Herman
Your indicator must interrupt that side Brake, and go back to brake when the indicator is switched off.
So the indicator is the more dominant and not the brake.
Herman
1952 Split Beetle 1835cc
1968 Fastback 2Lt.type4
1972 Low Light Bay Panel Van 2Lt type 4
1975 Fleetline Panel Van 1914cc
2020 MeFusco Beetle Truck 2Lt type 4
1972 FT Hahn SP 1776 cc
1968 Fastback 2Lt.type4
1972 Low Light Bay Panel Van 2Lt type 4
1975 Fleetline Panel Van 1914cc
2020 MeFusco Beetle Truck 2Lt type 4
1972 FT Hahn SP 1776 cc
-
Dawie
- Fuel Injection
- Posts: 2114
- Joined: Sat Sep 30, 2006 10:25 pm
- What model do you have?: Aircooled, various
- Location: Kaapstadt
- Has thanked: 45 times
- Been thanked: 208 times
Re: Betty the Oval - Donovan D - ex-MINCE
Think that diagram is a bit comfusing. It appears to show the US-only wiring and "rest of the world" wiring accidentally superimposed on top of each other. So it incorrectly appears as if the two rear brake filaments are shorted together, but still have individual fuses.
Staying Aircooled is so much nicer.
Do'nt assume anything- (While doing fault-finding).
Do'nt assume anything- (While doing fault-finding).
-
Dawie
- Fuel Injection
- Posts: 2114
- Joined: Sat Sep 30, 2006 10:25 pm
- What model do you have?: Aircooled, various
- Location: Kaapstadt
- Has thanked: 45 times
- Been thanked: 208 times
Re: Betty the Oval - Donovan D - ex-MINCE
On the left rear globe, ignore the wire crossing over to right globe. (That would only apply to standard brake light setup).
From brake light switch via fuse, only use one wire to US-style/ or "61 rest of the world" 6 wire indicator switch.
From brake light switch via fuse, only use one wire to US-style/ or "61 rest of the world" 6 wire indicator switch.
Staying Aircooled is so much nicer.
Do'nt assume anything- (While doing fault-finding).
Do'nt assume anything- (While doing fault-finding).
-
Dawie
- Fuel Injection
- Posts: 2114
- Joined: Sat Sep 30, 2006 10:25 pm
- What model do you have?: Aircooled, various
- Location: Kaapstadt
- Has thanked: 45 times
- Been thanked: 208 times
Re: Betty the Oval - Donovan D - ex-MINCE
Even on old models, VW used separate fuses for left and right rear parking/night lights for safety reasons. To prevent a single blown fuse from disabling both side's parking/ night lights. Numberplate light always "piggy-back" in parrallel on one side.
Combined US-style shared brake/indicator setup gives preference to indicator. So applying brake will light both side's lamps. Activating indicator will cause one brake light to flash while other brake light remains on as long as brake pedal is pressed.
As Retrovan mentioned, when not having the specific 6-wire indicator switch, one could use two "double pole double throw" relays to do the same function.
Staying Aircooled is so much nicer.
Do'nt assume anything- (While doing fault-finding).
Do'nt assume anything- (While doing fault-finding).
-
retrovan
- Donor
- Posts: 8710
- Joined: Mon Feb 07, 2011 8:51 pm
- What model do you have?: 52T1,68FB,72Bay,75FL
- Location: Eich! no, in Jefferys Bay
- Has thanked: 421 times
- Been thanked: 541 times
- Contact:
Re: Betty the Oval - Donovan D - ex-MINCE
You right Dawie,
but you need to remove two wires, the one you said as well as the one from the brake switch going down to the brake light terminal block.
Then it will work.
Herman
but you need to remove two wires, the one you said as well as the one from the brake switch going down to the brake light terminal block.
Then it will work.
Herman
1952 Split Beetle 1835cc
1968 Fastback 2Lt.type4
1972 Low Light Bay Panel Van 2Lt type 4
1975 Fleetline Panel Van 1914cc
2020 MeFusco Beetle Truck 2Lt type 4
1972 FT Hahn SP 1776 cc
1968 Fastback 2Lt.type4
1972 Low Light Bay Panel Van 2Lt type 4
1975 Fleetline Panel Van 1914cc
2020 MeFusco Beetle Truck 2Lt type 4
1972 FT Hahn SP 1776 cc
-
Donovan D
- Donor
- Posts: 2231
- Joined: Sun Jun 01, 2008 6:27 pm
- What model do you have?: 67 Panel
- Facebook: http://www.facebook.com/profile.php?id=536371512
- Location: Brackenfell
- Has thanked: 148 times
- Been thanked: 73 times
Re: Betty the Oval - Donovan D - ex-MINCE
Indeed the full diagram has the semaphores included as well.Dawie wrote: Wed Jan 08, 2020 10:47 am Think that diagram is a bit comfusing. It appears to show the US-only wiring and "rest of the world" wiring accidentally superimposed on top of each other. So it incorrectly appears as if the two rear brake filaments are shorted together, but still have individual fuses.
Thanks for the advice !
I do have the 6 wire indicator switch.
Will have another crack at it.
---------- 67 Panelvan -----------
---------- 56 Oval ----------
---------- 56 Oval ----------
-
Donovan D
- Donor
- Posts: 2231
- Joined: Sun Jun 01, 2008 6:27 pm
- What model do you have?: 67 Panel
- Facebook: http://www.facebook.com/profile.php?id=536371512
- Location: Brackenfell
- Has thanked: 148 times
- Been thanked: 73 times
Re: Betty the Oval - Donovan D - ex-MINCE
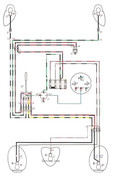
Updated the wiring and it seems to be in working order:
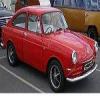
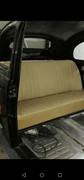
Im guessing its not but would these seats still be original for oval, or are they later or reupholstered ?
Will update with some more pics soon.

Im guessing its not but would these seats still be original for oval, or are they later or reupholstered ?
Will update with some more pics soon.
---------- 67 Panelvan -----------
---------- 56 Oval ----------
---------- 56 Oval ----------
-
Donovan D
- Donor
- Posts: 2231
- Joined: Sun Jun 01, 2008 6:27 pm
- What model do you have?: 67 Panel
- Facebook: http://www.facebook.com/profile.php?id=536371512
- Location: Brackenfell
- Has thanked: 148 times
- Been thanked: 73 times
Re: Betty the Oval - Donovan D - ex-MINCE
Been going at it again. Managed to get an entire week in during the holiday period. Made a list of all the little time consuming jobs and just did it.
This includes the little things that takes about a day to do and its not even seen.
Also had keys cut for door and t-handle but struggling to get the ignition key sorted. Anyone have a SC code key for me, please let me know.
I know SC is from a later beetle but it fits in the dash and looks original.
Some updates
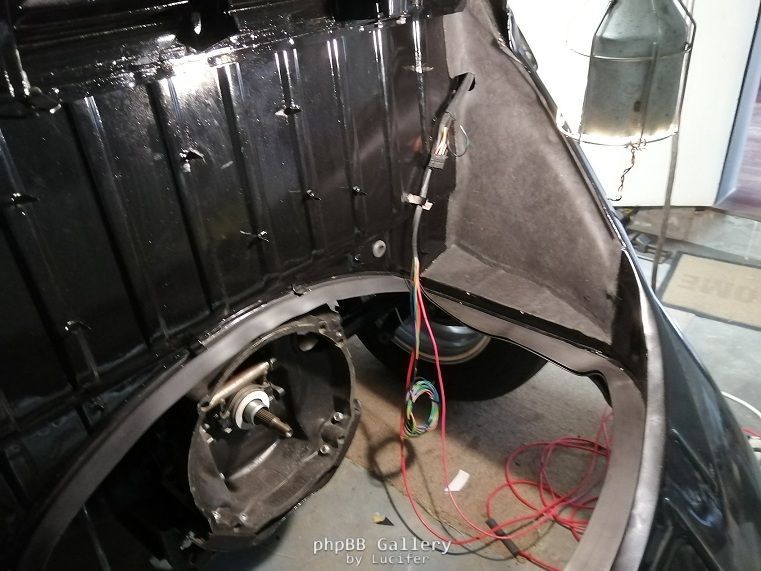
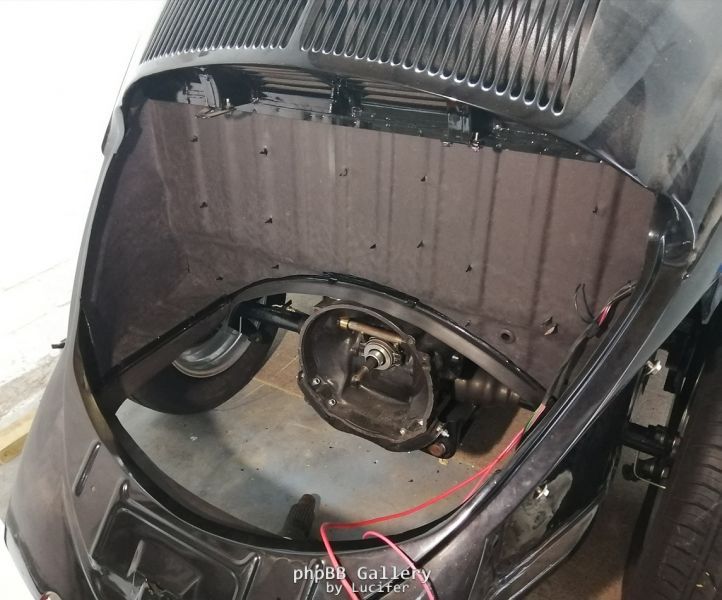
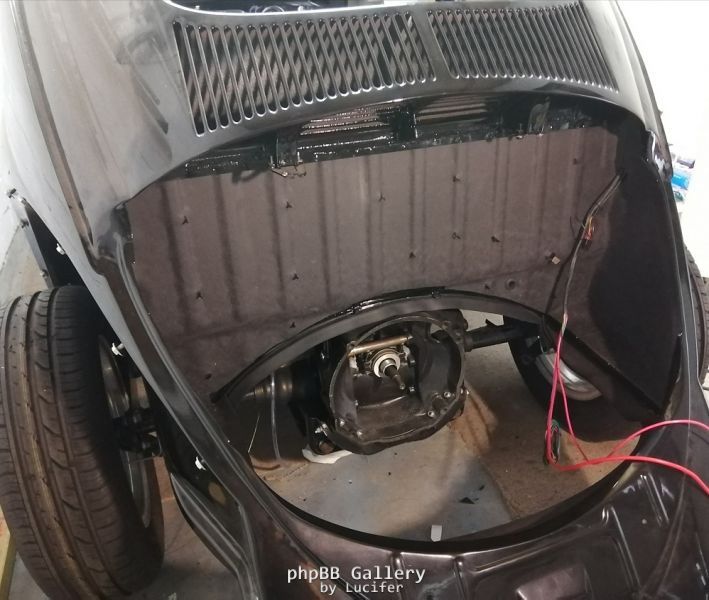
Installed the firewall/tarboard in the engine bay. Got it from Pro Auto Rubber, they have a few different options available. I went with the one without the silver for the engine bay. This is also the heat and stick stuff, once its on its on. Im happy with the way it came out.
I also used some of this around the beetle where I didnt stick the laykold tape.
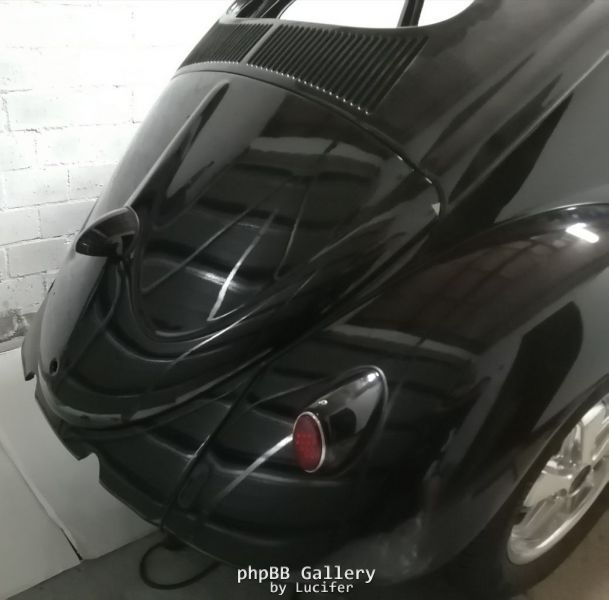
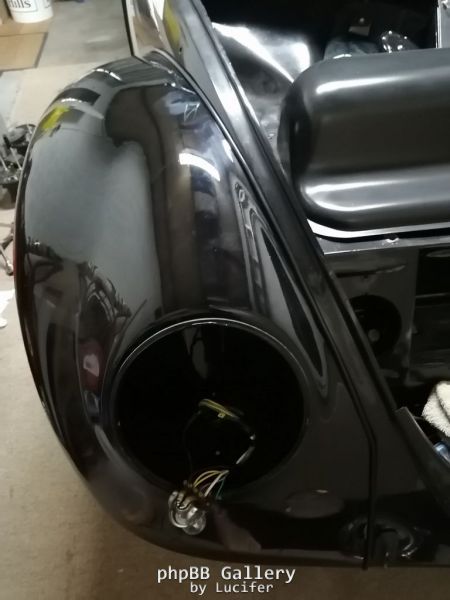
First time fitting the decklid. Its not 100% but trying to do it man alone without getting scratches is really hard. There is still a gap at the bottom and its hitting the body at the top. Will play around with it again once the handle is on and I have a helping hand.
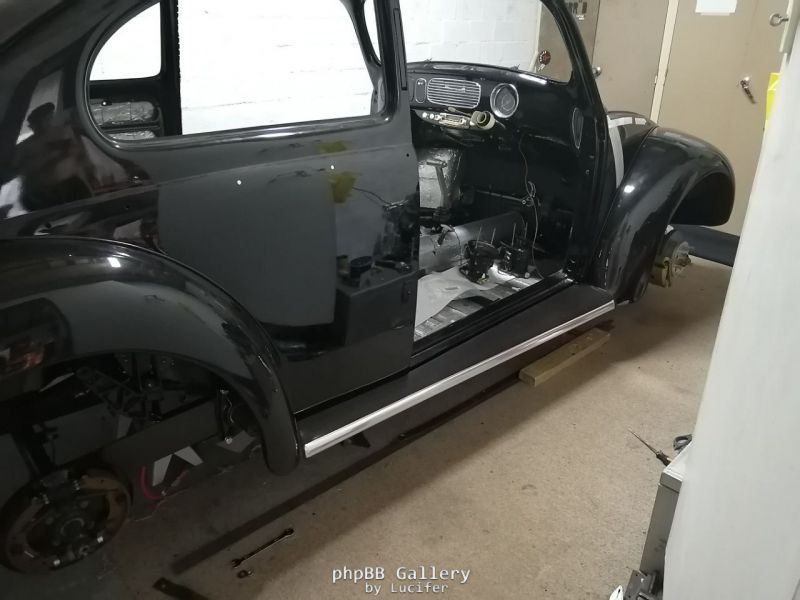
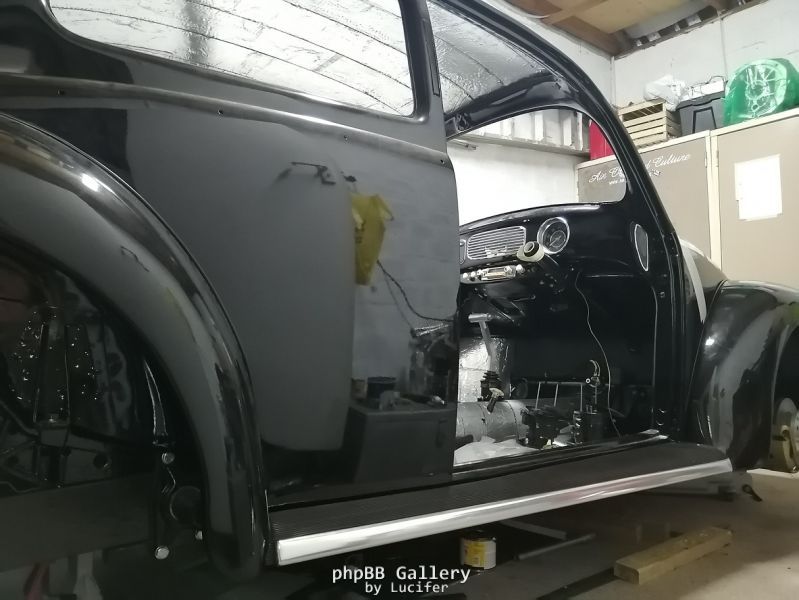
Cut all the fender to body rubbers and then fitted the front fender, finished up the wiring.
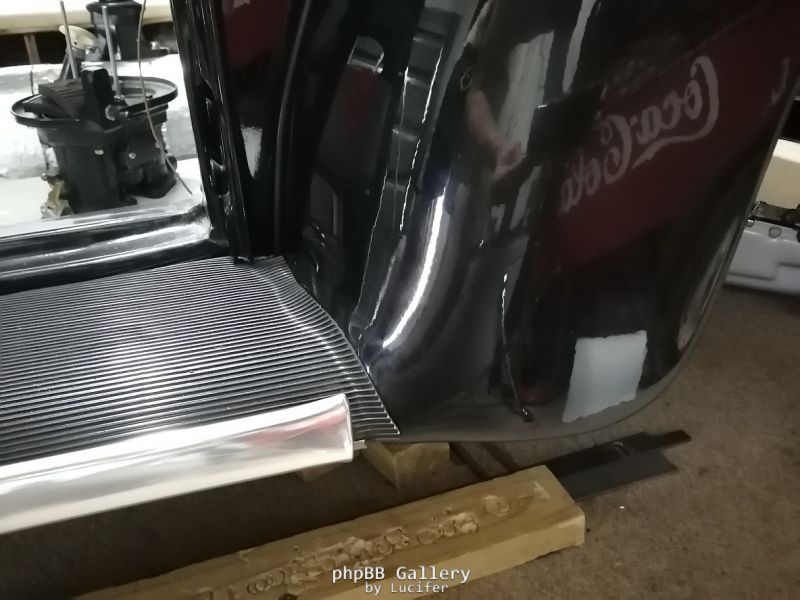
Then onto the running boards. These are the cheap empi ones. Im quite surprised how well they fit.
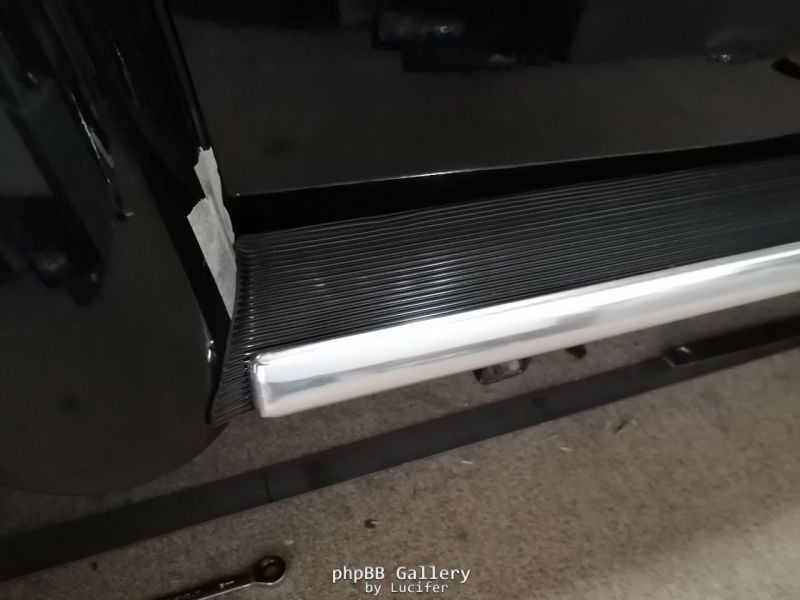
But as one can guess the metal used is very thin. Currently making some reinforcement brackets for underneath the boards to take some more weight.
I pulled off the rubber that was on there and got some from pro auto rubber. The genkem reacts with the rubber which is odd. It seems to make it soft and bubbly. Its still not 100% after redoing it three times. I might redo them in future using a different glue.
Still need to do some final trim on the rubber, will do this once everything is bolted in place to get a nice flush fit.
This includes the little things that takes about a day to do and its not even seen.
Also had keys cut for door and t-handle but struggling to get the ignition key sorted. Anyone have a SC code key for me, please let me know.
I know SC is from a later beetle but it fits in the dash and looks original.
Some updates
Installed the firewall/tarboard in the engine bay. Got it from Pro Auto Rubber, they have a few different options available. I went with the one without the silver for the engine bay. This is also the heat and stick stuff, once its on its on. Im happy with the way it came out.
I also used some of this around the beetle where I didnt stick the laykold tape.
First time fitting the decklid. Its not 100% but trying to do it man alone without getting scratches is really hard. There is still a gap at the bottom and its hitting the body at the top. Will play around with it again once the handle is on and I have a helping hand.
Cut all the fender to body rubbers and then fitted the front fender, finished up the wiring.
Then onto the running boards. These are the cheap empi ones. Im quite surprised how well they fit.
But as one can guess the metal used is very thin. Currently making some reinforcement brackets for underneath the boards to take some more weight.
I pulled off the rubber that was on there and got some from pro auto rubber. The genkem reacts with the rubber which is odd. It seems to make it soft and bubbly. Its still not 100% after redoing it three times. I might redo them in future using a different glue.
Still need to do some final trim on the rubber, will do this once everything is bolted in place to get a nice flush fit.
---------- 67 Panelvan -----------
---------- 56 Oval ----------
---------- 56 Oval ----------
-
acpaterson

- Carburettor
- Posts: 1960
- Joined: Sat Jan 05, 2013 6:50 pm
- What model do you have?: Winston, a 74 Bay
- Location: Parklands, Cape Town
- Has thanked: 80 times
- Been thanked: 131 times
- Contact: