Page 11 of 18
Re: Retrovans 1952 Split Beetle
Posted: Wed Nov 09, 2016 12:16 pm
by Donovan D
retrovan wrote:Edmond wrote:Looking good, is that the super laykold tape you used on the firewall
Thanks,
Yes, thats right, makes a very affordable sound proofing without causing condensation build up under the normal carpet type sound proofing.
Herman
Thanks for the info, I will be using this on my beetle as the other products are too expensive

Going to start with the pan first.
Keep up the great work on this project Herman !
Re: Retrovans 1952 Split Beetle
Posted: Wed Nov 09, 2016 11:29 pm
by retrovan
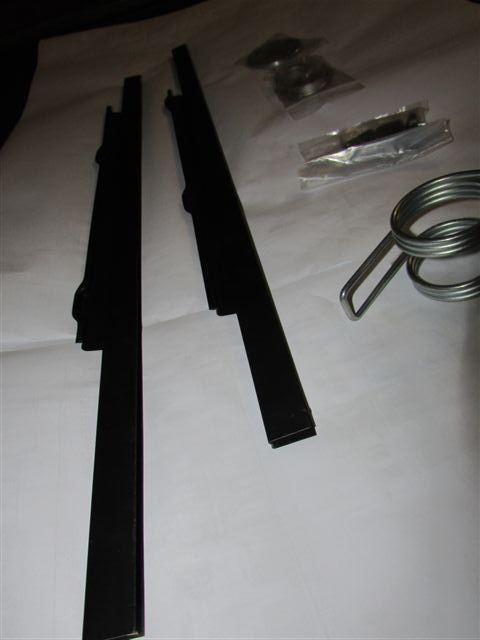
So one of the show stopper parts has final arrived,
and looking at the quality, it was well worth waiting for.
I am referring to the window sash, that is the thiingemebob that holds the glass in the door, and lets it move up and down.
YES....I know, its in the door panel.....No ones ever going to see it.....who cares what it looks like..... you can just as well use electrical tape and bubblegum........ well....
i will know its in there, and it will not make me happy, so it was a frantic search to find the correct one, and now I have a set....

So here they are....
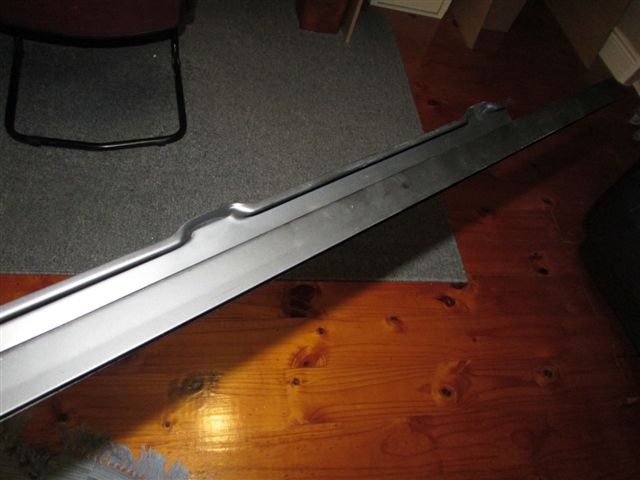
Not very clear in the bad light, so lets try again...
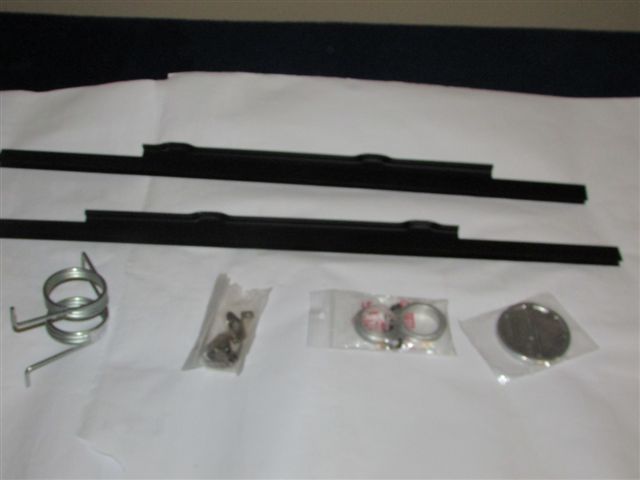
OH Yes.. and I got more ...more ...
Here is the true 1952 engine hood spring, the 1952 correct carpet heater hole rings, the 1952 correct bonnet VW emblem as well as some hubcap clips.
OK, so now you think, ...He should have it all by now...
NO. still waiting on the wiring harness, and hope to hell I do not get let down....
Also, there are a few small dash parts that is coming in from Spain, then it should all be here.....
Lets hope.
thanks for looking.
Herman
Re: Retrovans 1952 Split Beetle
Posted: Thu Nov 10, 2016 4:37 am
by freddiebooysen
Keep it up. Looking really good there Herman
Sent from my iPad using Tapatalk
Re: Retrovans 1952 Split Beetle
Posted: Thu Nov 10, 2016 9:11 am
by Tony Z
I am waiting for the post where you say you will install a T4 with ICTs

Re: Retrovans 1952 Split Beetle
Posted: Thu Nov 10, 2016 2:31 pm
by retrovan
Tony Z wrote:I am waiting for the post where you say you will install a T4 with ICTs
Like the breeze said to the Palm Tree...
"Hold on to your nuts, this is not going to be a simple blow job............"
T4.......mummm....do not think so......looking at T1 in the corner, Hey !...what does that label say ??

ICT's...........mummm.... not sure...........wait,...is that a box of new ICT's in that there shelf.???.....

Herman
Re: Retrovans 1952 Split Beetle
Posted: Thu Nov 10, 2016 8:43 pm
by Jdt1976
Those sashes looks good Herman.
Re: Retrovans 1952 Split Beetle
Posted: Thu Nov 10, 2016 11:42 pm
by retrovan
Jdt1976 wrote:Those sashes looks good Herman.
I would say that they look better then original equipment, if not the same, and the price is also not too bad.
Herman
Re: Retrovans 1952 Split Beetle
Posted: Fri Nov 18, 2016 8:01 pm
by retrovan
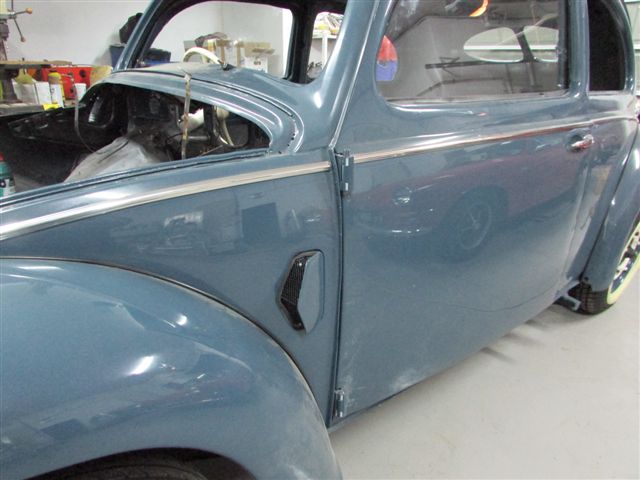
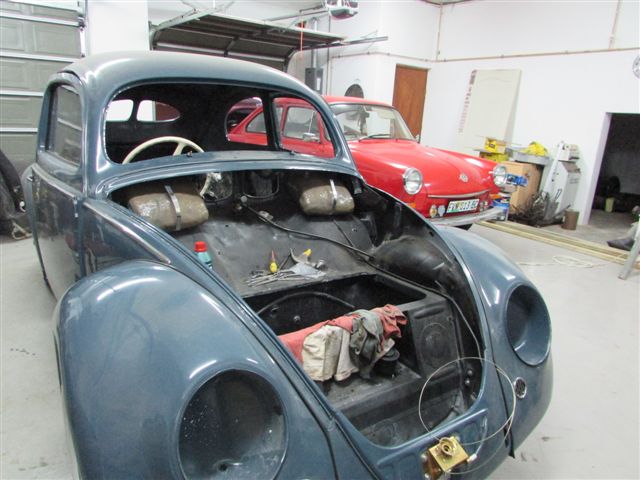
So not doing much during the wait, re-coned the MC and did some brake bleeding, should have the tyres fitted next week, fitted the door glass and winders, and now busy with the sealing of the under Pan and wheel arches, yes the factory never did, but Retrovan will, as he wants no rust.
So till next time when the camera goes with again, thanks for looking.
Herman
Re: Retrovans 1952 Split Beetle
Posted: Wed Nov 23, 2016 3:49 pm
by Eagle
Looking forward to any new developments on this awesome build sofar!!
Re: Retrovans 1952 Split Beetle
Posted: Sat Nov 26, 2016 11:30 pm
by retrovan
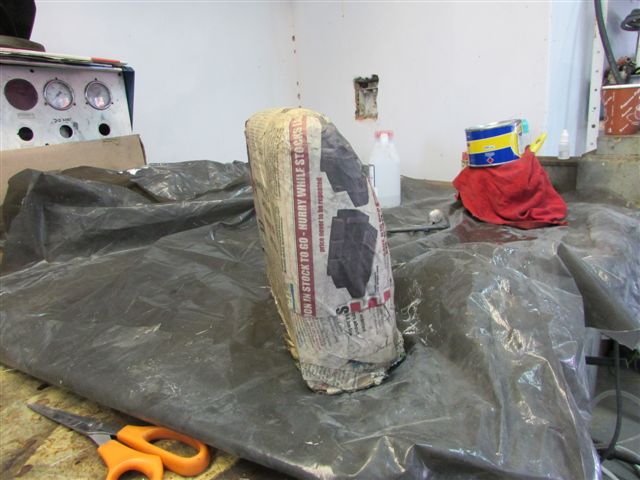
Been busy with the smaller things, still no word on the harness........

So I took my frustration out on a block of wood.
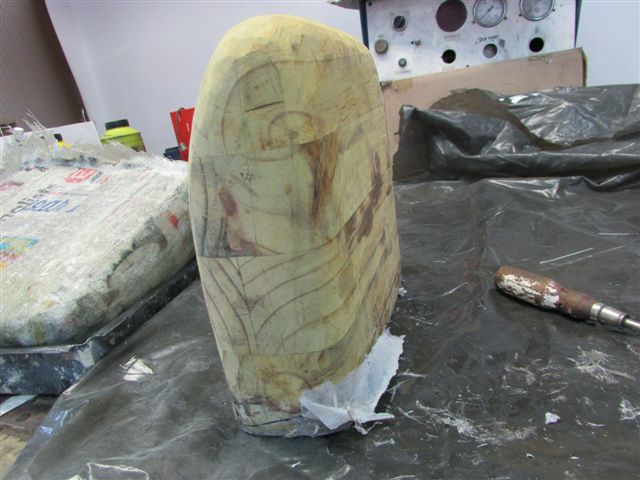

"Hope you not going to put that in your Lounge" ....I hear you all say......No, if you look carefully, you will see a shape of a Split Glove box.
Then I got the inner child in me to do some Paper-mache and covered the block, not once but twice, as there are two glove boxes.
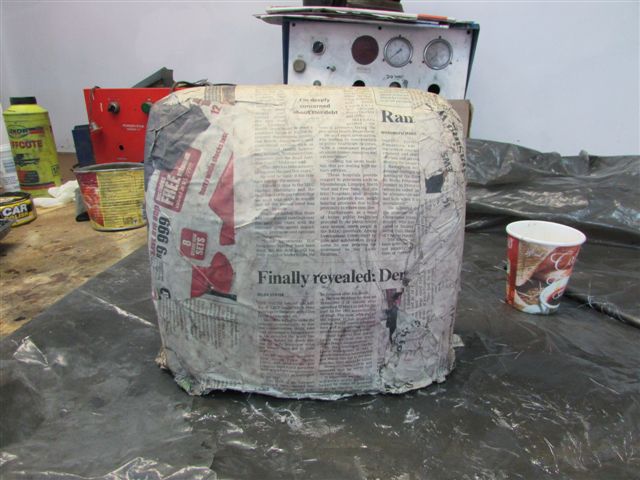
When dry, I applied a layer of Fiber glass, to stiffen it up a bit.
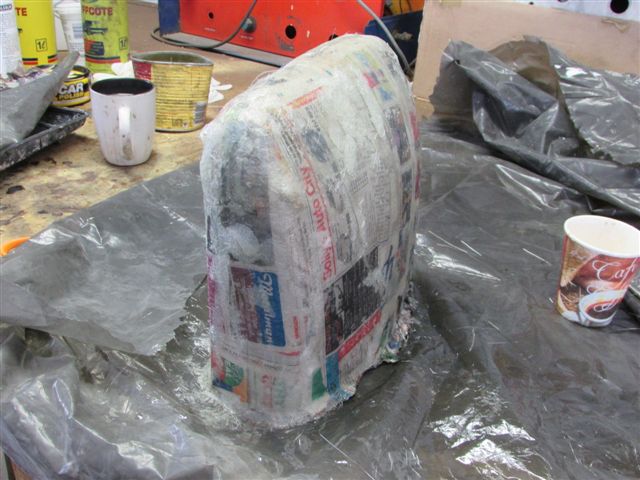
Here are both done with Fiber glass, so when dry, I will be finishing them off and make them ready for the upholstera so he can line them out with the same covering as the door covers.
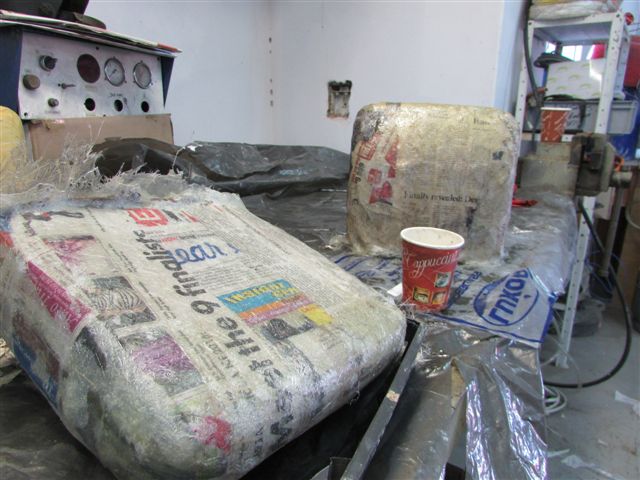
Then I made the finicky little glove box hinges, Man what a job, these frankfurters are way too big to do such little work, Had to swear constantly, just to get it right.
"Where are the photos of this..." you ask....
No, that would be giving away too much at one time need to fit them to the dash 1st.
Till next time..
Thanks for looking
Herman
Re: Retrovans 1952 Split Beetle
Posted: Wed Nov 30, 2016 8:30 pm
by Eagle
I really like the glove box idea Herman. My edition of clove box is not nearly as close as yours. I havent have a example to work from so I was cutting boxes to utilise the space behind the dash. All wel and fine it is and was a mess to remove it from the body. result is 15 % of clove box in prototype stage.
Re: Retrovans 1952 Split Beetle
Posted: Wed Nov 30, 2016 11:33 pm
by retrovan
Thanks but only had photos with sizes as sent by My split Beetle hero, Jaco.
It worked well and you do not get the Fiberglass smell in the car.
All I need to do now is to line the inside with the upholstery that goes on the door, then it will look OE.
Heard that the harness is just about ready to be shipped, so feeling like a kid in a candy store right now
Herman
Re: Retrovans 1952 Split Beetle
Posted: Thu Dec 01, 2016 5:13 pm
by Jdt1976
retrovan wrote:Thanks but only had photos with sizes as sent by My split Beetle hero, Jaco.
Herman
LOL

Re: Retrovans 1952 Split Beetle
Posted: Thu Dec 01, 2016 5:51 pm
by Tony Z
Jdt1976 wrote:retrovan wrote:Thanks but only had photos with sizes as sent by My split Beetle hero, Jaco.
Herman
LOL
Tis true...
some of us collect all sorts and only dream of a split bug.
Jaco only collects split bugs
Re: Retrovans 1952 Split Beetle
Posted: Sun Dec 04, 2016 11:12 pm
by retrovan
OK, So you all been thinking this guys become lazy, waiting for his harness............

Well, not exactly, been doing small things, and hiding them away from you guys......
But in the intrast of keeping this thread going, I have decided to share the little i have been up to so far.
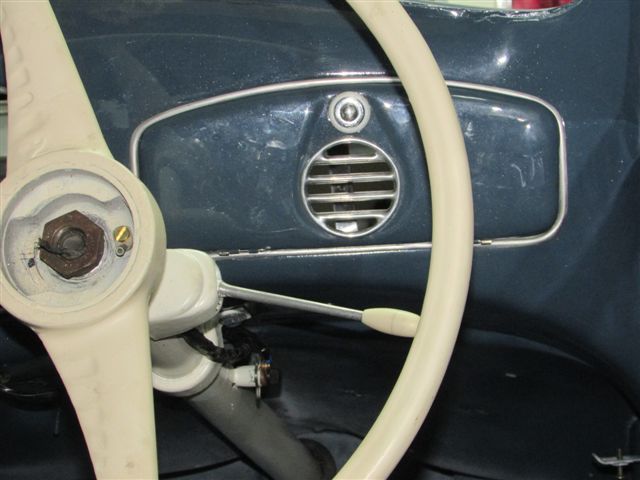
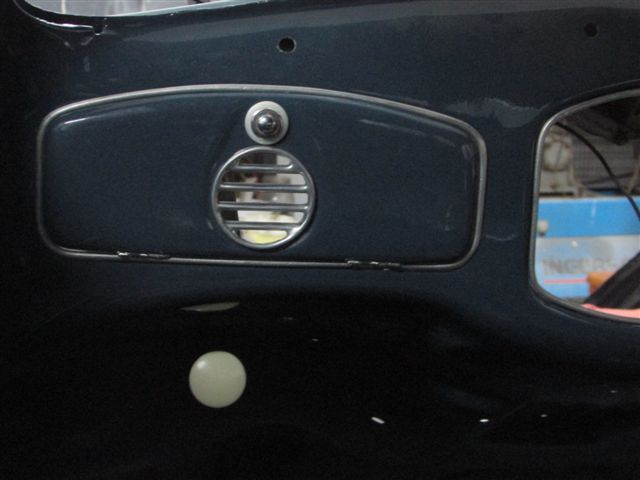
Managed to get the mesh done for the crouch coolers and fitted the flaps as well....

Then I made the hinges for the clove box doors and fitted them....
Been working on the MAIN Spring for the propulsion mechanics....
Test fitted the glove box bodys, as I can not bolt them down, as they neet to be upholstered.
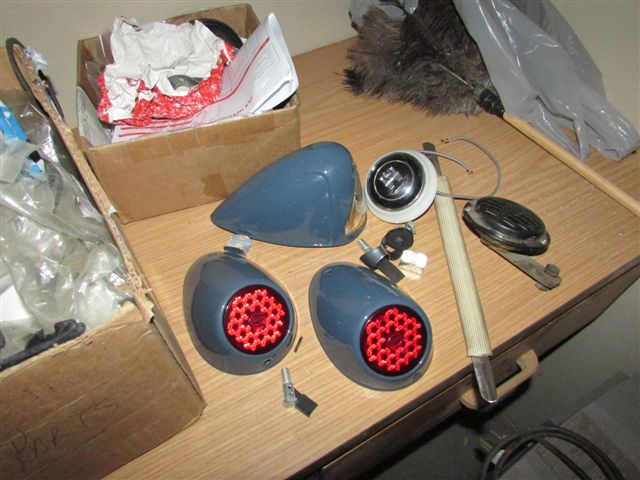
Also did the back lights assembly as well as the Popes nose.
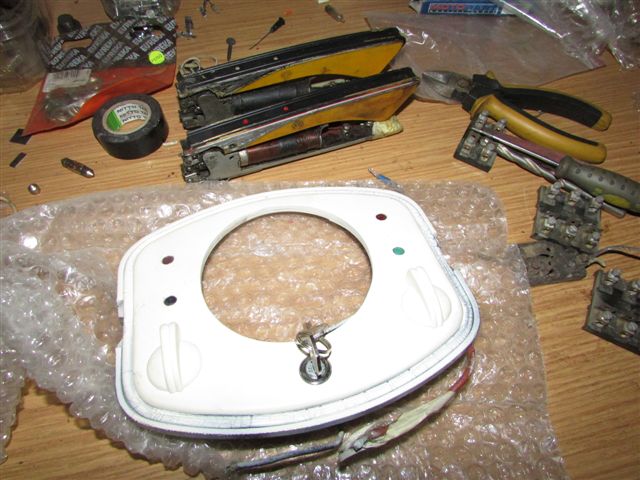
Assembled the intricate ignition switch with all its little fiddly parts
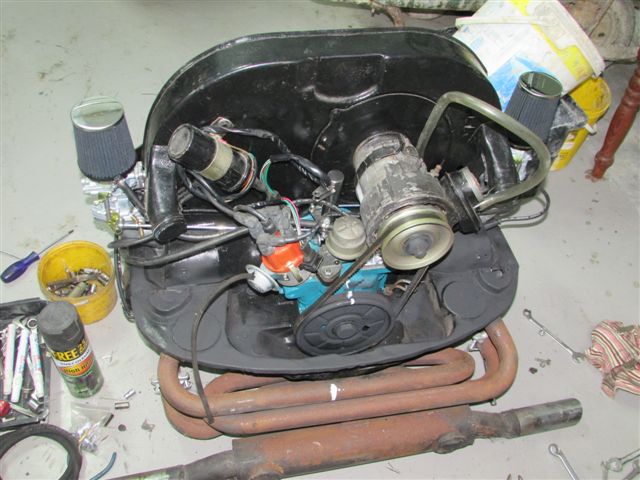
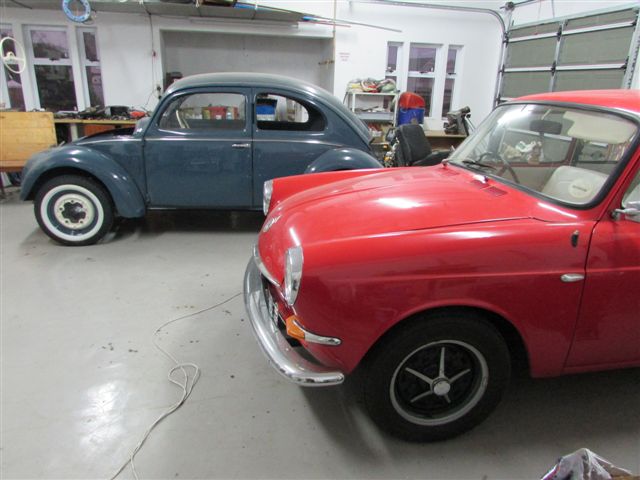
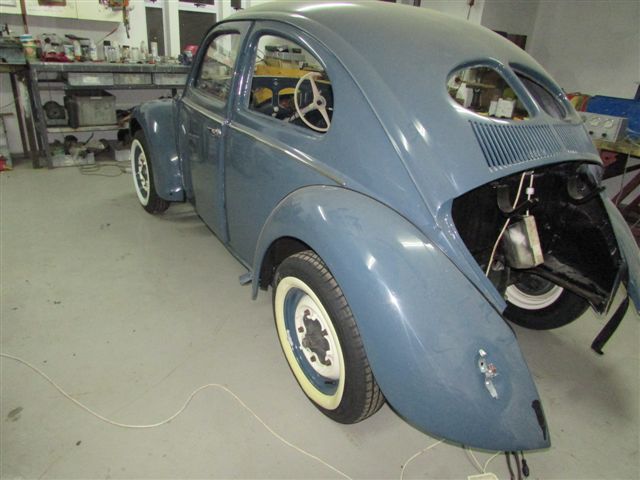
And placed the old girl back on her feet ( I mean wheels)
Have heard that the harness is complete, and will be shipped on Monday, so hopefully we will have it here in a week or so.
Well till then
Thanks for looking.
Herman