Let's clarify...
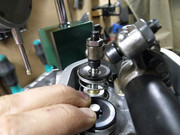
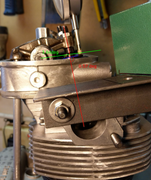
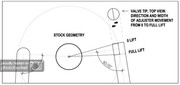
When viewing the valve tip from the top, draw a vertical line and a horizontal line through the centre. The horizontal line will be parallel to the rocker shaft.
You want to set up the rocker position so that it contacts the valve tip to the left or the right of the vertical line. This assists with valve rotation, as you have mentioned. This offset, is created by adding or re moving shims between the rockers and the rocker blocks. Do not get too close to the edge of the valve tip. A slight offset is all you need.
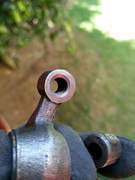
The geometry determines where the wipe pattern sits in relation to the horizontal line. If you blue the valve tip, and run the valve through a full lift cycle, you ideally want the pattern to be equal amounts above and below the horizontal line. If the pattern is mostly above the horizontal line (far side of the horizontal line in relation to the rocker shaft), you may have too many shims under the rocker blocks.
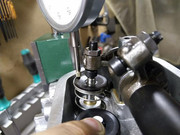
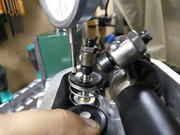
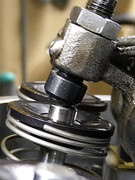
I usually set valve geometry to have the adjusting screw in line with the valve stem at 50% lift. Some prefer to have this alignment at 60 or 70% of valve lift, due to spring pressures increasing as they compress, causing greater side load on the valve guide towards full lift. This approach may be beneficial if you are running seriously heavy springs, but I always run the lightest springs possible, that are still capable of controlling the valve motion without float. In order to run light springs, I use light weight valve train components. Items like titanium valve spring retainers, heavy duty aluminium push rods (certainly not chromoly), and light weight valve lifters, come at a cost, but save significant reciprocating weight, requiring less spring pressure to control. Lighter springs will also extend the life of valve guides, seats, camshafts, and rob less power to drive the valve train. That is why I stick to adjuster/valve alignment at 50% lift.
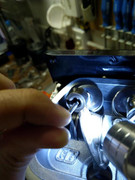
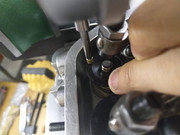
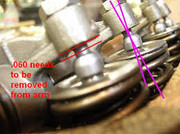
About grinding away the rocker arms... I have found this necessary, every time I use swivel feet adjusters.
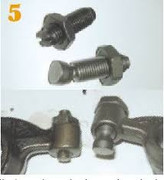
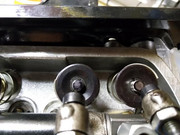
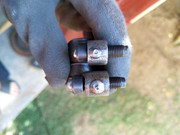
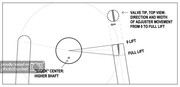
When you compare swivel foot valve adjusting screws, to a stock VW item, you will notice that the swivel end sticks out of the rocker a lot further on the valve end, than a stock VW adjusting screw. This has quite a detrimental effect on geometry, as you need to space the rockers away from the head quite a lot, to get the adjuster to align with the valve stem at 50% lift. Then you will end up with a wipe pattern that is mostly above the horizontal line (like what would appear to be happening in your last pic). Remember, the valve sits at a +/- 10 degree angle to the head, so shimming the rockers away from the head will move the wipe pattern as described above.
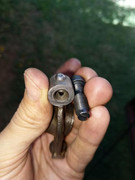
In order to correct this, you need grind the bottom of the rocker in the area where the adjuster screws into it. This will allow the adjuster to screw deeper into the rocker. You can then remove a shim from under the rocker block, and the wipe pattern will move closer to where it should be in relation to the horizontal line.

Or an even better, but more difficult/expensive way...
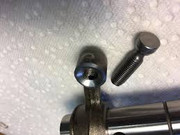
There is one added complication with the specific type of adjuster you are using. It has an oil hole, which needs to align with the oil feed hole in the rocker arm +/- 1 or 2 turns (allowed by the thinner area around the oil hole). If the oil hole area is not aligned to the oil feed, the adjuster will fail. These adjusters cannot really move much in relation to the oil hole, so this modification is probably going to misalign the oil holes, and cause failure.
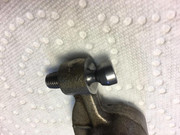
If you decide to grind the rockers to correct the geometry, I would suggest going to the "elephant foot" or "Porsche" type adjuster, which is not reliant on an oil feed from the rocker, but uses splash-oiling. It can then screw further into the ground down rocker, to create the needed clearance to correct the geometry.

As far as making unique push rods lengths for each valve... Well, that would be ideal but probably not worth the time it would take. If all valves are at the same level, you would probably be OK with measuring one-size-fits-all, and going with that. You will not get close to coil bind with your cam, so no risk of suffering a similar failure to mine.