Thanks Tony, I'll get back to you on this. I saw an ivory wheel at Dave's place, so for now, I'm in two minds here..
http://www.youtube.com/watch?v=Re-JiUdwYMI
OOOKKK.. The Goddamn Gear Linkage Bush.. FFS! There are times when I sit and stare at this piece of Engineering, and I wonder What the F&^K the Germans were thinking. Ok fair enough, they claim this only has to be done every 20 bloody years or so.. Well, I'm busy with it now.. I bought the coupling at the rear and the replacement bus today, got home, fitted new Coil, and am now bleeding to death trying to remove this linkage. It's a goddamn impossible task on these speedsters..
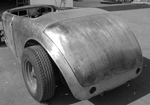
My 356. Now sold.
-
acpaterson

- Carburettor
- Posts: 1960
- Joined: Sat Jan 05, 2013 6:50 pm
- What model do you have?: Winston, a 74 Bay
- Location: Parklands, Cape Town
- Has thanked: 80 times
- Been thanked: 131 times
- Contact:

Re: My 356 Speedster - Replacing the Gear Linkage Bush!!!! O
Last edited by acpaterson on Sun Mar 02, 2014 9:16 am, edited 1 time in total.
-
Tony Z

- Donor

- Posts: 14992
- Joined: Wed Sep 14, 2005 8:33 am
- What model do you have?: 2.3L 69; 1302; P/Van
- Location: Klipheuwel (near Durbanville), Cape Town or working at sea
- Has thanked: 192 times
- Been thanked: 488 times
Re: My 356 Speedster - Replacing the Gear Linkage Bush!!!! O
here is a thread on how to do it
http://www.thesamba.com/vw/forum/viewtopic.php?t=436432
http://www.thesamba.com/vw/forum/viewtopic.php?t=436432
ANGRRR
http://www.aircooledvwsa.co.za/viewtopi ... 23&t=14775
1302S
http://www.aircooledvwsa.co.za/viewtopi ... 23&t=33521
Panel Van
http://www.aircooledvwsa.co.za/viewtopic.php?p=288723
http://www.aircooledvwsa.co.za/viewtopi ... 23&t=14775
1302S
http://www.aircooledvwsa.co.za/viewtopi ... 23&t=33521
Panel Van
http://www.aircooledvwsa.co.za/viewtopic.php?p=288723
vader wrote: The Force is strong with you young Sith Lord Z!
-
acpaterson
- Carburettor
- Posts: 1960
- Joined: Sat Jan 05, 2013 6:50 pm
- What model do you have?: Winston, a 74 Bay
- Location: Parklands, Cape Town
- Has thanked: 80 times
- Been thanked: 131 times
- Contact:
Re: My 356 Speedster - Replacing the Gear Linkage Bush!!!! O
Firstly, let me start this off by saying, of ALL the things I've done on my 6/7 whatever aircooled cars, this job has never been done previously, and let me say, it will NEVER, EVER, be done by me again.. I'm seriously getting to old for this

Here's the start of the pain. approx 13:00 midday. easy access hole, for a 5 year old!!! So we start. Linkage is held onto the Gearbox shaft with a weird square bolt, wire through it and wrapped around the shaft for safety.

Once rear shaft is off, then to get this long no: 10 bolt out the Coupling is another story. It's not really a "nut" on the end, more like a long, hollow soft metal shaft with two ears on the end. You have to hold it with a Longnose while you battle to turn out the long bolt, one angle turn at a time.. Here's the new kit.. You can see the shaft.. this will SERIOUSLY screw me up 6 or 7 hours later

Eventually I get the biaatch off..

At this point, my hands are already greased up and black, so photos slowed down. I'm also borrowing pics from some other peeps who have done this, and help to explain the process. Right. Next surprise, gear lever off. Below the lever is a plate which helps to center the spring and selector when bolted down. Mine's in 2 pieces!!!
Remove it all, and this is what I can see...

I poke around the "gear selector rod", and in the bottom of the tunnel, I find the rest of it.. Kaput is an acceptable word yes..

At least I know my diagnosis was right. The Bush was knackered. Ok, so now to get this cow Rod OUT.. All the other guys who have done this all go about it more or less the same way. Hook up the rod, and ease it forward mm by mm using a long-nose. Check. I'm lucky to have the previous owner's mechanic having butchered the tunnel in the footwell, and I have another hole down there, obviously to have repaired the pedals hinge system.. So I "hook" the pole with a piece of wire, and using the long nose method, I start shoving.

I then moved this hook down to the hole in the footwell to help the process.

Now, at this point, you'll all know how much space we have to work in.. Keep in mind I'm 6.3, and weigh around 120 Kg's! So it's a bit of a challenge for me just to get into a reasonably comfortable position to do this, and trust me, it takes an hour, possibly less if you don't get caught up in other pipework..
I'd estimate half way along, it all jams up, to the point where I'm blistering my hands squeezing the longnose so tight and trying to lever the rod forward. So, start going backward.. eventually it comes loose, and I manage to roll the rod with my fingers, and continue to push forward, and it goes.. must have gone the wrong side of the fuel feeder pipe or something.. This pic shows whats going on inside the tunnel.

I'm now dripping with sweat, and seriously taking strain with this.. What's supposed to be an hour job is well through 3 hours on this bloody chassis! Eventually I hit a solid "DONK".. I can see backward in the tunnel from the gear level hole at the metal plate which this bloody bush sits in, and the rod is still in there.. This means the inspection plate. FOK!
It is now located in between the two torsion bars in the front of the chassis, 2 x 10 mm bolts, and this plate is off, and I swear, the inspection hole is HALF THE SIZE of the cover plate.. WTF!! Inspect what, if you can see daylight in there.. FFS....

Now, on these speedster's, immediately in front of the torsion bars, is a low nosecone that the Battery sits in. I have the Speedster up on chocks, and I don't car how much I can bend my pinky finger, I cannot get my hand NEAR this hole.. Give up...
Missus comes back from work, and after some sweet talking, and swearing at how kark this design is, I talk her into getting under the car. My hook in the footwell has the front of the linkage rod near the hole, but obviously, it must twist a certain horizontal way then it fits through.. try ask a woman upside down under a car to explain which way to twist the rod!!! It was almost world war 3! I started cramping in legs and one wrist, had to jump out and grab some air.. frustration now through the roof! Ok, we try again.,. and this time I manage to twist it and it slides forward and out with her guidance.. VOILA! The back of the rod comes out the metal housing and is clear.
Dave at Flat Four suggested I not worry about the metal ring, as once this is properly pushed into that metal frame, it's in for life.. So I stuck it on the end of my finger and fingered the metal hole, and in the bush went. Pressed a little, and pop, in it popped.. Done.
Threw a bit of Grease all over it, and then grabbed the rod in the tunnel, hooked it up with my hook, asked the missus to push gently, and the rod went through the bush. Now it was a matter of reversing the process.. Bit by bit it comes back at me, hands are seriously cramping trying to grip the bloody long nose.. Here about 30 cm's from it's resting place, it jams up.. VAS!! Now I'm knackered beyond belief.. It's close to 7:00 PM, been going for 6 hours at least.. Jurre, and you can't get your hand in from the rear inspection hole, or from the gear linkage!! Like, the point of no return.. So, I start to reverse the process.. EVENTUALLY it slides forward and is free.. I look under the carpet buy the handbrake, and I can see it's right up against the passenger side of the tunnel.. It was running to one side of the handbrake cables.. So bit of one-handed steering with a screw driver through the handbrake slot, and other hand with the pliers in the gear lever hole, and the pole eventually reaches home..
Here, the last hurdle is putting the new rear Linkage and bushings on with the daft bolt! It is KAK difficult to get the rod into a new, tight coupling. and then to fiddle in there with the bushes, and then the long shaft thing and the bolt, and to reach in that hole on both sides and turn a spanner, angle by angle, I swear I was almost in tears!
It eventually tightens all up, and then pop the linkage onto the gearbox selector, and screw in the square bolt. then lash it all with new, fresh grease, as well as the ball joint.. I'll have to get another of those plates which help to alight the gear lever and spring, but it's all back in for now. Managed to close up the inspection plate and tried to drive it into the garage.. No throttle!!! So It's parked now. hoping I just un-clipped the accelerator pedal from the throttle cable in the side of the tunnel, hope it's only that.. If not, I might throw a match in the tank!
Seriously, I don't wish this task on ANYONE, unless you have a body off the chassis.. I also recommend anyone doing a chassis up build, do this BEFORE you drop any body on the chassis.. It will so much easier without a body on, and once done, you know your selector and gear linkage is good for another 30 years..
So gonna punish my pillow tonite..
Last edited by acpaterson on Sun Mar 02, 2014 2:13 pm, edited 1 time in total.
-
Bugger
- Advertiser

- Posts: 7948
- Joined: Fri Jun 09, 2006 6:25 pm
- What model do you have?: a Few Models
- Facebook: Pierre Bugger Eksteen
- Location: Johannesbirg
- Has thanked: 18 times
- Been thanked: 58 times
Re: My 356 Speedster - Replacing the Gear Linkage Bush!!!! O
Now you know why 90% Beetles out there have sloppy gear shifting
Adapterplates Available for Rotary in Beetle and others aswell
And Special Boxes built for Rotary Conversions and Scubies
Pierre
082 600 8663
CLick on Banner Below to be routed to the Web site

And Special Boxes built for Rotary Conversions and Scubies
Pierre
082 600 8663
CLick on Banner Below to be routed to the Web site
-
Blitzkrieg
- ACVWSA Junkie
- Posts: 10784
- Joined: Wed Mar 07, 2007 10:41 am
- What model do you have?: none
- Location: Johannesburg
- Has thanked: 91 times
- Been thanked: 44 times
Re: My 356 Speedster - Replacing the Gear Linkage Bush!!!! O
entertaining reading as always, hope you come right with it!
If it's too low, you're too old 
-
acpaterson
- Carburettor
- Posts: 1960
- Joined: Sat Jan 05, 2013 6:50 pm
- What model do you have?: Winston, a 74 Bay
- Location: Parklands, Cape Town
- Has thanked: 80 times
- Been thanked: 131 times
- Contact:
Re: My 356 Speedster - Replacing the Gear Linkage Bush!!!! O
Sorted,
The accelerator arm behind the small metal cover in the passenger footwell fell off the accelerator shaft connected to the pedal! So I've put through the shaft a piece of wire which will hold the plate on.
Compiled a list of what I've had to do on this car in the past 90 days. From front to back.
replaced hooter with Fiam twin air horns with 30 amp relay & wiring updated
headlights loose, stripped and re-furbished them - subsequently purchased brand new lights from the USA
replaced swollen battery and cleaned out leaked battery acid
replaced king and link pins - re-aligned wheels to perfect position
replaced 4 tires with pirelli 205 60 15's
replaced brake master cylinder and refurbished, re-piped brake circuits, replaced handbrake cables, replaced brake shoes
replaced fuse box and associated fuses, cleaned up faulty wiring
repaired steering column wiring and hooter circuit
re-upholstered interior and seats to tan colour
replaced useless side mirrors with genuine 356 Speedster mirrors from Germany
replaced gear linkage and bush
repaired Bowden Tube inside tunnel and fitted correct tube end on clutch cable
replaced leaking solex carb with twin 36 mm ICT Weber Carbs
replaced all leaking fuel hoses and fuel filter repositioned outside motor housing for safety reasons
replaced faulty coil with new coil
replaced engine wiring and removed un-wanted broken cabling
tightened up almost every nut and bolt in engine bay - Everything was loose, or rattling loose, or had fallen out
Big project to replicate rear lenses with resin and coloured tints, 80% successful, but also purchased new rear lights and chrome bezels from the USA
So right now, it's pretty awesome to drive, and behaves perfectly. As I mentioned, respray due end of March, and the re-fit all the new lights, and clean up brightwork etc, he's going to look as good as new.
regards
Alan
-
Speedy356

- Drip
- Posts: 9
- Joined: Mon Jul 30, 2012 7:51 pm
- What model do you have?: Porsche 356 (Rep).
- Location: Dinokeng Nature Reserve, Pretoria (Dont know where the hell "Tswane" is!).
- Has thanked: 1 time
Re: My 356 Speedster - Replacing the Gear Linkage Bush!!!! O
Well done! Are you going to respray her the same shade of red or are you going to tweak the colour a bit?
Yes it is a replica, but it is mine!
Remember......Drive it like you stole it!
Beware of stupid people......Especially when they congregate in large groups!
Remember......Drive it like you stole it!
Beware of stupid people......Especially when they congregate in large groups!
-
Firebird

- Oil Stain
- Posts: 155
- Joined: Wed Feb 27, 2008 11:45 pm
- What model do you have?: 356Speedster Replica
- Location: Gauteng
- Has thanked: 28 times
- Been thanked: 11 times
- Contact:
Re: My 356 Speedster - Replacing the Gear Linkage Bush!!!! O
After all the crap you have been through I am sure that HE is actually a SHE
-
Barry
- Single Port
- Posts: 1254
- Joined: Fri Jun 15, 2007 9:02 am
- Location: Stellenbosch
- Been thanked: 12 times
Re: My 356 Speedster - Replacing the Gear Linkage Bush!!!! O
On the gear linkage bush: is it not feasible to cut the tunnel and make up a removable cover so that you can actually get access and do it in situ? Seems like that would be a 2-3 hour job max.......
Barry
Metalshaping courses, full builds, replacement panels.
http://www.facebook.com/pages/Garage-Cl ... 2857822743" onclick="window.open(this.href);return false;
Metalshaping courses, full builds, replacement panels.
http://www.facebook.com/pages/Garage-Cl ... 2857822743" onclick="window.open(this.href);return false;
-
acpaterson
- Carburettor
- Posts: 1960
- Joined: Sat Jan 05, 2013 6:50 pm
- What model do you have?: Winston, a 74 Bay
- Location: Parklands, Cape Town
- Has thanked: 80 times
- Been thanked: 131 times
- Contact:
Re: My 356 Speedster - Replacing the Gear Linkage Bush!!!! O
Gary,
As what Barry suggested, I'm lucky to have a "hole" in the tunnel above the foot pedal hinge. This definitely helped in suspending the rod to come through the inspection plate. I'd suggested you cut a large square hole there that you can cover up with a plate and some screws. I guess it also depends on your luck when sliding the rod back in to place, and weather you hook up in Handbrake lines or the fuel line. Also keep in mind, when the plastic bush is in place, there's very little, if any play.. Good luck.
Now, I need to find one of these.

Mine's passenger side was broken, and is inside the tunnel, so the lever gos well left when looking for first.
As what Barry suggested, I'm lucky to have a "hole" in the tunnel above the foot pedal hinge. This definitely helped in suspending the rod to come through the inspection plate. I'd suggested you cut a large square hole there that you can cover up with a plate and some screws. I guess it also depends on your luck when sliding the rod back in to place, and weather you hook up in Handbrake lines or the fuel line. Also keep in mind, when the plastic bush is in place, there's very little, if any play.. Good luck.
Now, I need to find one of these.
Mine's passenger side was broken, and is inside the tunnel, so the lever gos well left when looking for first.
-
Tony Z
- Donor
- Posts: 14992
- Joined: Wed Sep 14, 2005 8:33 am
- What model do you have?: 2.3L 69; 1302; P/Van
- Location: Klipheuwel (near Durbanville), Cape Town or working at sea
- Has thanked: 192 times
- Been thanked: 488 times
Re: My 356 Speedster - Replacing the Gear Linkage Bush!!!! O
Well done Alan, glad you got it sorted.
Entertaining read, I am happy it wasnt me writing it though
Entertaining read, I am happy it wasnt me writing it though
ANGRRR
http://www.aircooledvwsa.co.za/viewtopi ... 23&t=14775
1302S
http://www.aircooledvwsa.co.za/viewtopi ... 23&t=33521
Panel Van
http://www.aircooledvwsa.co.za/viewtopic.php?p=288723
http://www.aircooledvwsa.co.za/viewtopi ... 23&t=14775
1302S
http://www.aircooledvwsa.co.za/viewtopi ... 23&t=33521
Panel Van
http://www.aircooledvwsa.co.za/viewtopic.php?p=288723
vader wrote: The Force is strong with you young Sith Lord Z!
-
acpaterson
- Carburettor
- Posts: 1960
- Joined: Sat Jan 05, 2013 6:50 pm
- What model do you have?: Winston, a 74 Bay
- Location: Parklands, Cape Town
- Has thanked: 80 times
- Been thanked: 131 times
- Contact:
Re: My 356 Speedster - Replacing the Gear Linkage Bush!!!! O
Glad I could supply the weekend's laughter column..
-
buggyfan

- Long Block
- Posts: 2979
- Joined: Wed Mar 12, 2008 2:26 am
- What model do you have?: lwb beachbuggy
- Location: newlands,jhb
- Has thanked: 95 times
- Been thanked: 87 times
Re: My 356 Speedster - Replacing the Gear Linkage Bush!!!! O
this guy might have what youre looking for .......
http://www.gumtree.co.za/a-replacement- ... 0005535109
gear selector plate R150
http://www.gumtree.co.za/a-replacement- ... 0005535109
gear selector plate R150
http://www.aircooledvwsa.co.za/viewtopi ... tt#p269451" onclick="window.open(this.href);return false;
-
acpaterson
- Carburettor
- Posts: 1960
- Joined: Sat Jan 05, 2013 6:50 pm
- What model do you have?: Winston, a 74 Bay
- Location: Parklands, Cape Town
- Has thanked: 80 times
- Been thanked: 131 times
- Contact:
-
buggyfan
- Long Block
- Posts: 2979
- Joined: Wed Mar 12, 2008 2:26 am
- What model do you have?: lwb beachbuggy
- Location: newlands,jhb
- Has thanked: 95 times
- Been thanked: 87 times
Re: My 356 Speedster - Replacing the Gear Linkage Bush!!!! O
Just compare it to your old one to make sure they are exactly the same ,as the ad only states baywindow parts.
http://www.aircooledvwsa.co.za/viewtopi ... tt#p269451" onclick="window.open(this.href);return false;