Page 3 of 4
Re: Baja Bug Chronicles
Posted: Mon Jul 09, 2018 10:47 am
by 73type2
Tony Z wrote: Sun Jul 08, 2018 2:26 pm
Flywheel needs to be torqued to around 350Nm to prevent the gland nut from coming loose.
Most people don't have a torque wrench that can do 350Nm, but I'm sure you can rent one if you really want to use one. The easy way is just to use a long pipe with a power bar. Check some Youtube videos for guidance.
Re: Baja Bug Chronicles
Posted: Mon Jul 09, 2018 10:48 am
by 73type2
Or, some people use a torque multiplier tool.
Re: Baja Bug Chronicles
Posted: Mon Jul 09, 2018 11:55 am
by Tony Z
and thats when people snap the nuts... remember, its only 35kg on 1m or 23kg on 1.5m.
Long pipe and "feel" = way too much
Re: Baja Bug Chronicles
Posted: Sun Jul 15, 2018 12:55 am
by MrHappypants
Right, thanks for all the replies and answered questions. I am definitely going to need your guys help along the way, so it is really appreciated.
I have got back home so I can carry on with the Baja now

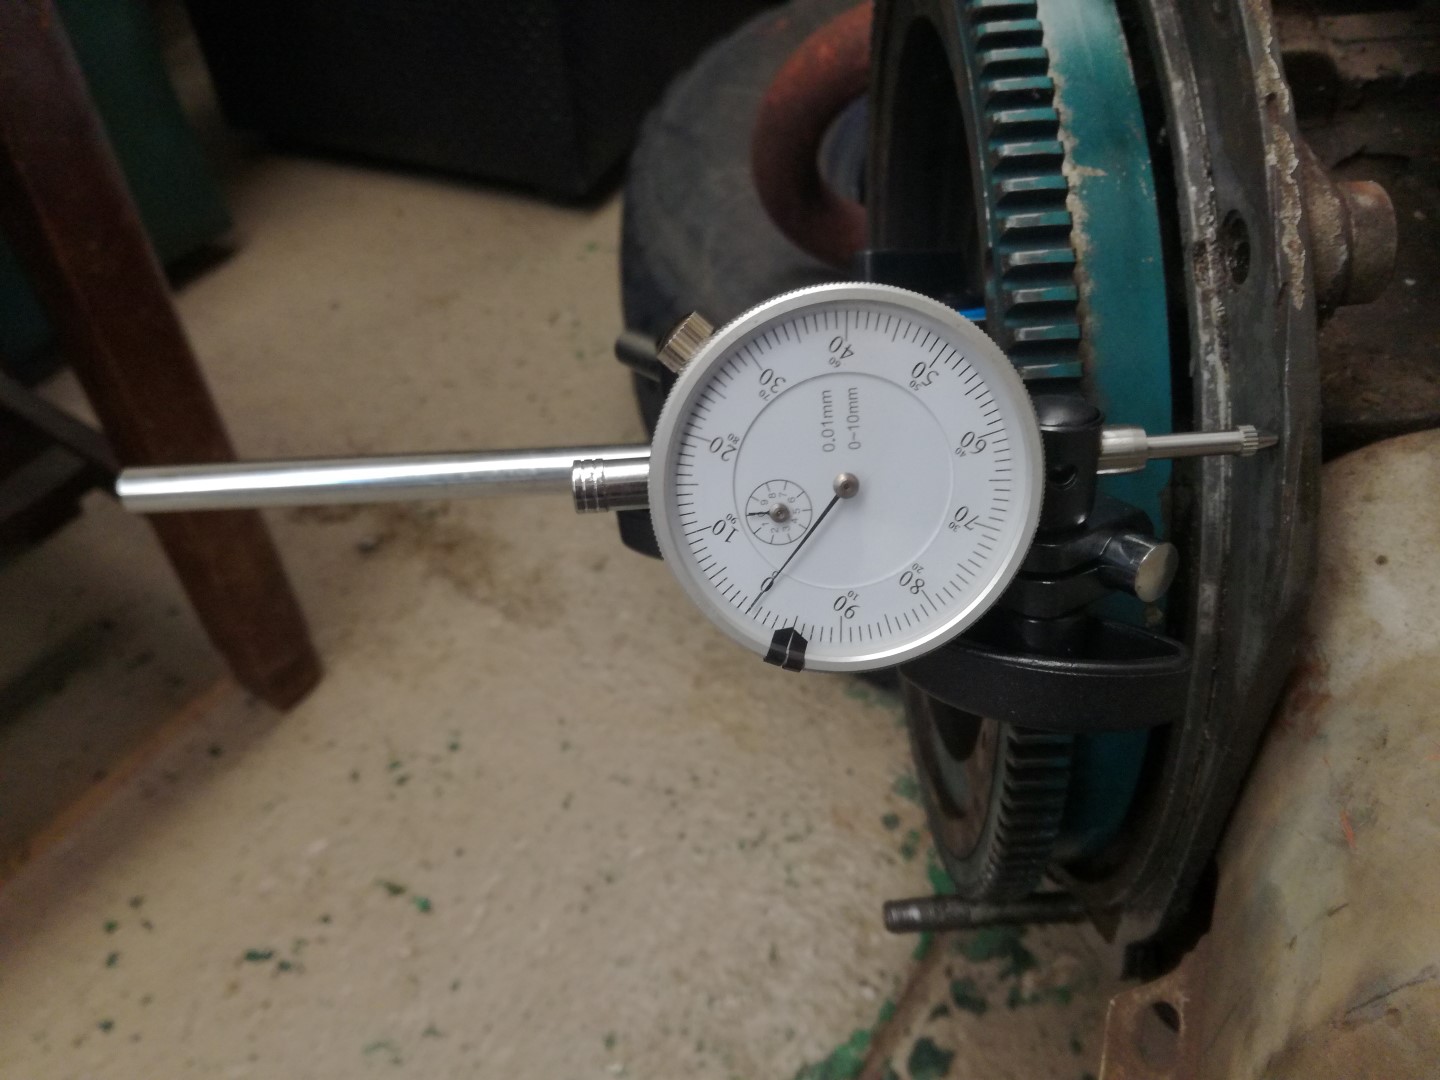
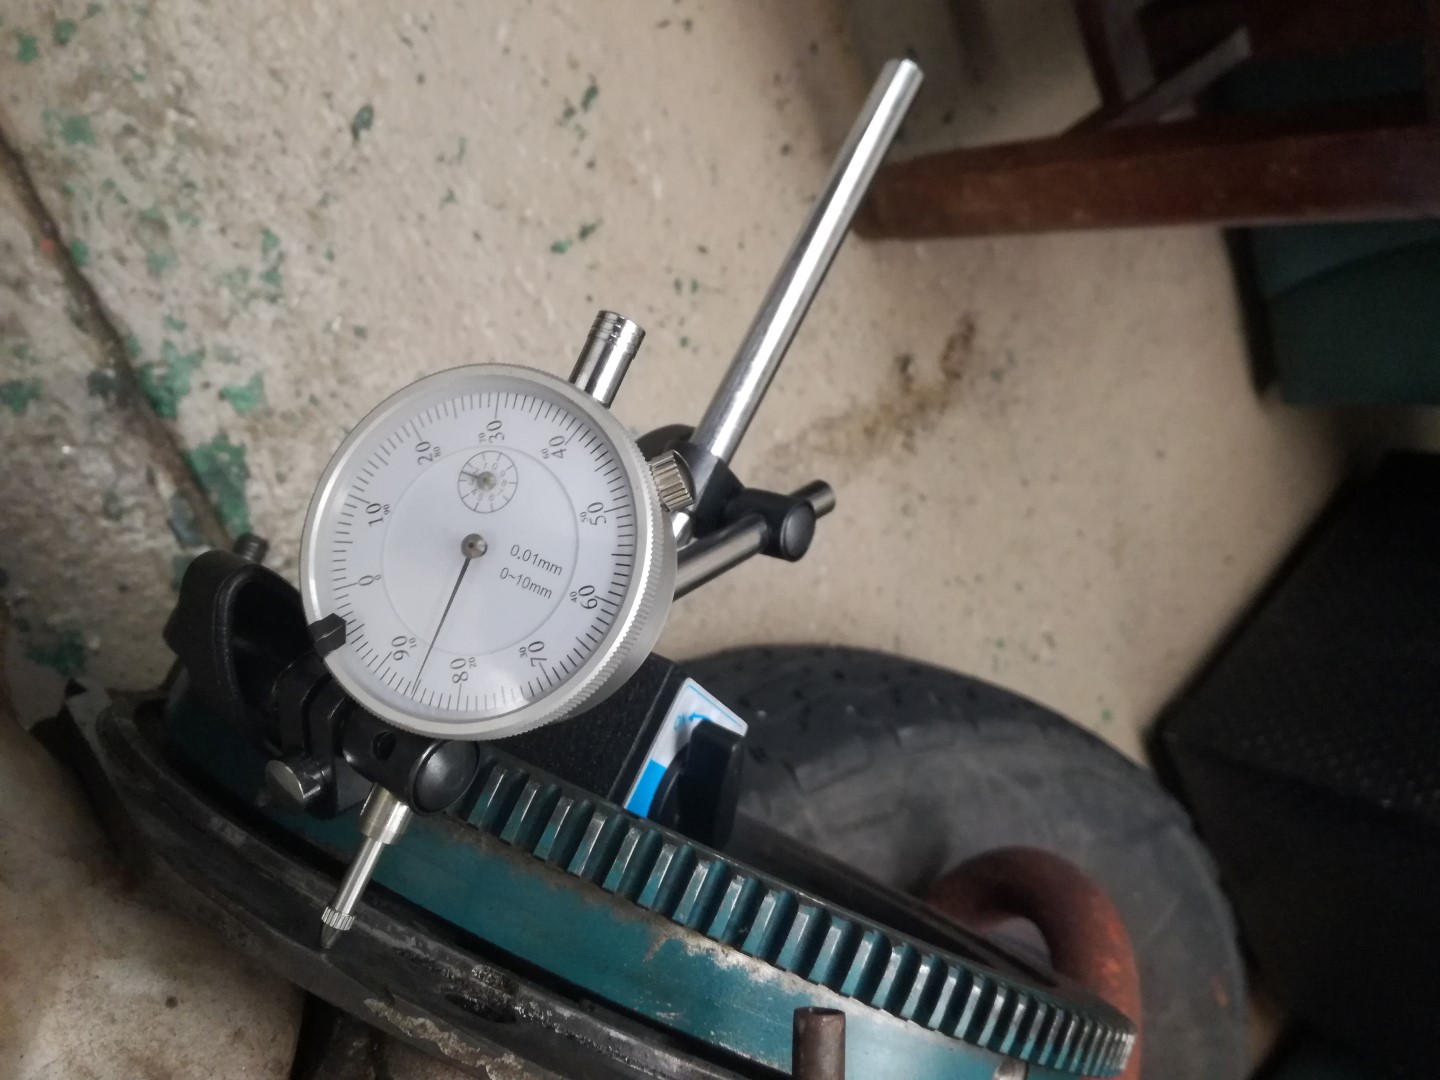
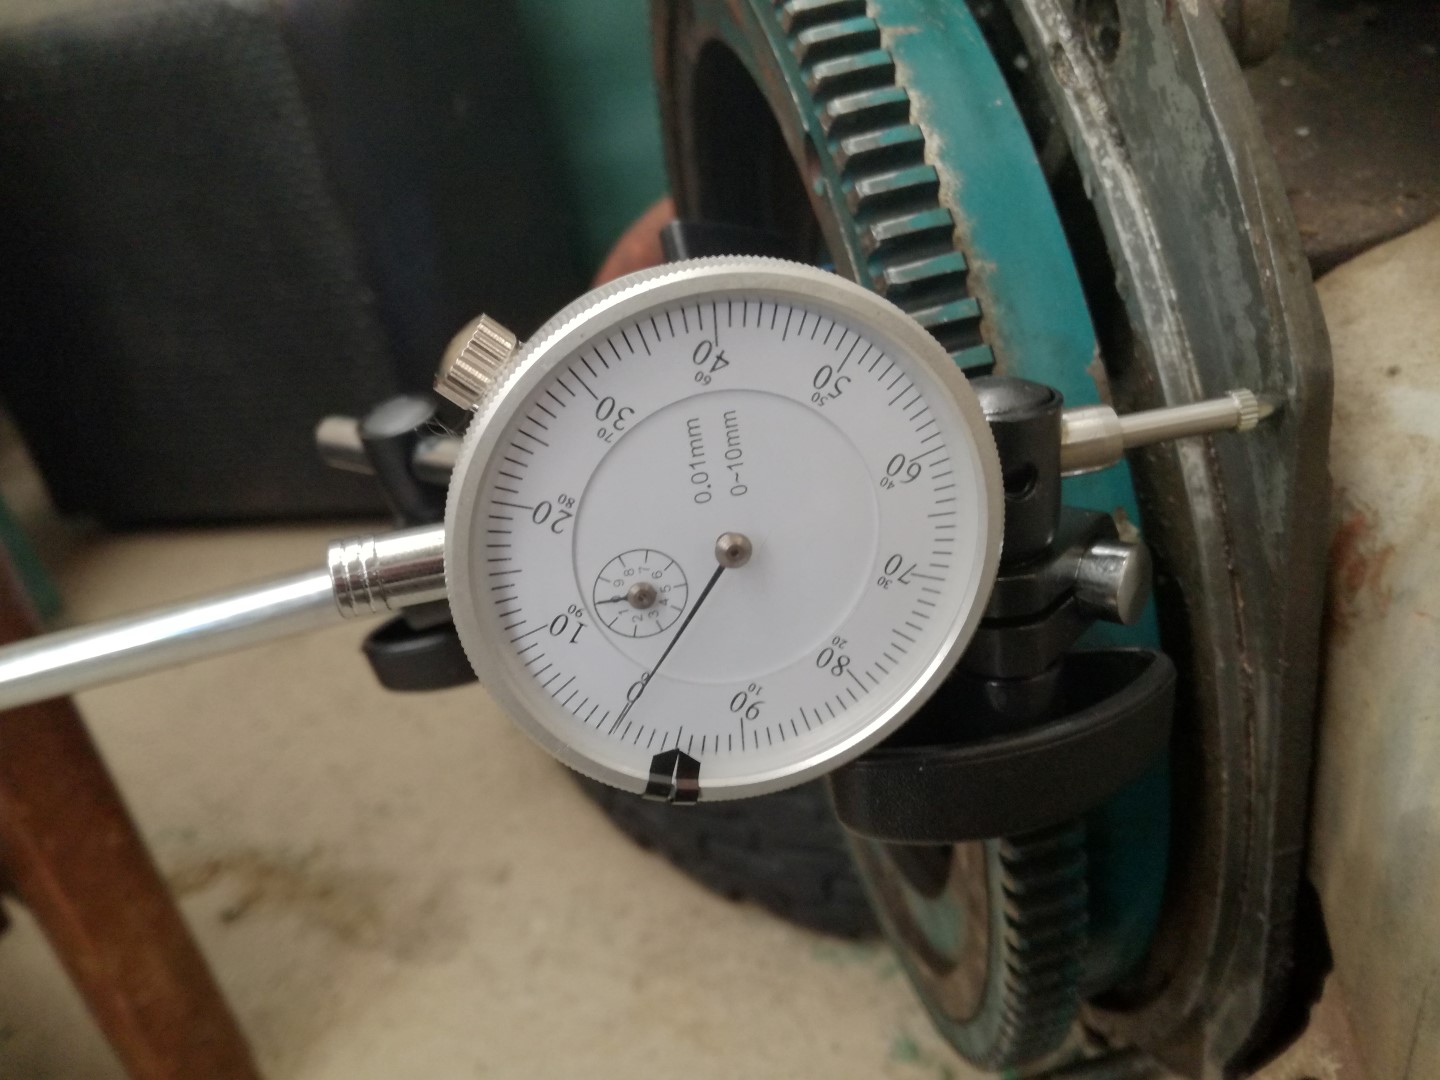
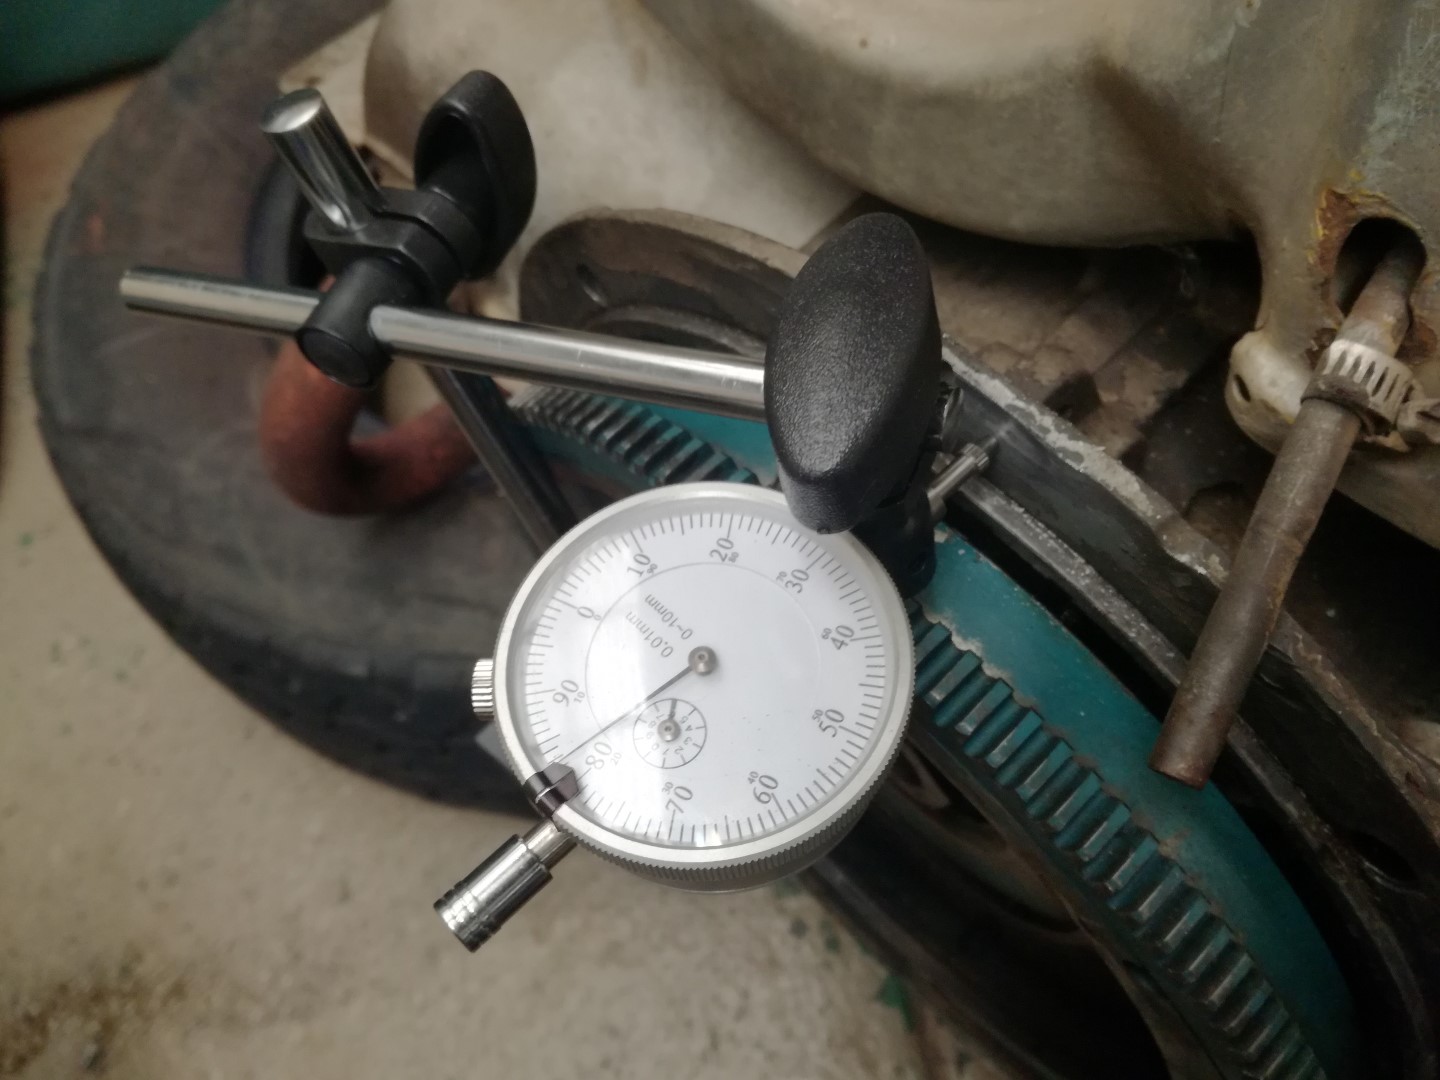
I have measured the end play, it is my first time measuring end play but I get the concept and took my time. I put the dial indicator on a few different spots at the flywheel side and got a consistent-ish
0.84mm which is way too much according to the max wear spec of 0.15mm.
Now my questions are:
1. Can I just put the correct thickness washers in to get the correct end play so that I can get some more life out of the engine before a rebuild? I understand it is not the perfect solution but can I do that, just to get some more life out of it?
2. Is the excessive end play the reason why the seal has gone?
3. How bad is 0.84mm in the real world? Would the case be damaged already?
I will be using my 85kg body weight on the right length bar to torque the gland nut when the time comes. My little torque wrench only goes to 110nm.
Can I use a pneumatic impact wrench to loosen the gland nut or will I damage something?
I took some photos for you guys but my laptop crashed yesterday and the one I am using at the moment doesn't want to upload any pics to any sites. Will pop them up here once I figure it out.
EDIT: Got my laptop back so can add the pics of the end play measurements.
 IMG_20180714_145812
 by
B R, on Flickr
 IMG_20180714_145604
 by
B R, on Flickr
 IMG_20180714_150056
 by
B R, on Flickr
 IMG_20180714_152610
 by
B R, on Flickr
Re: Baja Bug Chronicles
Posted: Sun Jul 15, 2018 1:00 am
by MrHappypants
John Alves wrote: Mon Jul 02, 2018 10:43 am
MrHappypants wrote: Sun Jul 01, 2018 6:13 pm
I also checked and saw that the battery gets around 14 volts when the car is running so at least the battery is charging. I just need to find out why the alternator light isn't going out. At least the battery is charging!
Are you sure its not the oil pressure light that is staying on, check that the wiring is correct
There is no wiring to the oil pressure switch and no oil pressure switch installed. Only one light - the alt light comes on when ignition is on and then once started that same light stays on but gets dimmer and brighter and sort of flickers when the car is running.
Re: Baja Bug Chronicles
Posted: Sun Jul 15, 2018 8:08 pm
by Edmond
0.84mm is way too much, adding thicker end play shims is not the answer as it will lock up the crank as the problem lies with the no1 bearing moving in the case, it wears the shoulder where it sits in due to the clutch force and once the bearing starts moving it hammers the case where it fits eventually making the case scrap.
The excessive end play will also ruin the seal, had the same problem in my baja, the no1 bearing was moving 0.5mm in the case which caused the flywheel seal to fail, it used about 1L of oil a week
Take the flywheel off with the impact gun, no harm will be caused there and check the no1 bearing for movement in the case.
The longer you leave the excessive end play the worse it gets though, a full rebuild might be on the cards.
Might be better to look for a good s/h engine rather
Re: Baja Bug Chronicles
Posted: Sun Jul 15, 2018 9:06 pm
by MrHappypants
Edmond wrote: Sun Jul 15, 2018 8:08 pm
0.84mm is way too much, adding thicker end play shims is not the answer as it will lock up the crank as the problem lies with the no1 bearing moving in the case, it wears the shoulder where it sits in due to the clutch force and once the bearing starts moving it hammers the case where it fits eventually making the case scrap.
The excessive end play will also ruin the seal, had the same problem in my baja, the no1 bearing was moving 0.5mm in the case which caused the flywheel seal to fail, it used about 1L of oil a week
Take the flywheel off with the impact gun, no harm will be caused there and check the no1 bearing for movement in the case.
The longer you leave the excessive end play the worse it gets though, a full rebuild might be on the cards.
Might be better to look for a good s/h engine rather
I Feared that would be the answer. Reality strikes again.
Re: Baja Bug Chronicles
Posted: Wed Jul 18, 2018 8:05 pm
by MrHappypants
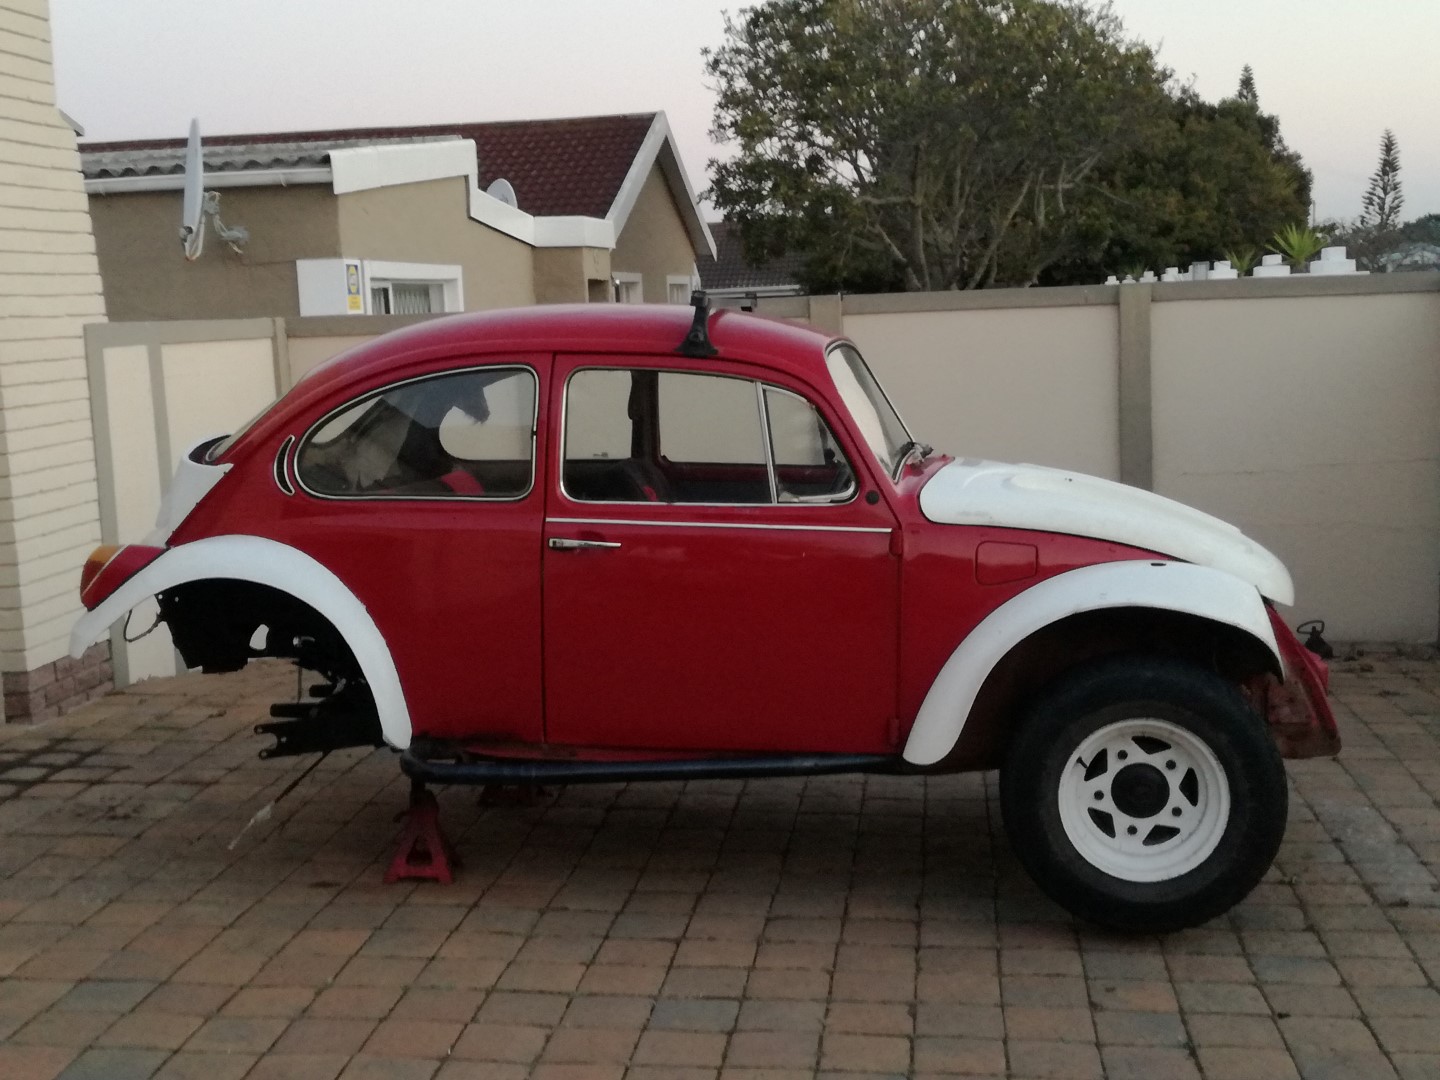
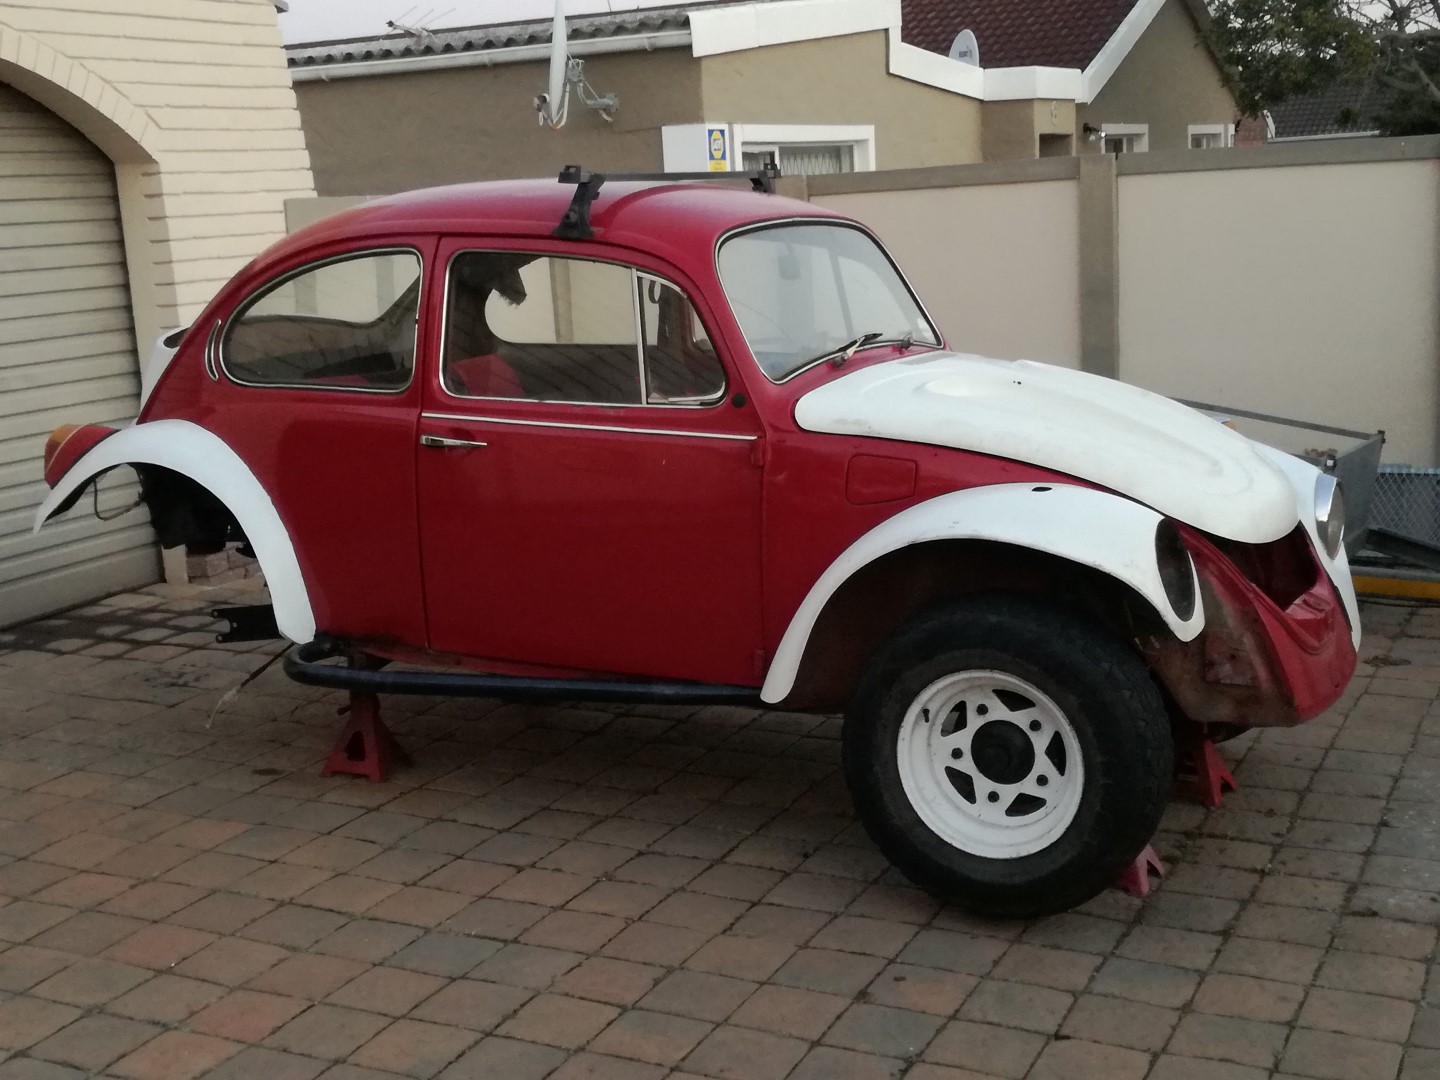
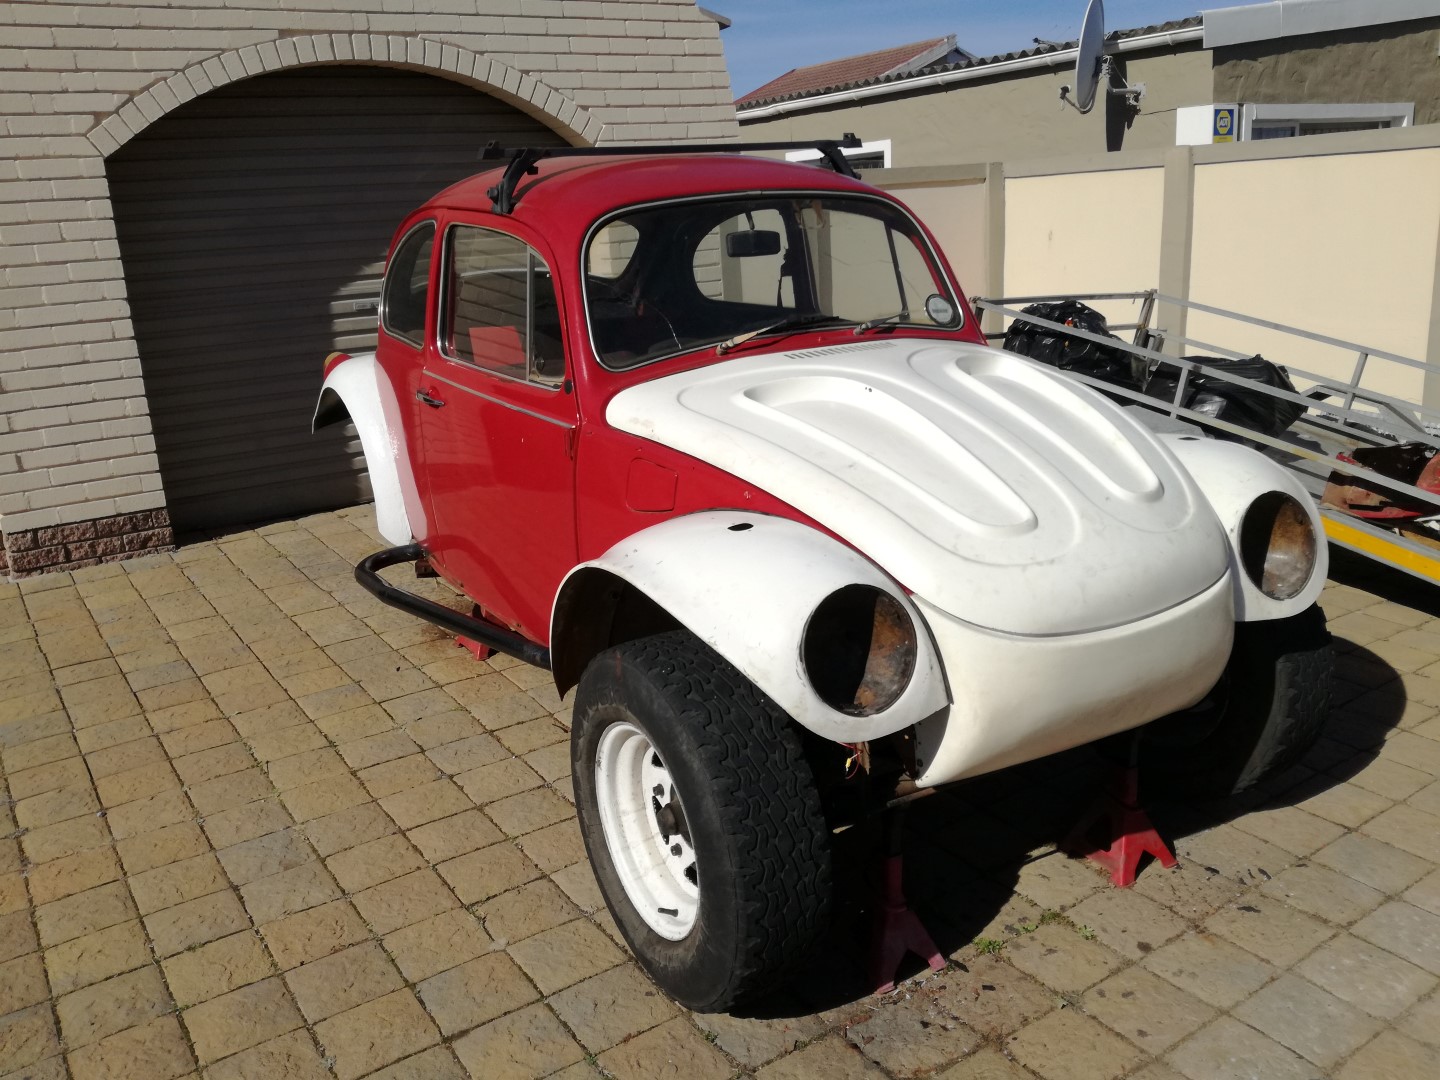
Managed to swap my 14 inch front wheels for 15 inch, same style so that was a bonus. I threw some old 215/R15 Firestone ATX's on.
Also started mocking up the front Baja fiberglass kit so I can make a cut line.
The axle tube cover plate gaskets are busy getting cut at Pro Cut Gaskets so with any luck I can put the gearbox back in the Baja on saturday.
The back drums have been skimmed and the shoes relined, picking those up tomorrow.
Got a replacement windscreen.
Slowly getting things done.
 IMG_20180718_173605
 by
B R, on Flickr
 IMG_20180718_173556
 by
B R, on Flickr
Re: Baja Bug Chronicles
Posted: Thu Jul 19, 2018 12:23 am
by Tony Z
red and white suits the car, its a good colour scheme
Re: Baja Bug Chronicles
Posted: Thu Jul 19, 2018 5:43 am
by freddiebooysen
Getting along there
Re: Baja Bug Chronicles
Posted: Thu Jul 19, 2018 1:46 pm
by MrHappypants
Tony Z wrote: Thu Jul 19, 2018 12:23 am
red and white suits the car, its a good colour scheme
Thanks but i'm not sold on it, Might change the Baja body panels to black...I managed to find a virgin kit that has never been sprayed, so white it is for now.
Re: Baja Bug Chronicles
Posted: Thu Jul 19, 2018 5:17 pm
by buggyfan
MrHappypants wrote: Thu Jul 19, 2018 1:46 pm
Tony Z wrote: Thu Jul 19, 2018 12:23 am
red and white suits the car, its a good colour scheme
Thanks but i'm not sold on it, Might change the Baja body panels to black...I managed to find a virgin kit that has never been sprayed, so white it is for now.
Or just add some blue to it


Re: Baja Bug Chronicles
Posted: Thu Jul 19, 2018 7:09 pm
by MrHappypants
buggyfan wrote: Thu Jul 19, 2018 5:17 pm
MrHappypants wrote: Thu Jul 19, 2018 1:46 pm
Tony Z wrote: Thu Jul 19, 2018 12:23 am
red and white suits the car, its a good colour scheme
Thanks but i'm not sold on it, Might change the Baja body panels to black...I managed to find a virgin kit that has never been sprayed, so white it is for now.
Or just add some blue to it
If it wasn't so American then I might have ... not too fond of the American flag

Re: Baja Bug Chronicles
Posted: Thu Jul 19, 2018 8:32 pm
by Edmond
Making good progress there
Re: Baja Bug Chronicles
Posted: Sat Jul 21, 2018 1:07 pm
by MrHappypants
Well the gaskets will only be ready next week, so no gearbox going in this weekend - just as well because it gives me a chance to clean and paint the axle tubes and drums.
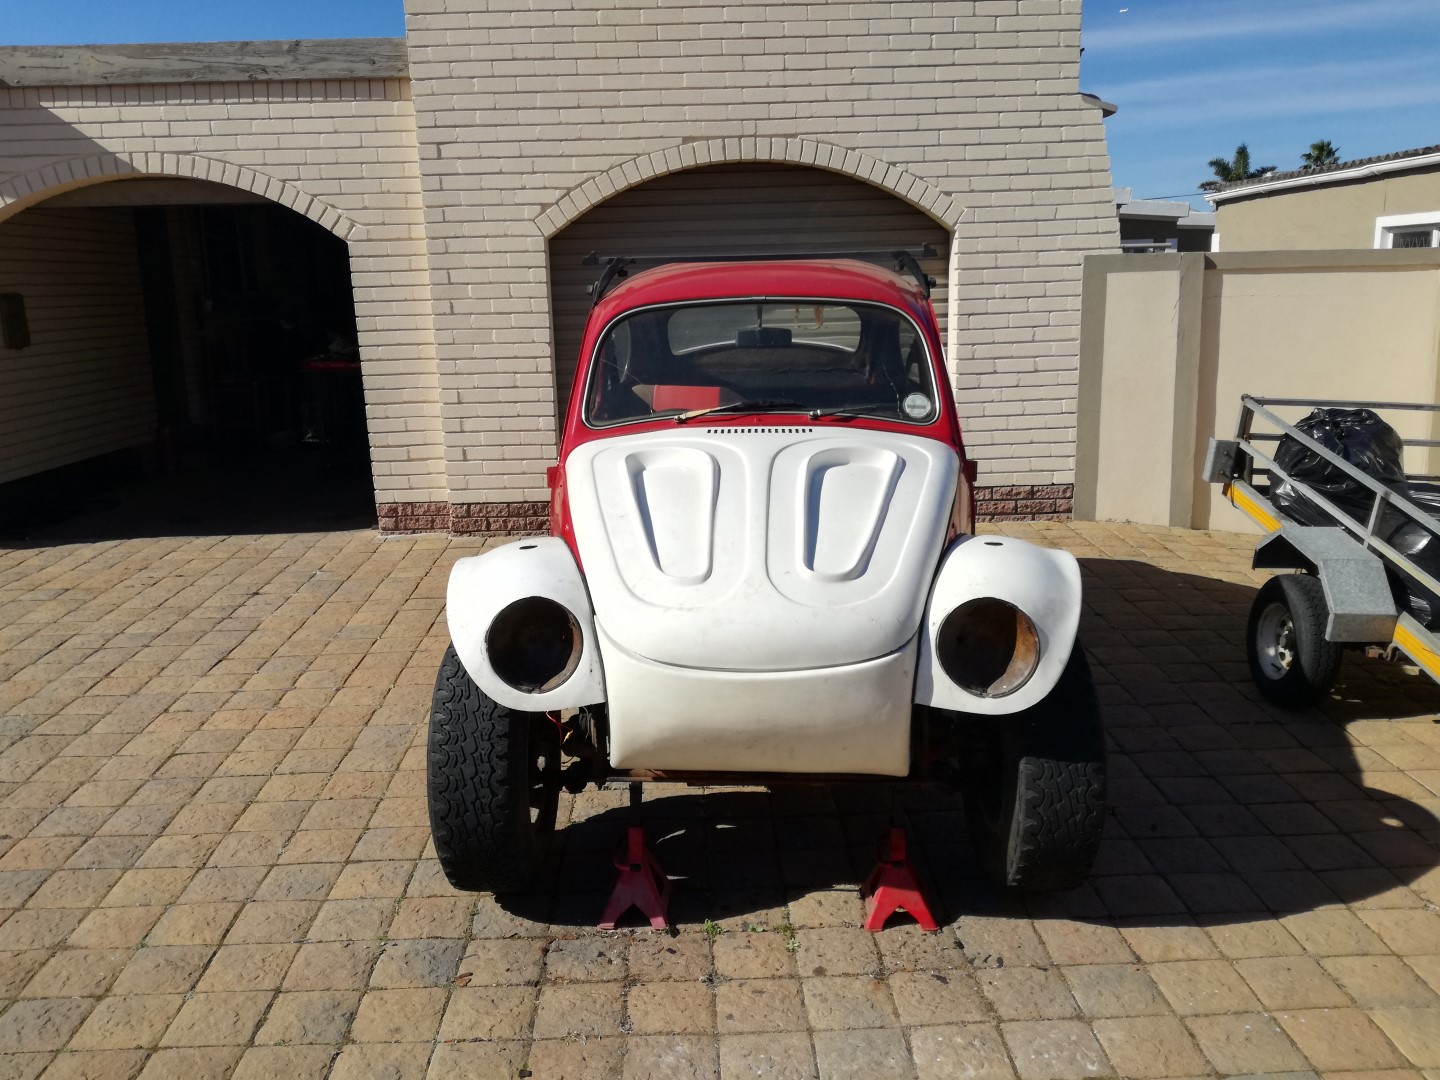
I managed to cut the front off and fit the nose cone. This kit is not that great, quite flimsy and not very well aligned, I also think the front of this beetle had a prang at some stage but nonetheless the front kit is on, not perfectly aligned but good enough for my Baja...just need some rubber hood clamp things to finish it off.
I also ripped all the old dirty torn siff headlining out. Not 100% sure what I will do for a headlining. Might just rubberise the ceiling or something, but anything will be better than what was in there, even just a fresh coat of paint.
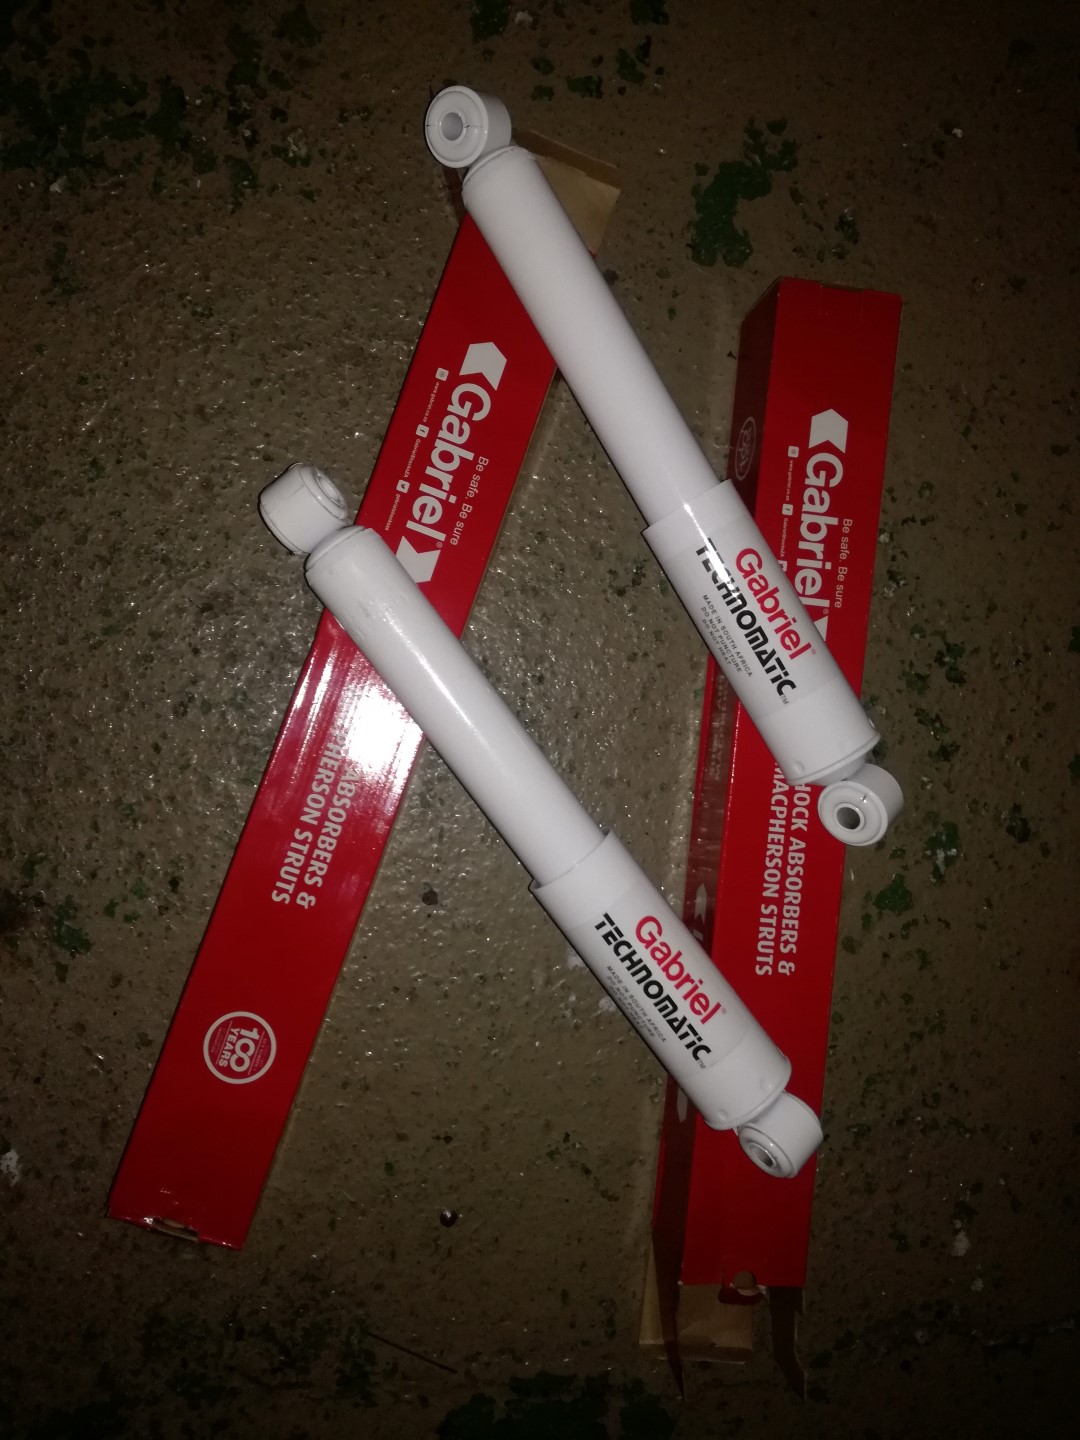
I got 2 Gabriel shocks for the rear. The front will get new ones too when I get to doing the front axle.
 IMG_20180720_190750
 by
B R, on Flickr
 IMG_20180721_123734
 by
B R, on Flickr
 IMG_20180721_123744
 by
B R, on Flickr