Ad blocker detected: Our website is made possible by displaying online advertisements to our visitors. Please consider supporting us by disabling your ad blocker on our website.
fig wrote:There's no difference between the front engine tin on a Beetle and a split bus. The tin is different between single and twin port (twin port has a cut-out for the oil cooler air outlet; you can cut a SP tin in need). The early type1 engined baywindow buses have a different front tin to the Beetle; it stands a bit higher. You can see how VW simply welded an extra bit on top.
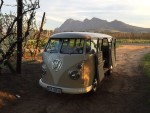
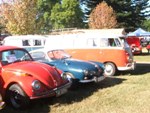
I took this pic a few years ago when I was trying to get my 1970 Westy on the road, did'nt realize there were so many different types ....
The middle "tin" is the one Fig is referring to
Thanks Paul
The one I need is the third one with the ducting for the oil cooler. The fan shroud on my motor is also a bit beaten up, so in need for one of those too.
Volksie World say they have all the pieces around. I must just make a trip through there some time to collect it.
I think its the one I used and had some problems after a year with the paint.
Internet wrote:Check if the primer you used is the normal 2k or the 2k filler primer. If it's filler
primer you can use dry paper to smooth. Never wet sand
2k it absorb water like a sponge right to the metal.
I wet sanded mine and the primer absorbed the water. I did not know about the primer absorbing the water.
The paint started bubbling in some areas as the primer was not completely dried right through before applying the paint and the clear coat, even though it did not look wet at all.
Im no expert in this field thats just what some pro's told me when they saw the paint and asked about the prep work
You can see the fleetline build at http://s725.photobucket.com/albums/ww25 ... Fleetline/ ....if you havent seen it already
I will watch out for this, I have used it many times with no problems.
Thanks for the link, first time a saw this bus was at the Panarama or Tyger Berg wheels show a few years ago. Pity it was sold after all that work that you put in. Where was it from when you purchased it?
sean wrote:Thanks for the link, first time a saw this bus was at the Panarama or Tyger Berg wheels show a few years ago. Pity it was sold after all that work that you put in. Where was it from when you purchased it?
Yes, that was quite a while back. I got a lead on that bus from Erus, it was someone he knew from Hermanus. It was just standing in a garage.
It was sad selling it after all the effort and work, and its such a solid rust free bus
But atleast its back on the road again...well sorta
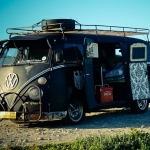
Final product, this makes that awful work seem not so bad. I am quite pleased with the colour scheme. It is always a bit tricky choosing from a colour chart, but what I had in my head managed to turn out on the bus!
Sean great thread . I have too like the colour here is a shot of mine its not far ahead of yours needs the interior to finish. BTW what colour is yours? Mine is Savannah beige and is actually a little darker than it looks in this pic.
Keep up the good work Mitchell
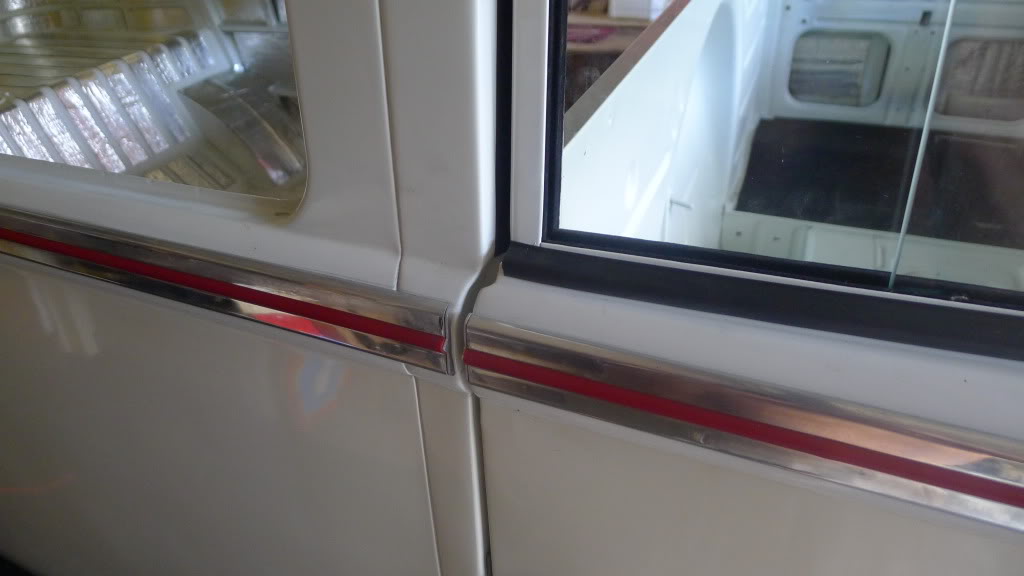
the red beltline insert is a must foe this colour.
Last edited by fleetline15 on Thu Jul 14, 2011 12:05 am, edited 1 time in total.
The bus is currently on stands now while I am having the rims sandblasted. In this time I am now stripping all the suspension out again and finishing it underneath. It was cleaned up underneath earlier on already so I just need to finish coating it with chassis paint underneath.
I am picking up all the mechanical components on Friday. New tie rods, drag link, shocks, brakes, brake cylinders, master cylinder, flexible brake hoses, boots, gearbox mountings etc. etc. that I can complete the underneath.
The engine will be next, all the tinware must be blasted and powder coated and other parts cleaned up. Fuel system too.
Then lastly will be final assembly, the best part for last. All the body components, windows doors and hopefully it will all come together beautifully.
I bought these few crates of spares over the weekend, mainly for the hubcaps, intake manifold and starter. The rest is beetle, so I will have to find another home for the rest.
Some before and after pictures. The brakes are completed; seals at the reduction boxes replaced, all the new parts received so far have also been fitted. Still just waiting for the tie rod and drag link to be completed after having new ball joints welded in by Flat4 Racing.