....as Warwick asked me this morning on the phone....."if the Gerson panels are painted green howcome the dust was white ??"sean wrote:turned the entire factory white and covered me head to toe in dust, what I hideous job.
1959 Bus
Forum rules
Only post pictures of YOUR cars here.
Only post pictures of YOUR cars here.
-
splitbusahollic

- Advertiser

- Posts: 1265
- Joined: Tue Sep 07, 2010 7:10 pm
- What model do you have?: a couple of buses
- Facebook: vintage kombi
- Location: Port Elizabeth
- Has thanked: 87 times
- Been thanked: 54 times
- Contact:

Re: 1959 Bus
vintage kombi.co.za (Website)
vintage kombi on Facebook
vintage kombi on Facebook
-
Warwick-Lowlight
- Donor

- Posts: 750
- Joined: Thu Jul 21, 2011 4:14 pm
- What model do you have?: 61 Split
- Facebook: http://www.facebook.com/warwick.beaumont
- Location: Grabouw Westen Cape
- Has thanked: 18 times
- Been thanked: 14 times
-
Warwick-Lowlight
- Donor
- Posts: 750
- Joined: Thu Jul 21, 2011 4:14 pm
- What model do you have?: 61 Split
- Facebook: http://www.facebook.com/warwick.beaumont
- Location: Grabouw Westen Cape
- Has thanked: 18 times
- Been thanked: 14 times
Re: 1959 Bus
Seems when I try and post using the login it keeps kicking me out
Quick reply seems to work ????
Great going there Sean
Seems the 12 hr day is helping you Rip thru the restore
Might come and make a turn later today - will give you a buzz and see if you are there
Quick reply seems to work ????
Great going there Sean
Seems the 12 hr day is helping you Rip thru the restore
Might come and make a turn later today - will give you a buzz and see if you are there
-
Braki

- Drip
- Posts: 23
- Joined: Wed Aug 29, 2012 12:53 pm
- What model do you have?: Engin: '63 Body: '74
- Location: Randburg
- Has thanked: 1 time
Re: 1959 Bus
This is the most awesome story and repair job I have seen to date. Nice work. When Im down in Cape Town I would really like to see the bus. I will probably be finished by then, but still its a monument on wheels.
-
splitbusahollic
- Advertiser
- Posts: 1265
- Joined: Tue Sep 07, 2010 7:10 pm
- What model do you have?: a couple of buses
- Facebook: vintage kombi
- Location: Port Elizabeth
- Has thanked: 87 times
- Been thanked: 54 times
- Contact:
Re: 1959 Bus
Hanging for progress pic's !!!
i must say ...watching your resto got me going flat-out on my australian bus.....thanks Sean !!
now give us an update please !!
i must say ...watching your resto got me going flat-out on my australian bus.....thanks Sean !!
now give us an update please !!
vintage kombi.co.za (Website)
vintage kombi on Facebook
vintage kombi on Facebook
-
jolas

- Donor
- Posts: 4253
- Joined: Fri Jul 16, 2010 10:11 am
- What model do you have?: '65 Kombi
- Location: Klapmuts, Western Cape
- Has thanked: 393 times
- Been thanked: 173 times
Re: 1959 Bus
just came back from a visit to see Sean's '59 - unbelievable progress, the 2 cargo floor sections are in now, all major panel fitting work seems to be complete. These Classic Fab panels are perfect in every respect. Worth it in the long run to save up the cash and order these panels if you have a bus to restore, there is no doubt about it .....
Can't wait to get going on my '59
Can't wait to get going on my '59
by fig » Mar 26, 2018
Sambas in South Africa are good for only 2 things: showing off and sunburn.
Sambas in South Africa are good for only 2 things: showing off and sunburn.
-
sean
- Transmission
- Posts: 2400
- Joined: Sun Aug 03, 2008 8:51 pm
- What model do you have?: Bays & Splits
- Location: Somerset West
- Has thanked: 63 times
- Been thanked: 227 times
Re: 1959 Bus
Sorry Jacques, I didn’t take any pic’s of the welding work on Saturday.  The cargo floors are now welded in. Just did a lot of final welding, cleaning with the wire brush etc to finish off some area’s.
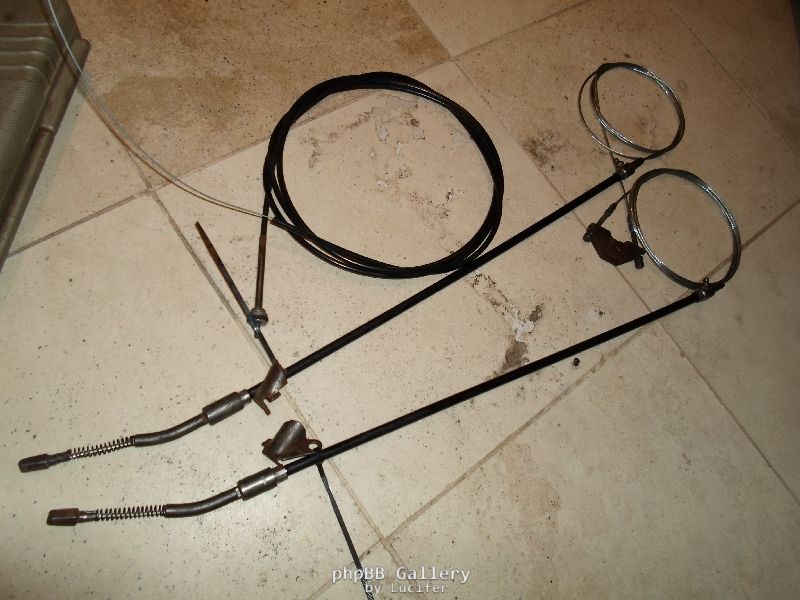
I at least a picked up some of my mechanical goodies too, just for Warwick in case he thought he was getting ahead in that department.

All my brake components were rebuild, got the new flexible hoses, clutch also reconditioned, handed in my old steel brake lines to have new ones made and a couple of other goodies, seals, bushes etc for when it comes to assembly time.
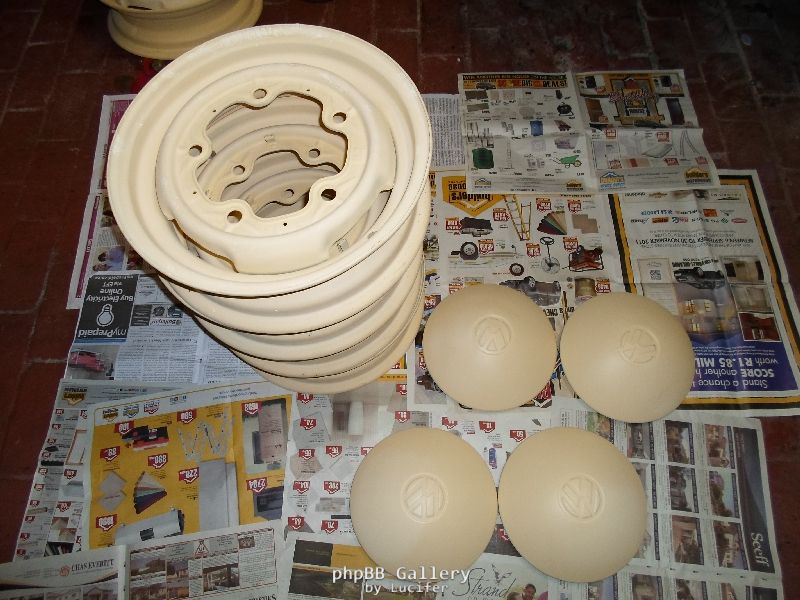
In the meantime I have also prepared the rims and the hubcaps, they are now in their final primer and ready for top coat.
I didn’t get a huge amount done this weekend due to all the running around and the car show today, but will have some good progress again soon.
I am hoping to be able to take it through for police clearance this week to sort out the licensing too, but will just see how much time I have to manage.
I at least a picked up some of my mechanical goodies too, just for Warwick in case he thought he was getting ahead in that department.
All my brake components were rebuild, got the new flexible hoses, clutch also reconditioned, handed in my old steel brake lines to have new ones made and a couple of other goodies, seals, bushes etc for when it comes to assembly time.
In the meantime I have also prepared the rims and the hubcaps, they are now in their final primer and ready for top coat.
I didn’t get a huge amount done this weekend due to all the running around and the car show today, but will have some good progress again soon.
I am hoping to be able to take it through for police clearance this week to sort out the licensing too, but will just see how much time I have to manage.
Last edited by sean on Thu Aug 17, 2017 10:08 pm, edited 1 time in total.
-
sean
- Transmission
- Posts: 2400
- Joined: Sun Aug 03, 2008 8:51 pm
- What model do you have?: Bays & Splits
- Location: Somerset West
- Has thanked: 63 times
- Been thanked: 227 times
Re: 1959 Bus
This is one hideous job! Paul and myself checked this evening and there is still loads of dirt trapped in there. Going to have to tackle this again.splitbusahollic wrote:....as Warwick asked me this morning on the phone....."if the Gerson panels are painted green howcome the dust was white ??"sean wrote:turned the entire factory white and covered me head to toe in dust, what I hideous job.
-
splitbusahollic
- Advertiser
- Posts: 1265
- Joined: Tue Sep 07, 2010 7:10 pm
- What model do you have?: a couple of buses
- Facebook: vintage kombi
- Location: Port Elizabeth
- Has thanked: 87 times
- Been thanked: 54 times
- Contact:
Re: 1959 Bus
package the dust this time ...maybe we can sell it !
vintage kombi.co.za (Website)
vintage kombi on Facebook
vintage kombi on Facebook
-
Warwick-Lowlight
- Donor
- Posts: 750
- Joined: Thu Jul 21, 2011 4:14 pm
- What model do you have?: 61 Split
- Facebook: http://www.facebook.com/warwick.beaumont
- Location: Grabouw Westen Cape
- Has thanked: 18 times
- Been thanked: 14 times
Re: 1959 Bus
Dude you need a bigger tablesean wrote:I at least a picked up some of my mechanical goodies too, just for Warwick in case he thought he was getting ahead in that department.
Good going there guy
-
splitbusahollic
- Advertiser
- Posts: 1265
- Joined: Tue Sep 07, 2010 7:10 pm
- What model do you have?: a couple of buses
- Facebook: vintage kombi
- Location: Port Elizabeth
- Has thanked: 87 times
- Been thanked: 54 times
- Contact:
Re: 1959 Bus
....My arms are really getting tired of "hanging" for this update !


take your time Sean.....
take your time Sean.....
vintage kombi.co.za (Website)
vintage kombi on Facebook
vintage kombi on Facebook
-
Warwick-Lowlight
- Donor
- Posts: 750
- Joined: Thu Jul 21, 2011 4:14 pm
- What model do you have?: 61 Split
- Facebook: http://www.facebook.com/warwick.beaumont
- Location: Grabouw Westen Cape
- Has thanked: 18 times
- Been thanked: 14 times
Re: 1959 Bus
Must have been a big birthday
or
Sean has taken sooo many photies that he has crashed the photobucket site
Hit us with some news man
Pleeeeeeeezeeeeeee
or
Sean has taken sooo many photies that he has crashed the photobucket site
Hit us with some news man
Pleeeeeeeezeeeeeee
-
sean
- Transmission
- Posts: 2400
- Joined: Sun Aug 03, 2008 8:51 pm
- What model do you have?: Bays & Splits
- Location: Somerset West
- Has thanked: 63 times
- Been thanked: 227 times
Re: 1959 Bus
Hell, you guys are impatient! 
I haven’t taken many pics, but I have still been very busy. The panels are all fitted and welded. I will take some pics of them this weekend.
In the meantime I have had all the new cables made up, they all came out very nice. They have since been fitted.
Last weekend I had the gear box out which I took over to Flat4Racing to have the rear axle threads re-cut and purchased a new set of axle nuts. The previous owner had tried to beat off the drums and damaged the threads in the process.
The fuel tank has been cleaned and installed.
After attending the event at Grand Slam on Saturday I went back to install the gearbox and the engine. All fitted well and hopefully ready to start. I managed to borrow an original 30hp kombi tailpiece, so going to see if I can copy it and fit it to my new silencer before starting the motor.
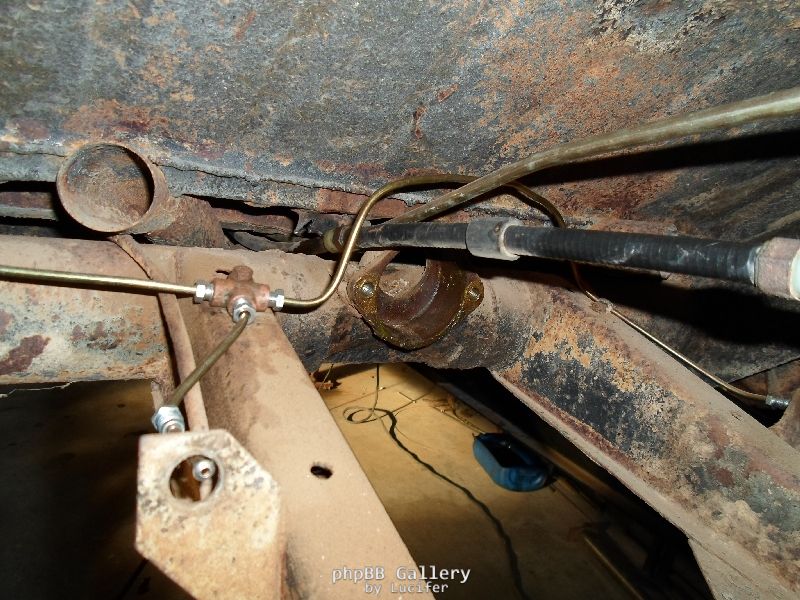
I have also fitted the new brake lines.
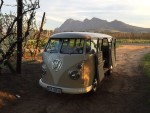
All this work seems all wrong with having to leave this original crusty paint, you just want to sand blast and clean, but I keep saying, this is exactly how I want it. It must look exactly like it came out of the veld, but all the mechanicals must be in tip top shape.
I haven’t taken many pics, but I have still been very busy. The panels are all fitted and welded. I will take some pics of them this weekend.
In the meantime I have had all the new cables made up, they all came out very nice. They have since been fitted.
Last weekend I had the gear box out which I took over to Flat4Racing to have the rear axle threads re-cut and purchased a new set of axle nuts. The previous owner had tried to beat off the drums and damaged the threads in the process.
The fuel tank has been cleaned and installed.
After attending the event at Grand Slam on Saturday I went back to install the gearbox and the engine. All fitted well and hopefully ready to start. I managed to borrow an original 30hp kombi tailpiece, so going to see if I can copy it and fit it to my new silencer before starting the motor.
I have also fitted the new brake lines.
All this work seems all wrong with having to leave this original crusty paint, you just want to sand blast and clean, but I keep saying, this is exactly how I want it. It must look exactly like it came out of the veld, but all the mechanicals must be in tip top shape.
Last edited by sean on Thu Aug 17, 2017 10:09 pm, edited 1 time in total.
-
sean
- Transmission
- Posts: 2400
- Joined: Sun Aug 03, 2008 8:51 pm
- What model do you have?: Bays & Splits
- Location: Somerset West
- Has thanked: 63 times
- Been thanked: 227 times
Re: 1959 Bus
I had started to fix the whole in the roof, but I have done a  job. Checking these pictures out now, it seems I didn’t even get the repair centred. The roof is unfortunately a bit worse than I thought, it’s quite wobbly. The rear part where I repaired is stretched and hence every time I try to push it up, it just pops in and out everywhere else. It will need some more work at a later stage, but for the time being I am just going to try matching the brown colour of the roof and paint the repair.
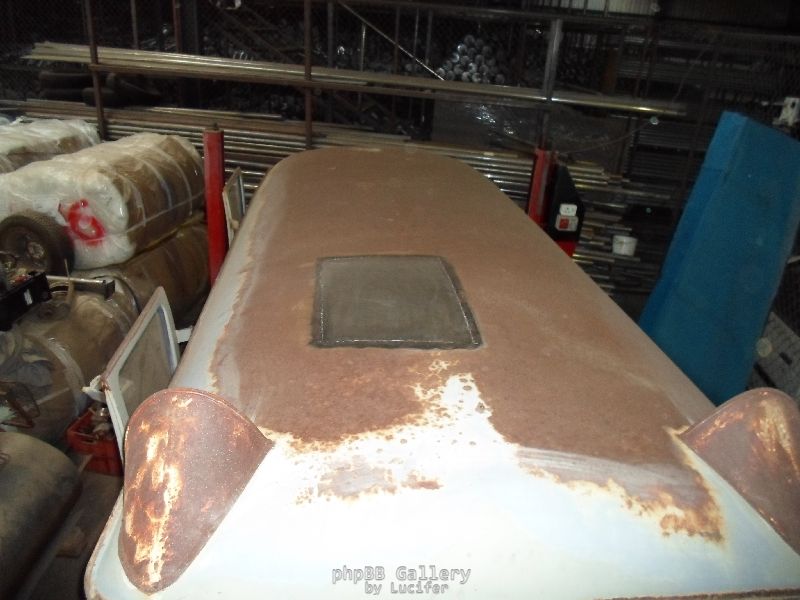
The rims have been sprayed in the final top coat. I have decided to settle with the 165/80/R15 tire size. I am going to have these fitted over the weekend, I managed to find a set of Kumho’s for R620 each.
Then finally, the bus is coming back home this weekend. The plan is to fetch it on Friday, stopover at the police clearance on the way back and then get started again.
Will definitely get some pics this weekend and update.
Last edited by sean on Thu Aug 17, 2017 10:10 pm, edited 1 time in total.
-
sean
- Transmission
- Posts: 2400
- Joined: Sun Aug 03, 2008 8:51 pm
- What model do you have?: Bays & Splits
- Location: Somerset West
- Has thanked: 63 times
- Been thanked: 227 times
Re: 1959 Bus
It seems I haven’t taken any pictures of the door hinge repairs either, but here’s one from when doing the doors from Paul's 59, I had to do exactly the same job on my doors.
Here’s the inner section welded in. After this, the outer gets welded in followed by the hinge sliding between the two surfaces. I used countersunk bolts to secure the hinges in place of the original rivets’.
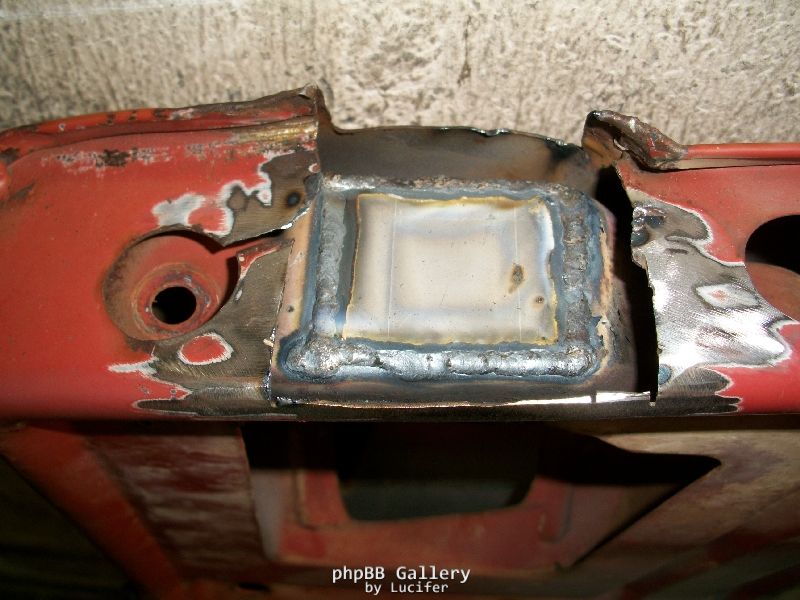
Here’s the inner section welded in. After this, the outer gets welded in followed by the hinge sliding between the two surfaces. I used countersunk bolts to secure the hinges in place of the original rivets’.
Last edited by sean on Thu Aug 17, 2017 10:10 pm, edited 1 time in total.