At the end of oct 2011 i bought a stripped beamish buggy, it was an abandoned project by the previous owner. He stripped the buggy after a minor accident ( bend front suspension and some damage to the body work). He replaced the suspension (wich i'm gonne replace again, one of the mods) and started fixing the body. The buggy then stood outside for three years with the body off the pan resulting in a stuck engine. Ok so i'm already 3 months into the project but only decided now to start a thread.
What i have in mind for this buggy ( wich obviously will change as i go along)
1) I want to convert to type 2 front and rear suspension and use a 091 gearbox (lower gear ratio and no positive camber, ideal for the bigger wheels used on a buggy)
2) New wheels
3) Respray the body and all the other stuff needed to make the buggy look ok on the outside
4) Clean up the engine ( wich i already got loose and started) to make it look nice
Quite a short list of stuff to do or thats how it seems.
More to follow
Arno
My beamish buggy rebuild & mod's
-
slak

- Donor

- Posts: 1031
- Joined: Wed Jul 14, 2010 11:07 am
- What model do you have?: Baja, Bay , Beetle
- Facebook: http://www.facebook.com/editprofile.php
- Location: Jhb , Germiston
- Has thanked: 7 times
- Been thanked: 32 times
Re: My beamish buggy rebuild & mod's
Hi Arno welcome to acvwsa have U got some pics we love pics
U Only Live Once Right !!!
-
arnocill
- Oil Pump
- Posts: 213
- Joined: Sun Nov 20, 2011 12:53 pm
- What model do you have?: beamish buggy
- Location: Brackenfell cpt
- Has thanked: 6 times
- Been thanked: 4 times
Re: My beamish buggy rebuild & mod's
The same weekend i got the beach buggy i bought a late model bay panel van that has seen better days. (lots of rust)
It was fitted with i think a 2.2 5 cylinder audi motor, with some fire damge to the engine wiring due to leaking feul hoses!
So first on the list was to strip the kombi and salvage what i could (there was'nt much apart from the stuff that i want to use since it was a bare panel van) Took out the motor & gbox, took out the front suspension, cut out the rear suspension and sent the rest to the scrap dealers to become a toyota in its next life
Still got the windscreen rear window and a set of clocks left, if anyone is interested
Unfortunatly i never took pics of the buggy when it arrived.
So i set out at fitting the front suspension first wich went well and quite quick
Once fitted i stripped the suspension to overall everything and i ended spending more money on the overall and new steering parts than i paid for the whole kombi!
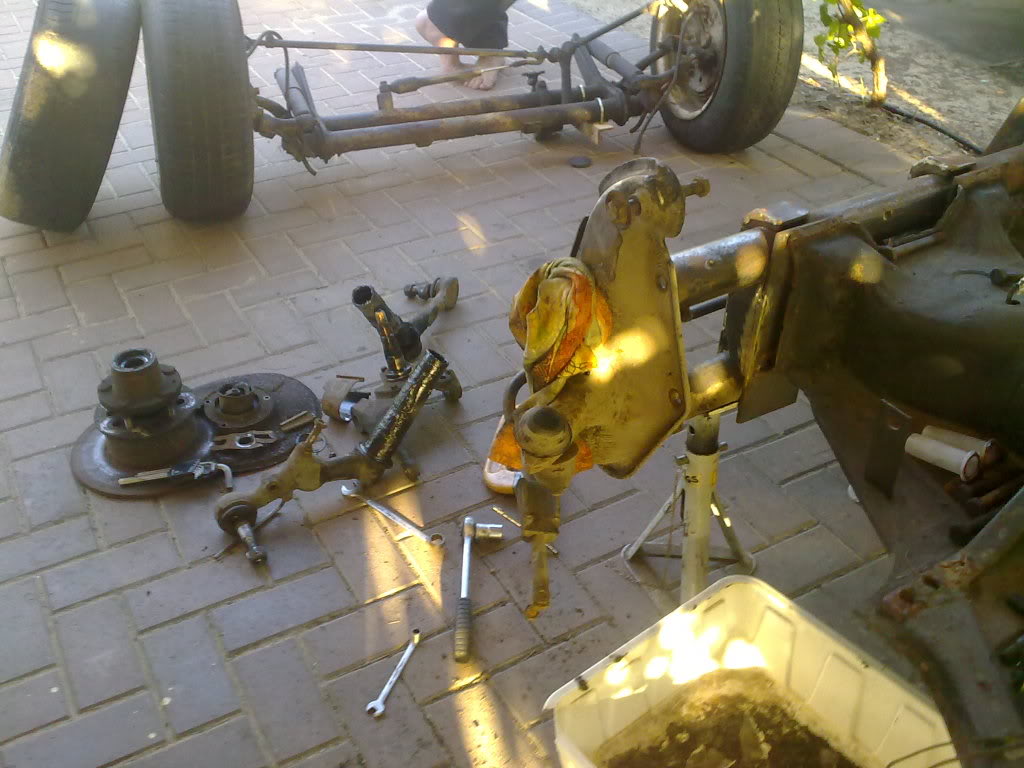
Trailing arms were badly worn down where they move on the inner bush inside the suspension tubes. (Due to lack of maintenance) So i machined the worn section down removed the inner bushes and outer bearings from the tube and made up new polyethylene bushes to fit inside the tubes
I must say the movement on the bushes feels very smooth without any play
Replaced the trailing arm balljoints wich made the steering of the wheels very light. i could barely steer the wheel by hand with the old balljoints. Note: the balljoints "sit soos aan n wol kombers" even with a press. At 60kn they basicly shot right out without any warning.
Then i got a new mk1 golf steering rack with tie rod ends.
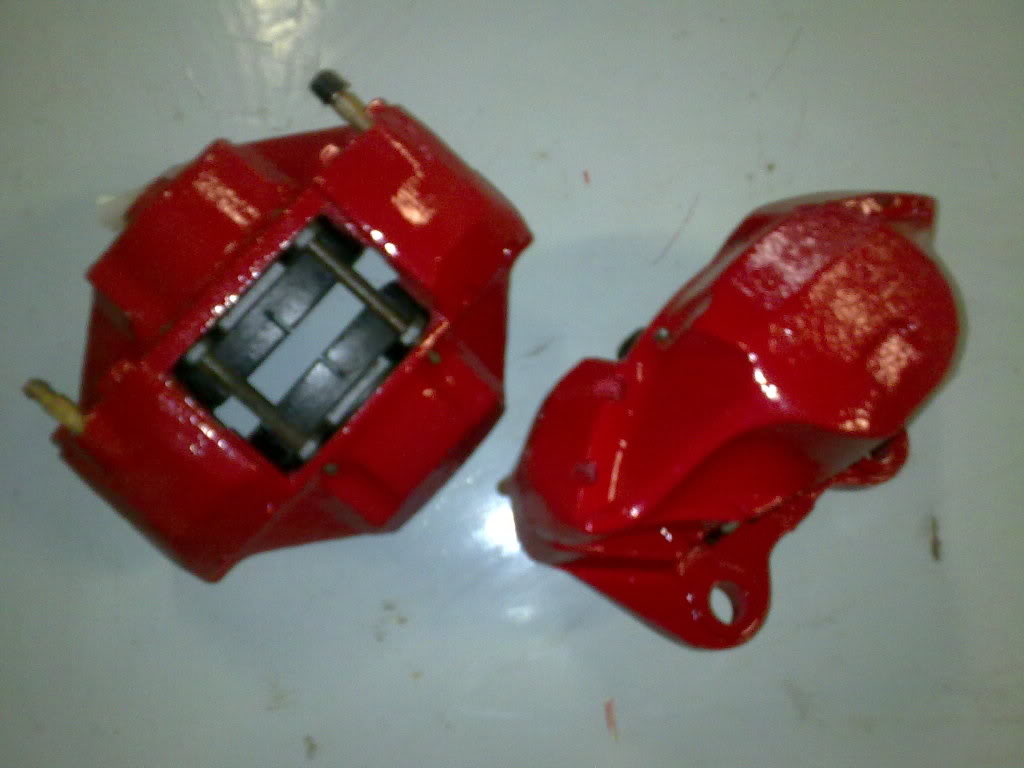
Overalled the brake callipers and reasembled everything.
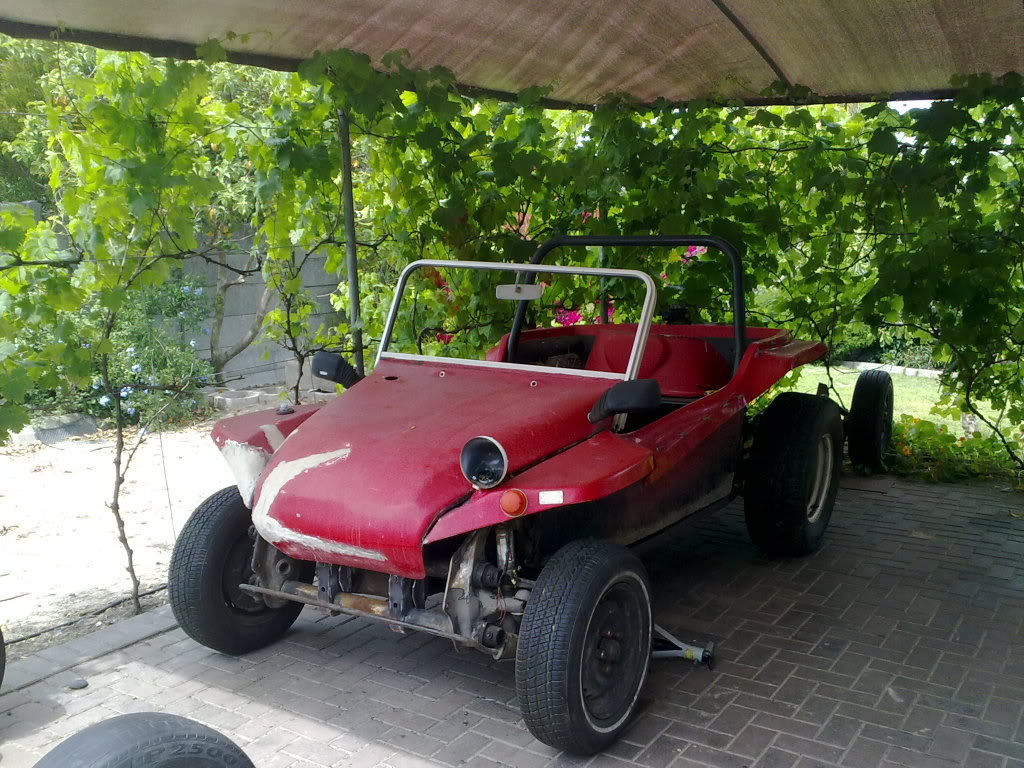
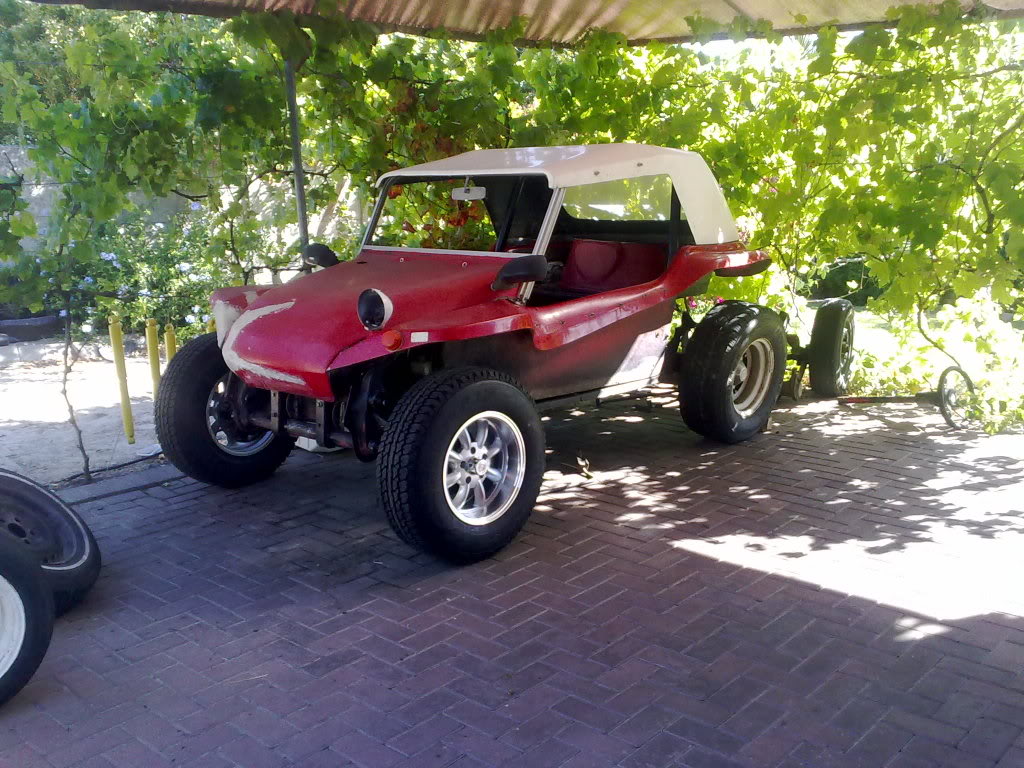
At that time it basicly looked like this accept that the suspension is cleaned and resprayd
Arno
It was fitted with i think a 2.2 5 cylinder audi motor, with some fire damge to the engine wiring due to leaking feul hoses!
So first on the list was to strip the kombi and salvage what i could (there was'nt much apart from the stuff that i want to use since it was a bare panel van) Took out the motor & gbox, took out the front suspension, cut out the rear suspension and sent the rest to the scrap dealers to become a toyota in its next life
Still got the windscreen rear window and a set of clocks left, if anyone is interested
Unfortunatly i never took pics of the buggy when it arrived.
So i set out at fitting the front suspension first wich went well and quite quick
Once fitted i stripped the suspension to overall everything and i ended spending more money on the overall and new steering parts than i paid for the whole kombi!
Trailing arms were badly worn down where they move on the inner bush inside the suspension tubes. (Due to lack of maintenance) So i machined the worn section down removed the inner bushes and outer bearings from the tube and made up new polyethylene bushes to fit inside the tubes
I must say the movement on the bushes feels very smooth without any play
Replaced the trailing arm balljoints wich made the steering of the wheels very light. i could barely steer the wheel by hand with the old balljoints. Note: the balljoints "sit soos
Then i got a new mk1 golf steering rack with tie rod ends.
Overalled the brake callipers and reasembled everything.
At that time it basicly looked like this accept that the suspension is cleaned and resprayd
Arno
-
arnocill
- Oil Pump
- Posts: 213
- Joined: Sun Nov 20, 2011 12:53 pm
- What model do you have?: beamish buggy
- Location: Brackenfell cpt
- Has thanked: 6 times
- Been thanked: 4 times
Re: My beamish buggy rebuild & mod's
slak wrote:Hi Arno welcome to acvwsa have U got some pics we love pics
Thanks Slak i've been here since i started this project, but only reading
-
Loopy

- Oil Cooler
- Posts: 318
- Joined: Fri Dec 25, 2009 8:15 pm
- What model do you have?: Beach Buggy
- Location: Brackenfell, Western Cape
- Has thanked: 11 times
- Been thanked: 6 times
Re: My beamish buggy rebuild & mod's
Arno
Waar in B'fell is jy? Het ook 'n Beamish wat ek so stadig aan opdoen.
Waar in B'fell is jy? Het ook 'n Beamish wat ek so stadig aan opdoen.
"What I would suggest is that you draw up a project plan and then prioritise the things you NEED to do linked to the budget you have." by Vader
Truer words have never been spoken...
Truer words have never been spoken...
-
arnocill
- Oil Pump
- Posts: 213
- Joined: Sun Nov 20, 2011 12:53 pm
- What model do you have?: beamish buggy
- Location: Brackenfell cpt
- Has thanked: 6 times
- Been thanked: 4 times
Re: My beamish buggy rebuild & mod's
Ruwari teen die reservaatLoopy wrote:Arno
Waar in B'fell is jy? Het ook 'n Beamish wat ek so stadig aan opdoen.
-
Loopy
- Oil Cooler
- Posts: 318
- Joined: Fri Dec 25, 2009 8:15 pm
- What model do you have?: Beach Buggy
- Location: Brackenfell, Western Cape
- Has thanked: 11 times
- Been thanked: 6 times
Re: My beamish buggy rebuild & mod's
Wat is jou plan met die kleur? My buggy is ook rooi, en ek dink aan 'n Candy Apple Rooi.
"What I would suggest is that you draw up a project plan and then prioritise the things you NEED to do linked to the budget you have." by Vader
Truer words have never been spoken...
Truer words have never been spoken...
-
arnocill
- Oil Pump
- Posts: 213
- Joined: Sun Nov 20, 2011 12:53 pm
- What model do you have?: beamish buggy
- Location: Brackenfell cpt
- Has thanked: 6 times
- Been thanked: 4 times
Re: My beamish buggy rebuild & mod's
By this time the rear suspension is also welded in place apart from the shock mounts that i must still do. I don,t have any pics at this stage so i will leave the rear for later.
In the mean time i started a search for wheels. Since i now have a 5x112 pcd there's a lot more options, or so i thought. Well there's lots 5x112 in 17" or bigger available. I'm trying to achieve more of an offroad look than a street racer so i don't want flat face wheels. I had a look at some bakkie mags wich you do get in different widths but then i would still need adapters to fit them and i did'nt like the bakkie rims anyway.
In the end i got a retro mag that i love and have,nt seen them on a buggy before, only problem is i can't get it in diffrent widths, except if i bought the imported ones at a bit more than double the price of the locals. According to my budget the locals were the best.
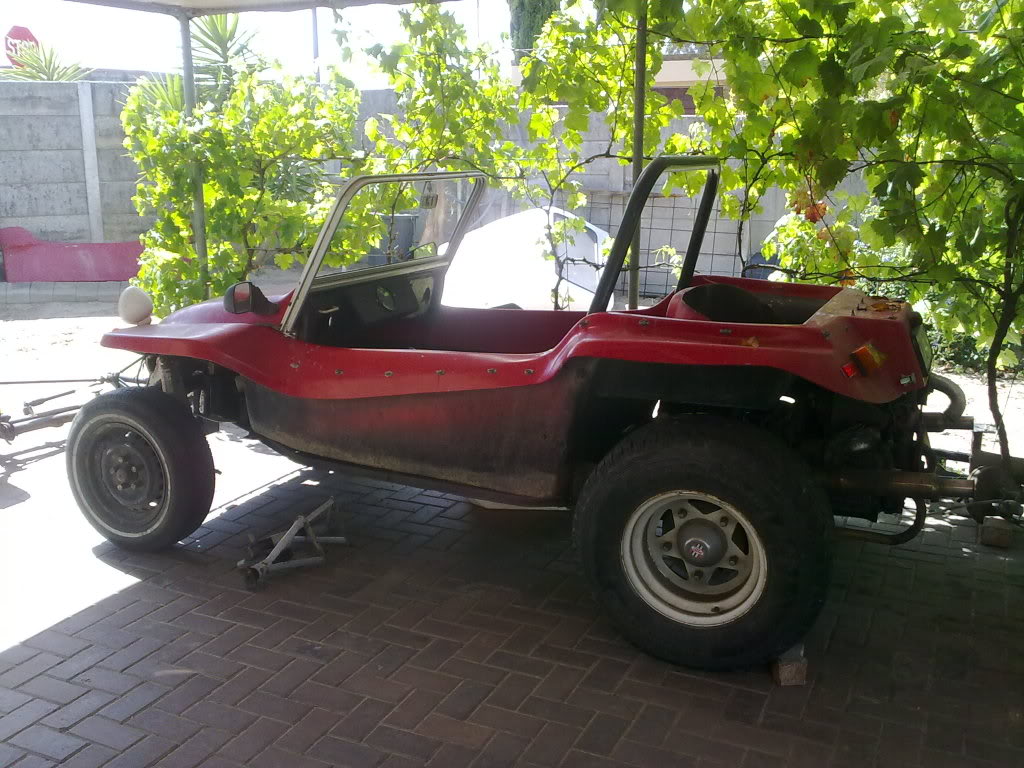
Another problem that was easily solved in the end was that i could only get them in a 5x114 pcd. Since the kombi has 14mm wheel studs and the rims made to use 12mm studs it worked perfectly! Removed the 14mm studs, bought 12 studs, made up a spigot for the rim and hub. Bolted the rim to the hub with the 12mm studs wich is now a loose fit in the hole and tack welded them in place. So now i've got a 5x114 pcd hub.
Ok so the rims are 15x7,5 with a 10mm negative offset and about a 50mm polished lip, shot with 215/80/15's for the front and 31/10.5 for the rear.
Minilite copies
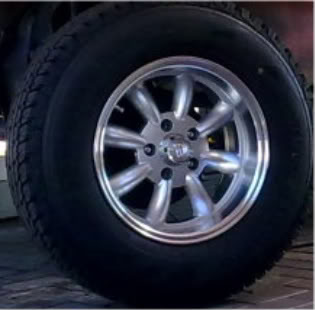
Looking like this on the front
In the mean time i started a search for wheels. Since i now have a 5x112 pcd there's a lot more options, or so i thought. Well there's lots 5x112 in 17" or bigger available. I'm trying to achieve more of an offroad look than a street racer so i don't want flat face wheels. I had a look at some bakkie mags wich you do get in different widths but then i would still need adapters to fit them and i did'nt like the bakkie rims anyway.
In the end i got a retro mag that i love and have,nt seen them on a buggy before, only problem is i can't get it in diffrent widths, except if i bought the imported ones at a bit more than double the price of the locals. According to my budget the locals were the best.
Another problem that was easily solved in the end was that i could only get them in a 5x114 pcd. Since the kombi has 14mm wheel studs and the rims made to use 12mm studs it worked perfectly! Removed the 14mm studs, bought 12 studs, made up a spigot for the rim and hub. Bolted the rim to the hub with the 12mm studs wich is now a loose fit in the hole and tack welded them in place. So now i've got a 5x114 pcd hub.
Ok so the rims are 15x7,5 with a 10mm negative offset and about a 50mm polished lip, shot with 215/80/15's for the front and 31/10.5 for the rear.
Minilite copies
Looking like this on the front
-
arnocill
- Oil Pump
- Posts: 213
- Joined: Sun Nov 20, 2011 12:53 pm
- What model do you have?: beamish buggy
- Location: Brackenfell cpt
- Has thanked: 6 times
- Been thanked: 4 times
Re: My beamish buggy rebuild & mod's
Ek het lank gedink en baie gekyk na kleure en het tot n besluit gekom. Dit gaan nie rooi wees nie en ek het klaar die verf laat meng wat ek wil he. Maar dis vir later, al wat ek kan se is dis INTENS.
-
Loopy
- Oil Cooler
- Posts: 318
- Joined: Fri Dec 25, 2009 8:15 pm
- What model do you have?: Beach Buggy
- Location: Brackenfell, Western Cape
- Has thanked: 11 times
- Been thanked: 6 times
Re: My beamish buggy rebuild & mod's
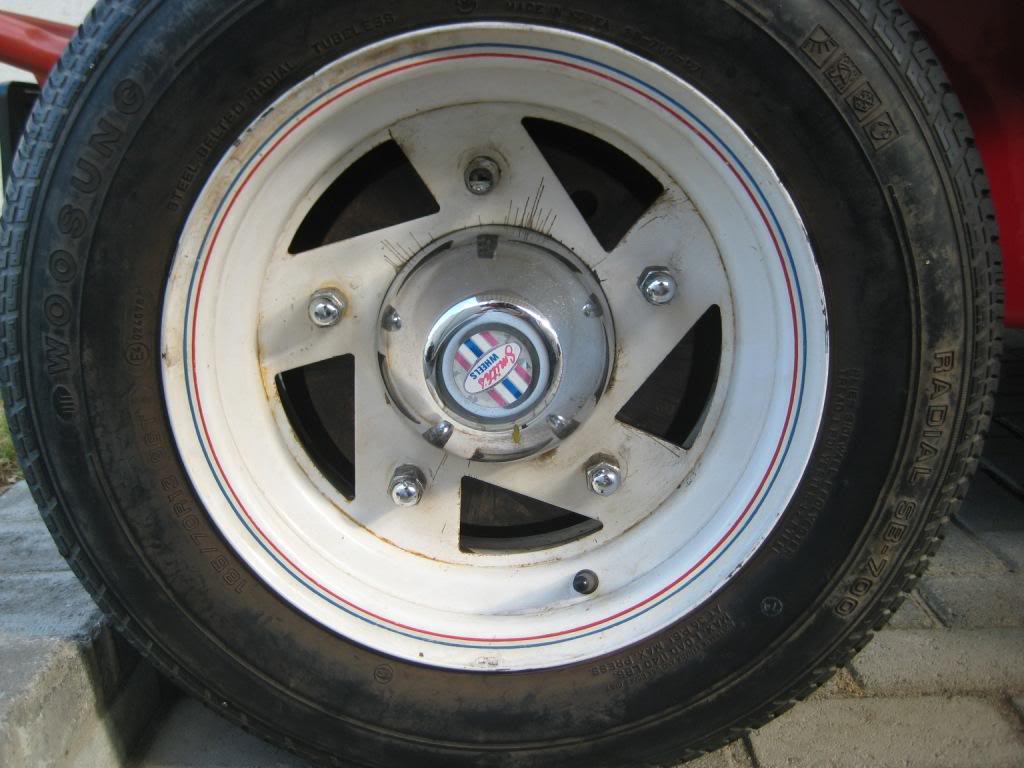
Sjoe! Die buggy lyk amper soos Bigfoot met daai wiele! Het jy dalk nog die oorspronklike wit rims?
Jy maak mens nuuskierig oor die kleur...
Jy maak mens nuuskierig oor die kleur...
"What I would suggest is that you draw up a project plan and then prioritise the things you NEED to do linked to the budget you have." by Vader
Truer words have never been spoken...
Truer words have never been spoken...
-
arnocill
- Oil Pump
- Posts: 213
- Joined: Sun Nov 20, 2011 12:53 pm
- What model do you have?: beamish buggy
- Location: Brackenfell cpt
- Has thanked: 6 times
- Been thanked: 4 times
Re: My beamish buggy rebuild & mod's
Jip ek het nog die wit rims maar die 2 voor rims is al gespray en nie baie mooi nie. Die agterste 2 lyk beter nog met die oorspronklike epoxy. As jy rims soek kan ek dalk 2 ander 14" rims kry wat nog oorspronklik is en my 2 15" agter rims. n Vriend van my wat ook n buggy oorgedoen het het mooi voor rims en lelike agter rims gehad. So ons kan n stel opmaak tussen ons 2
-
Loopy
- Oil Cooler
- Posts: 318
- Joined: Fri Dec 25, 2009 8:15 pm
- What model do you have?: Beach Buggy
- Location: Brackenfell, Western Cape
- Has thanked: 11 times
- Been thanked: 6 times
Re: My beamish buggy rebuild & mod's
Het op die stadium 13" voor en 15" agter
Wik en weeg nog of ek moet oorgaan na mags toe agv die verandering van pcd.
Wik en weeg nog of ek moet oorgaan na mags toe agv die verandering van pcd.
"What I would suggest is that you draw up a project plan and then prioritise the things you NEED to do linked to the budget you have." by Vader
Truer words have never been spoken...
Truer words have never been spoken...
-
arnocill
- Oil Pump
- Posts: 213
- Joined: Sun Nov 20, 2011 12:53 pm
- What model do you have?: beamish buggy
- Location: Brackenfell cpt
- Has thanked: 6 times
- Been thanked: 4 times
Re: My beamish buggy rebuild & mod's
Last weekend i got a bit "gatvol" for the pan and suspension so i thought i'll start with the motor. My plan was to clean up repaint and minor mods just to give the 1600 a little more oomph.
What the motor looked like
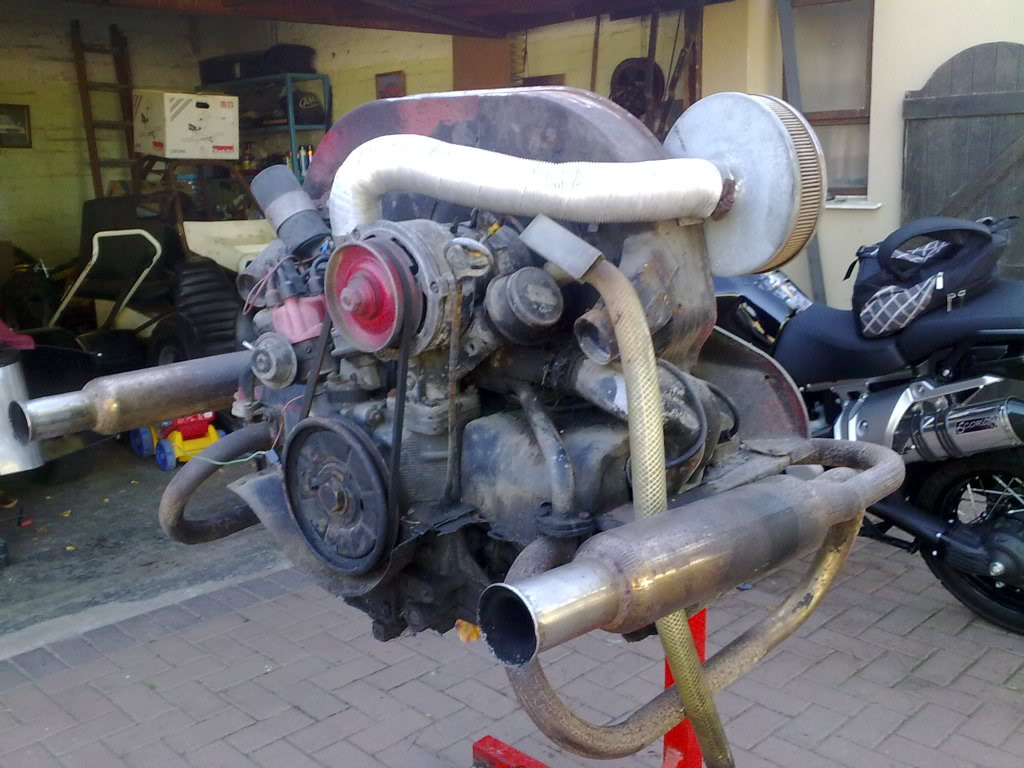

So i stripped off all the tin and removed the heads. One head was cracked and the cylinders had some reach. In my search for heads i found a brand new 88mm big bore kit. The owner not knowing what it was as he bought the stuff on an auction and obviously i did not tell him either. So there i got brand new cylinders, pistons, new cam and new cam followers for slightly less than half price of a standard set of pistons and cylinders.
That ended in a complete strip down of the motor, the crankcase luckily in good condition.It had been line bored to 060 thou before with no play on the thrust. Took everything for engineering: crank cut from 010" to 020" crank case and cylinder heads fly cut to except new cylinders and do guides seats and new exhaust valves. Got the crank and case back and started assembly, i'll get the heads on friday since i'm not at home currently. Then hopefully i can have the motor asembled sometime next week.
That will now leave me with a 1679cc
To be continued
Arno
What the motor looked like
So i stripped off all the tin and removed the heads. One head was cracked and the cylinders had some reach. In my search for heads i found a brand new 88mm big bore kit. The owner not knowing what it was as he bought the stuff on an auction and obviously i did not tell him either. So there i got brand new cylinders, pistons, new cam and new cam followers for slightly less than half price of a standard set of pistons and cylinders.
That ended in a complete strip down of the motor, the crankcase luckily in good condition.It had been line bored to 060 thou before with no play on the thrust. Took everything for engineering: crank cut from 010" to 020" crank case and cylinder heads fly cut to except new cylinders and do guides seats and new exhaust valves. Got the crank and case back and started assembly, i'll get the heads on friday since i'm not at home currently. Then hopefully i can have the motor asembled sometime next week.
That will now leave me with a 1679cc
To be continued
Arno
-
arnocill
- Oil Pump
- Posts: 213
- Joined: Sun Nov 20, 2011 12:53 pm
- What model do you have?: beamish buggy
- Location: Brackenfell cpt
- Has thanked: 6 times
- Been thanked: 4 times
Re: My beamish buggy rebuild & mod's
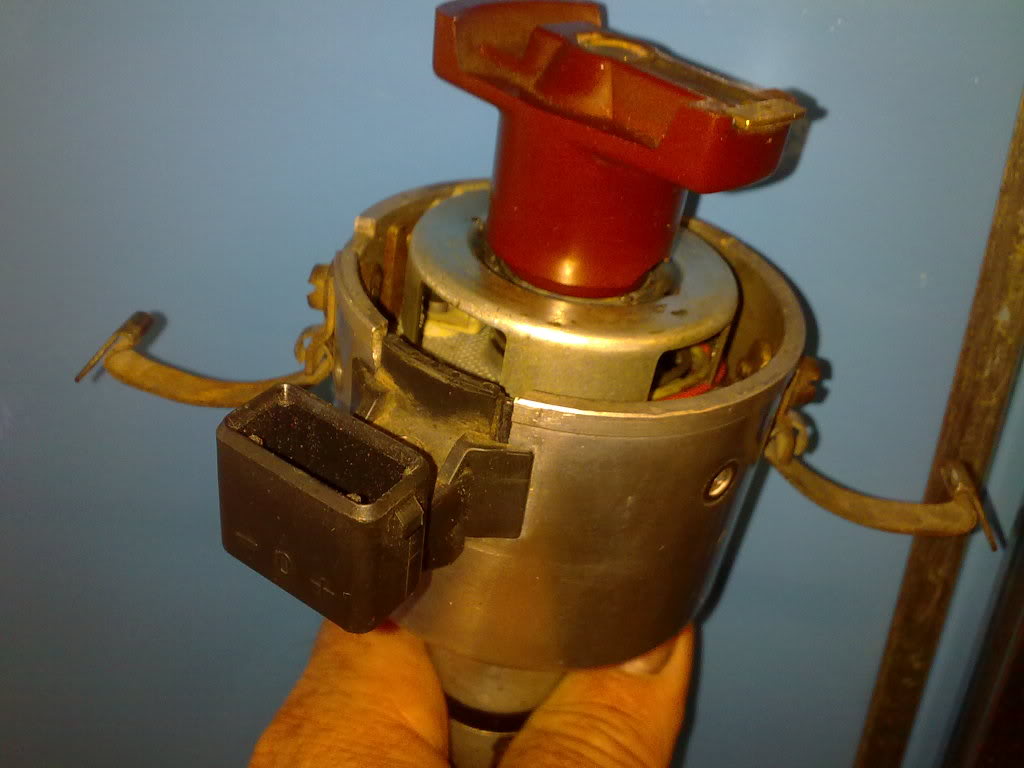
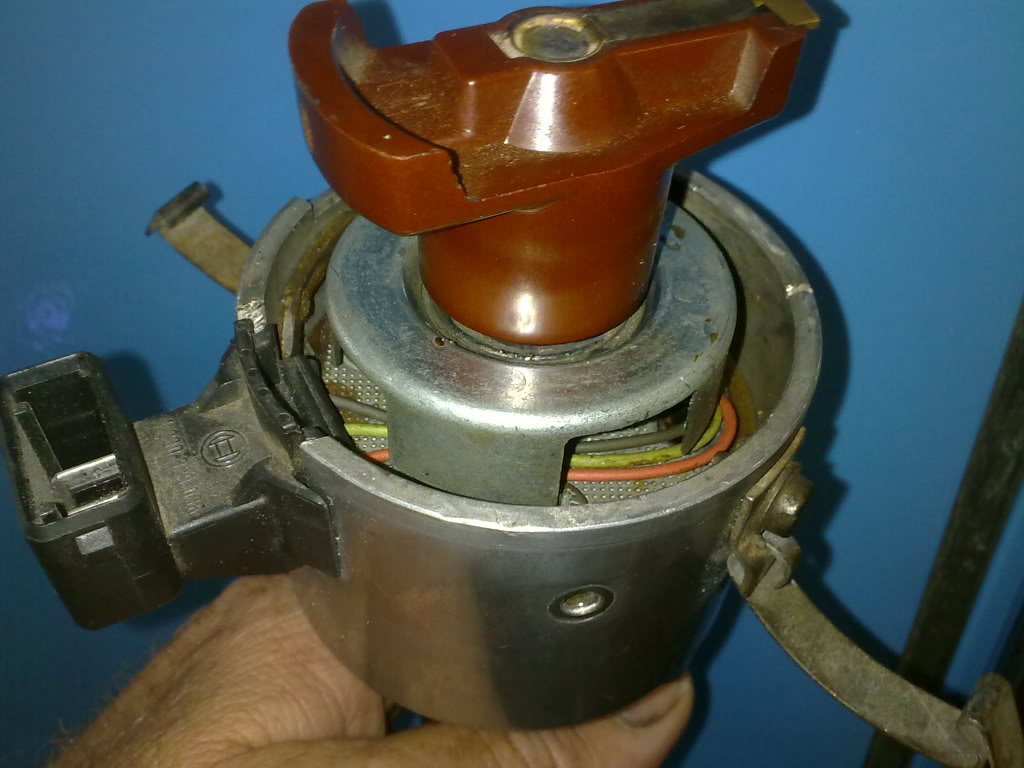
Here's a few pic's of stuff that i've done so far
Modded the distributor to a electronic unit, using a golf distributor as donor
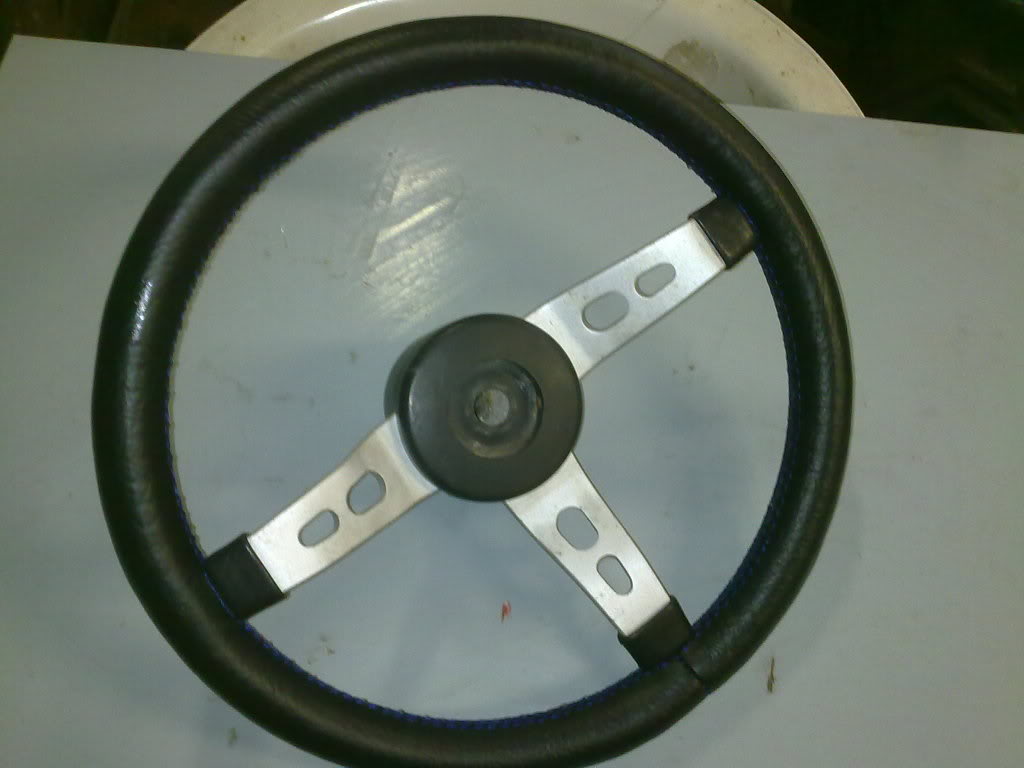
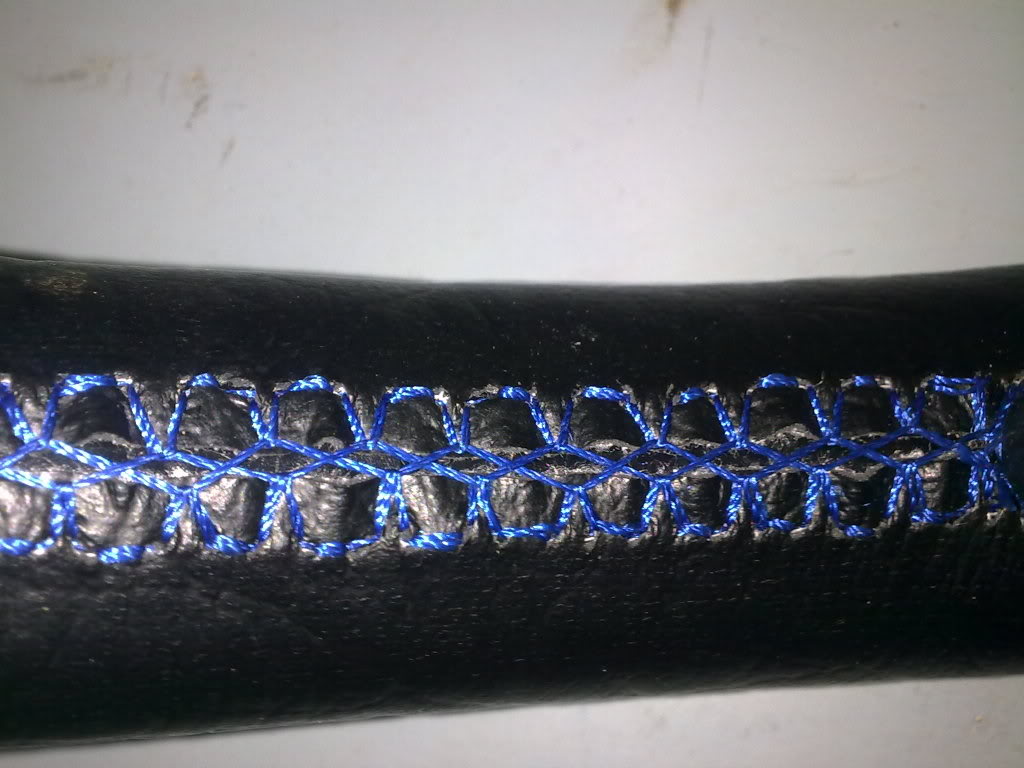
My steering wheel that i recovered myself. (took 4 attempts )
)
The stitching
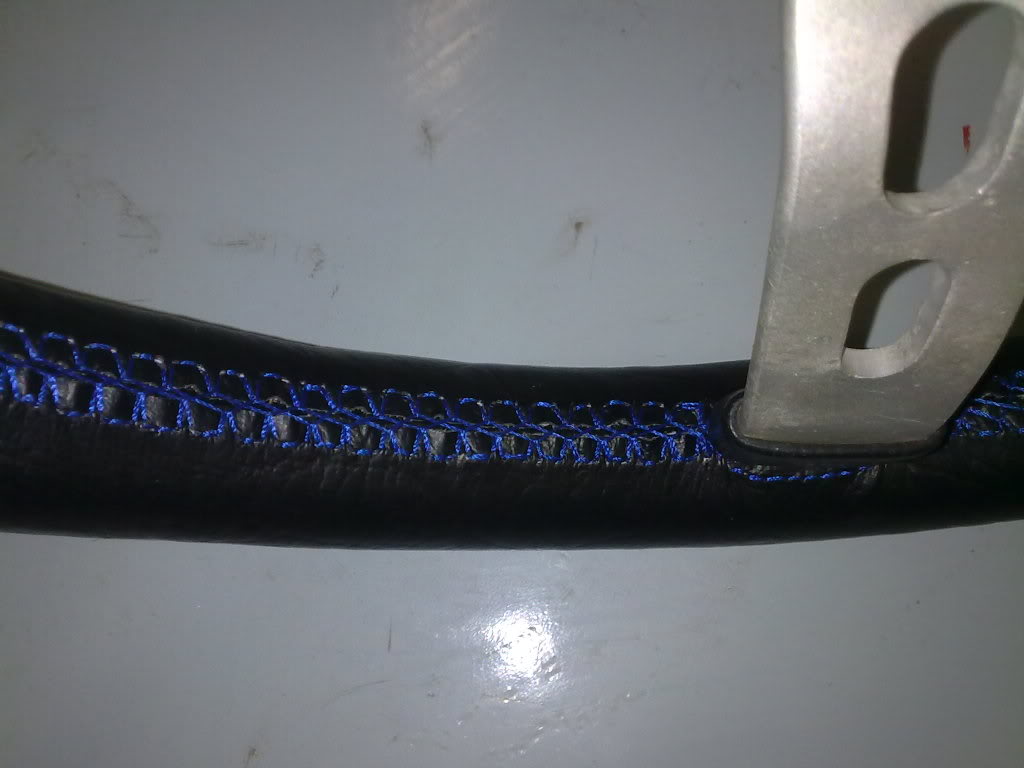
And a real closeup
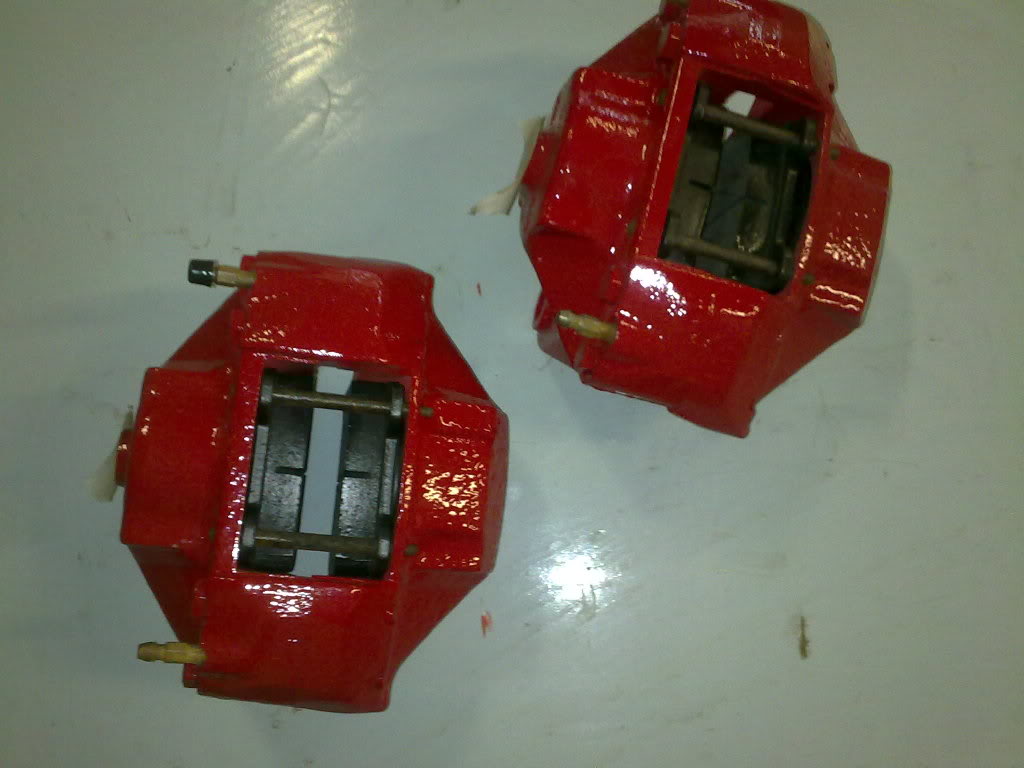
The reconditioned and sprayed calipers
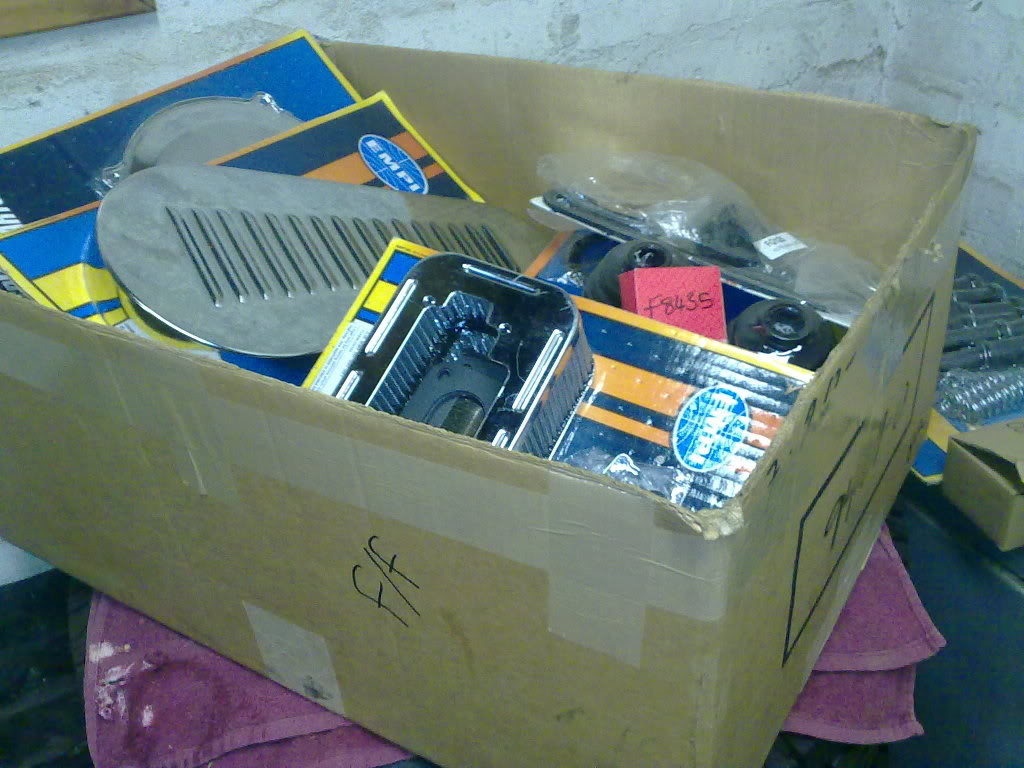
A visit to Dave at FFR
Modded the distributor to a electronic unit, using a golf distributor as donor
My steering wheel that i recovered myself. (took 4 attempts
The stitching
And a real closeup
The reconditioned and sprayed calipers
A visit to Dave at FFR