The Rebuild of "Stoffel" - 1969 Bug

Give details and pictures of your ACVW projects here.
merlinpta
Oil Stain
Posts: 158
Joined: Mon Oct 22, 2007 9:47 pm
What model do you have?: 1969 Type 1
Location: Centurion
Has thanked: 1 time

The Rebuild of "Stoffel" - 1969 Bug

Post by merlinpta »

So the time has arrived, poor "Stoffel" named by my kids took his last breath and decided to spit out some engine parts and oil.

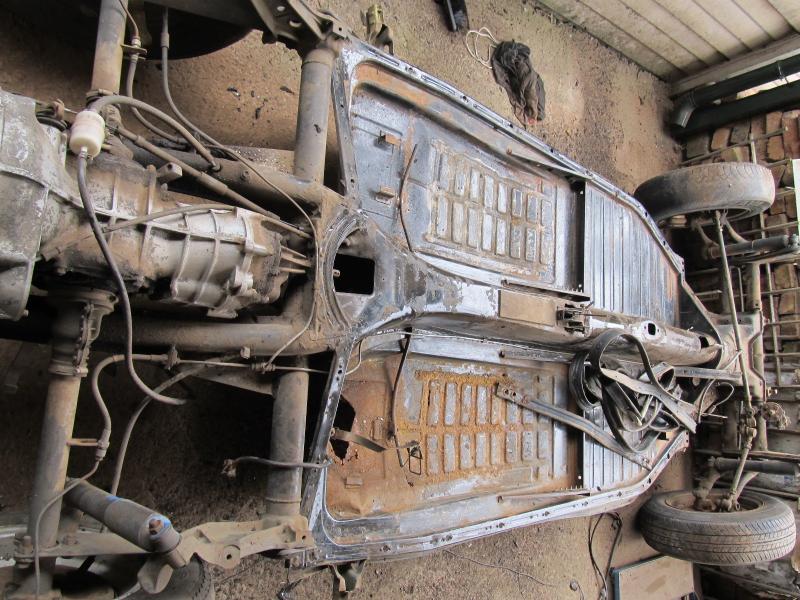
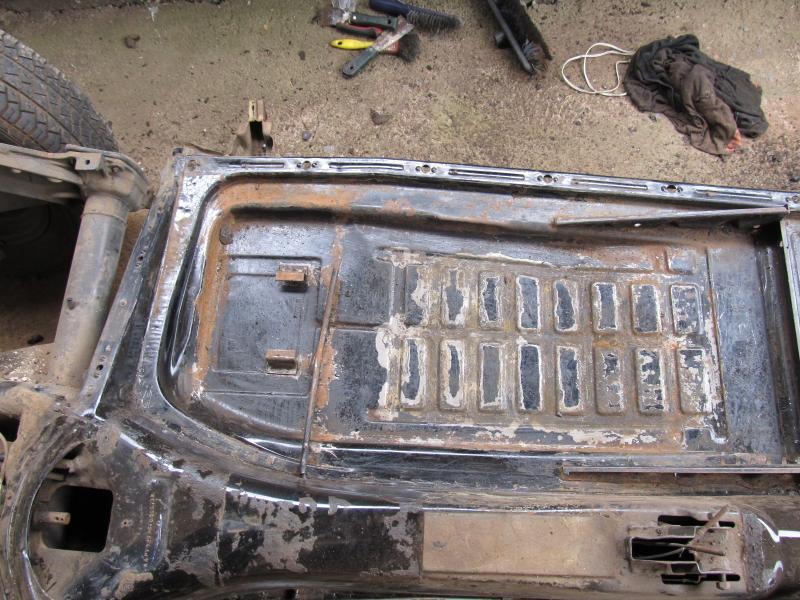
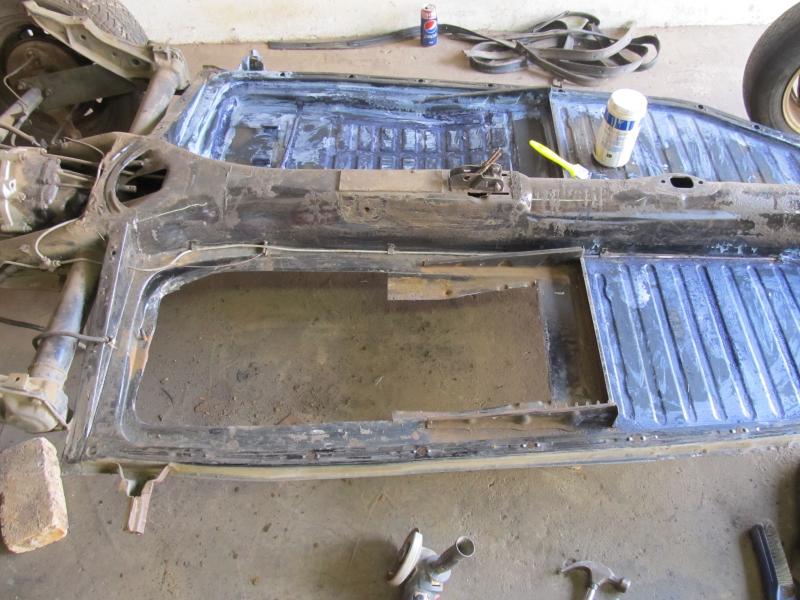
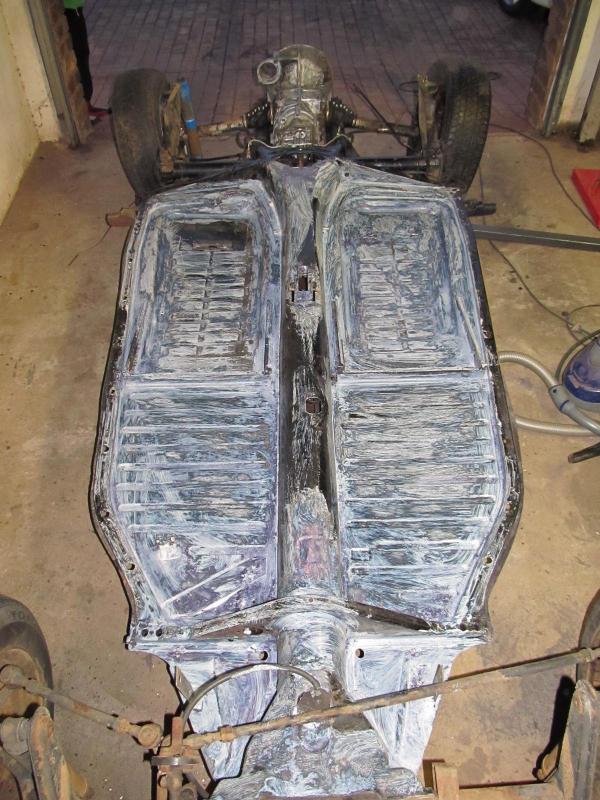
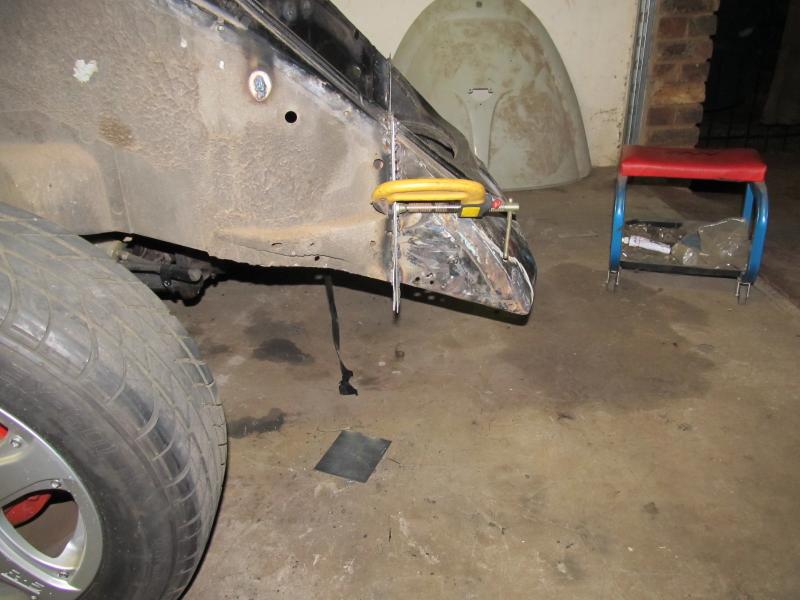
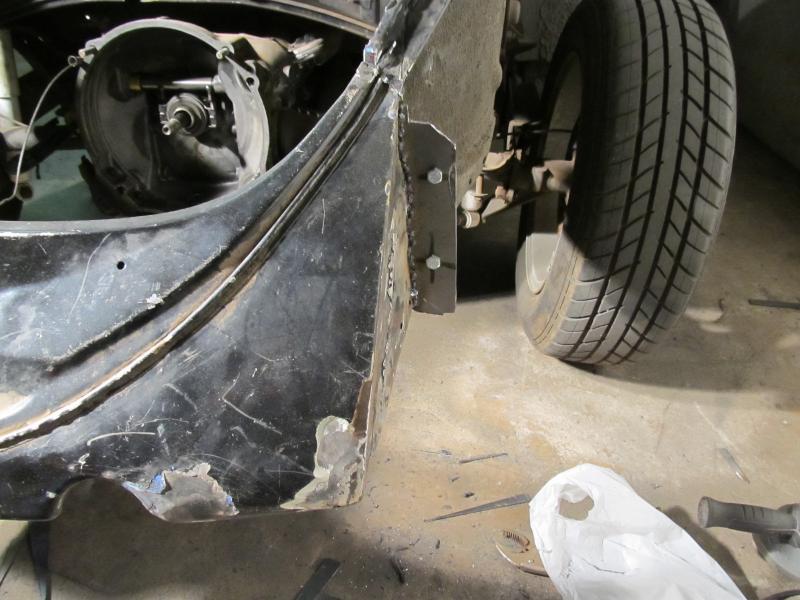
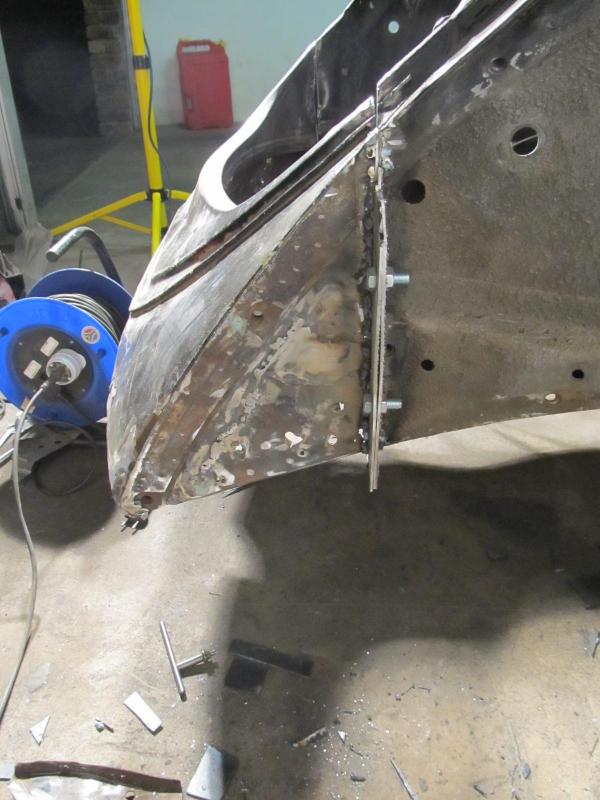
This will be a pan up restore as the current pan has had some work done to the fork at the back were the gearbox mounts and this was a bit of a butcher job. It seems that the fork was damaged, some one decided to cut the one end off and welled it on again skew, strengthen it with a piece of Iron bar and did a pretty :bn: job when it was done. So currently standing at the back of the bug the engine is about 2 to 3 cm higher on the left side.

So the plan is:

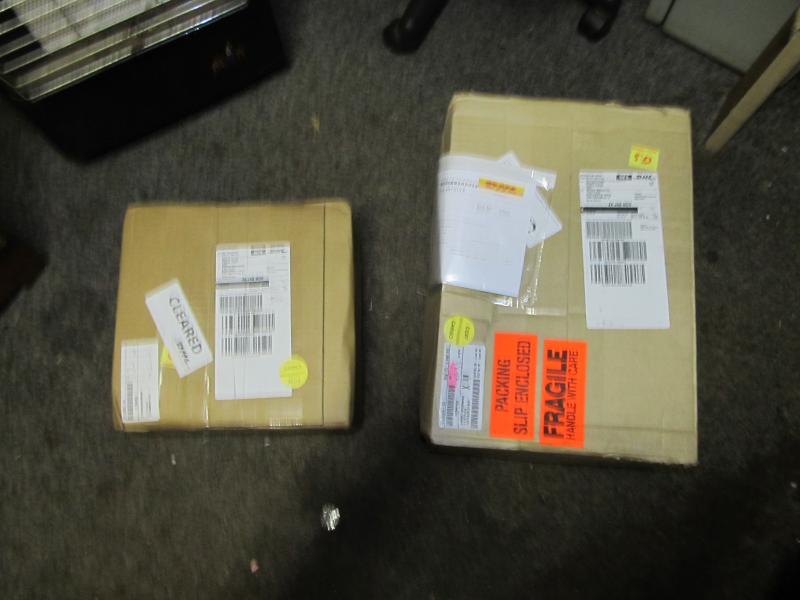
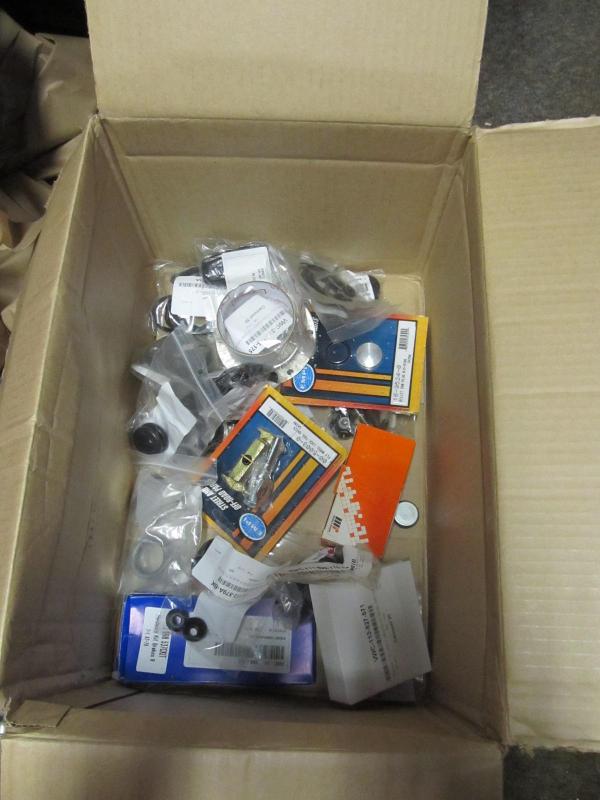
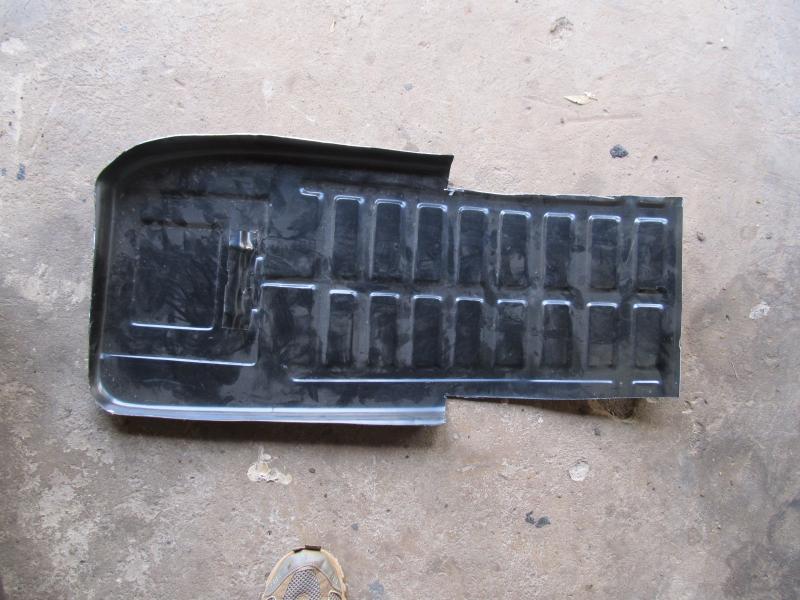
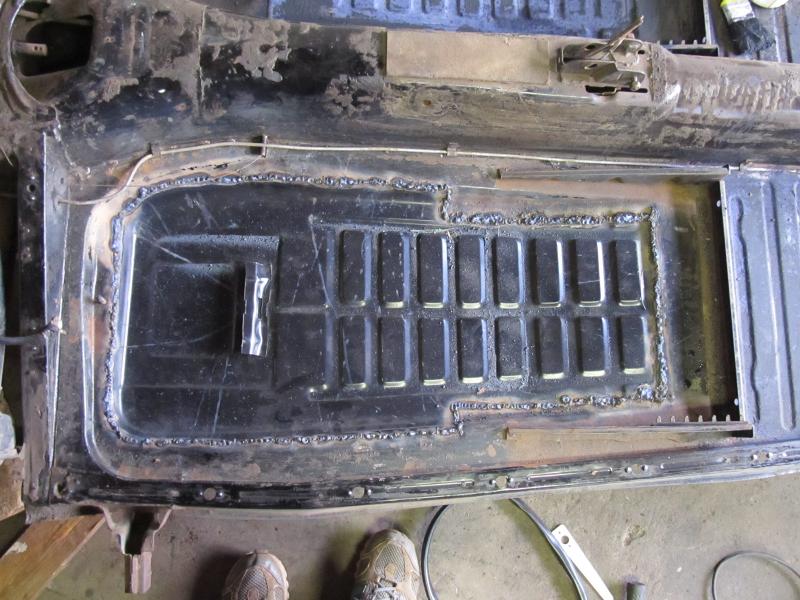
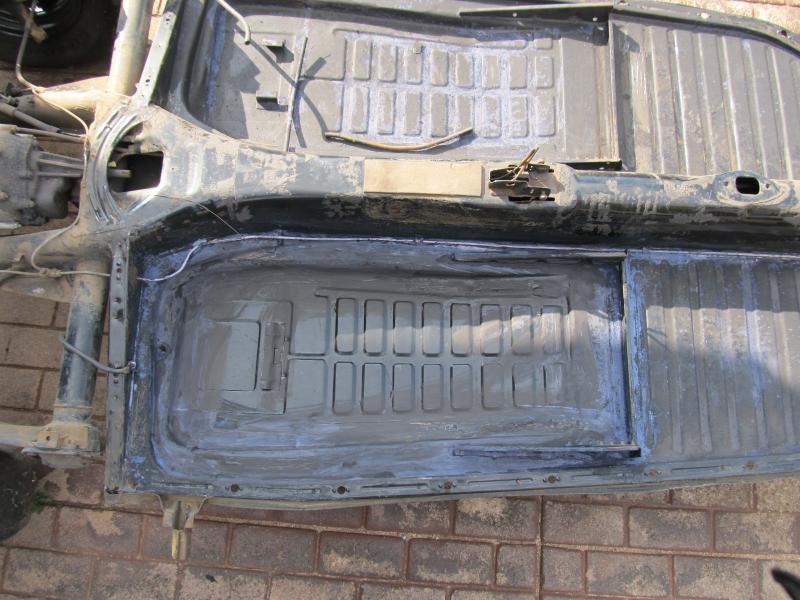
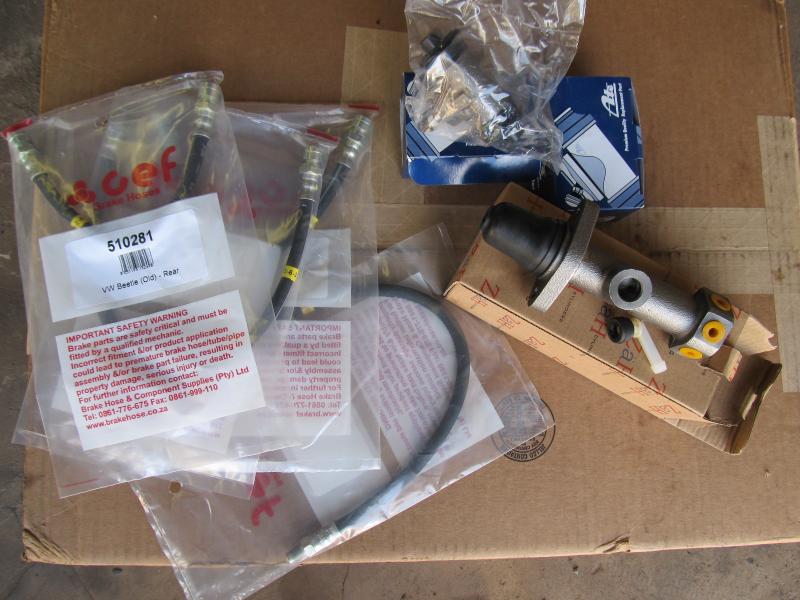
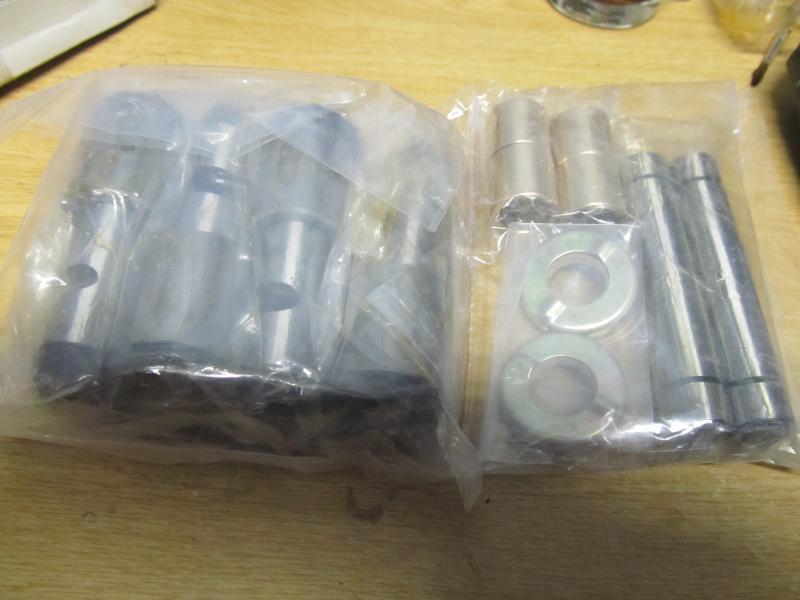
1. Fix a another pan, replacing all seals, bearings, rubbers stops, king pins, link pins ect.. Most parts will be arriving shortly. :hangloose: Will have a new rolling pan completely rebuild. Front disk break kit and adapters at the rear.
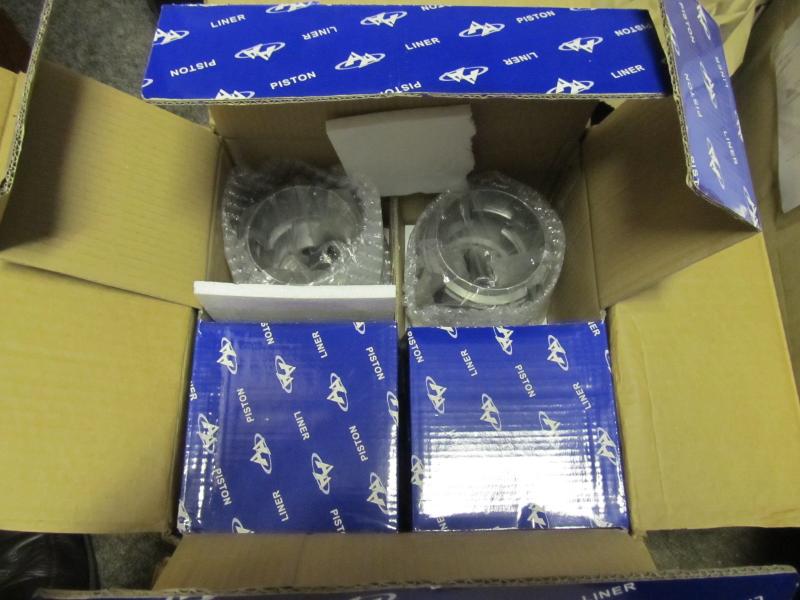
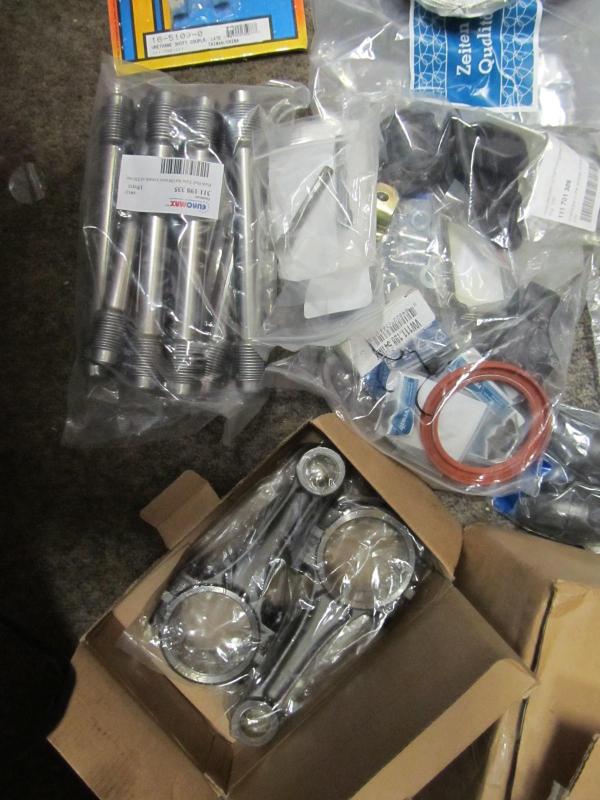
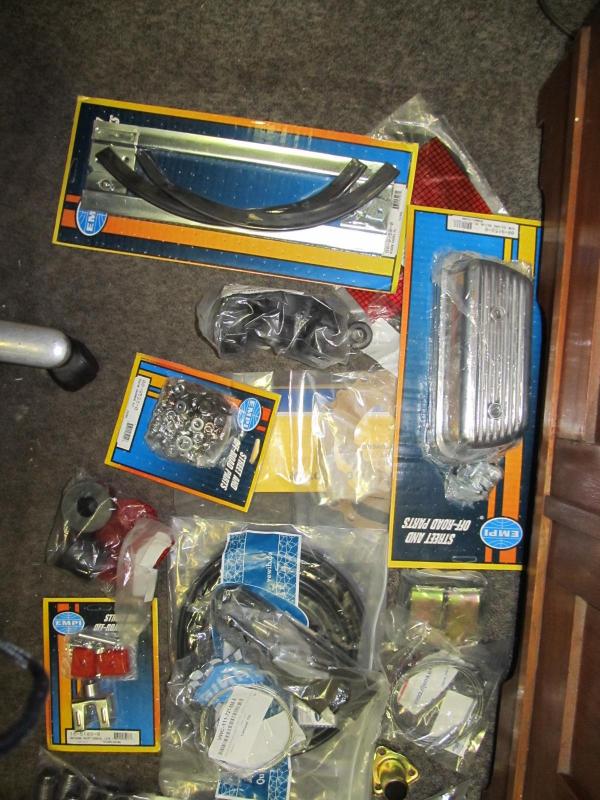
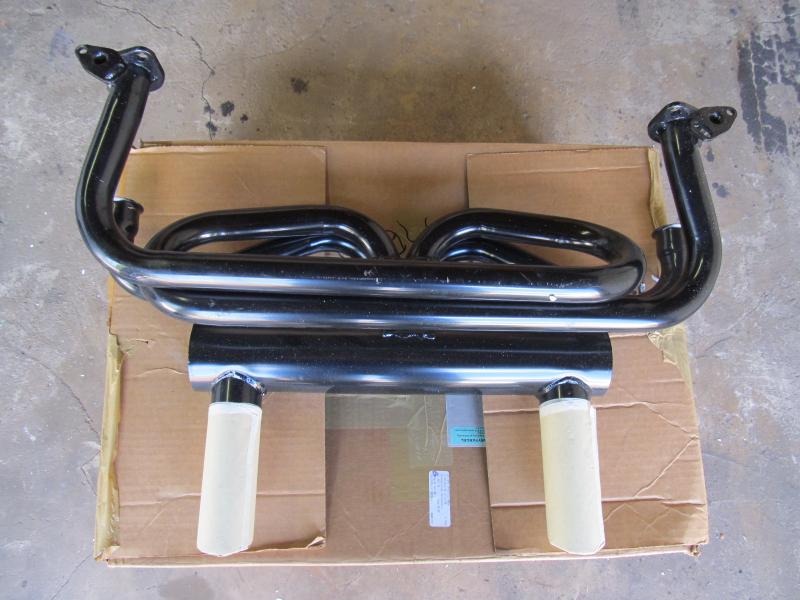
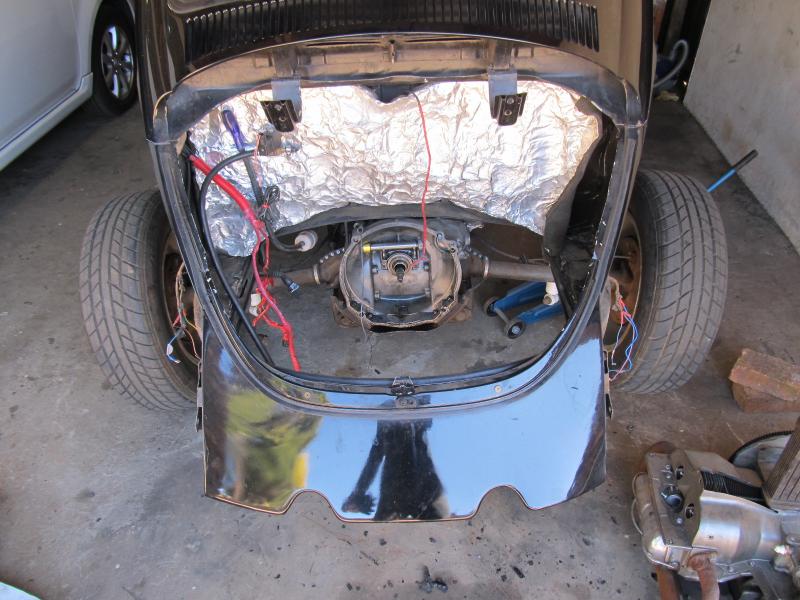
2. Take a nice engine casing, Line bore, drop in new 1680 Sleeves and pistons, con rods, cam "CAMSHAFT KIT .462 INCH LIFT"; Some nice valve springs. Motor will be balanced and Fly wheel will be slightly lightened. Set of Twin 34 Carbs to round it of and a nice 4 into 1 Exhaust with J-Pipes, thanks for the exhaust Rui.
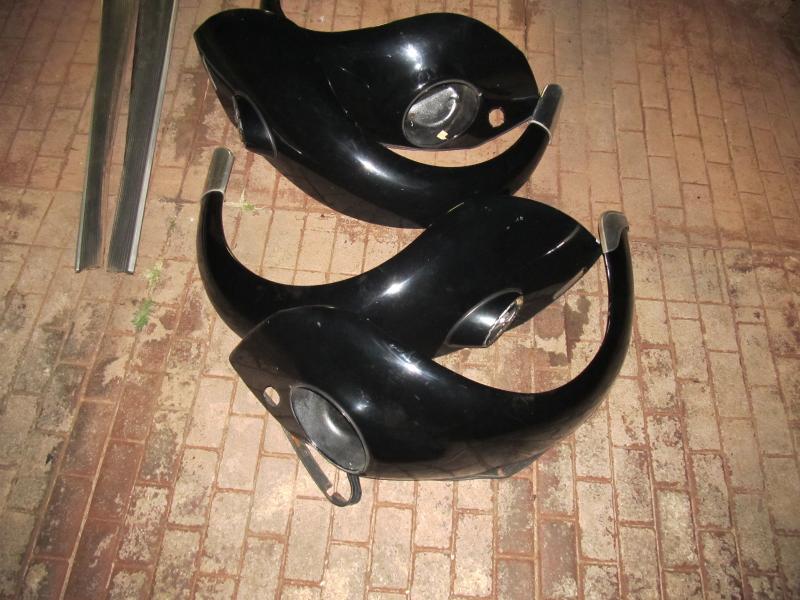
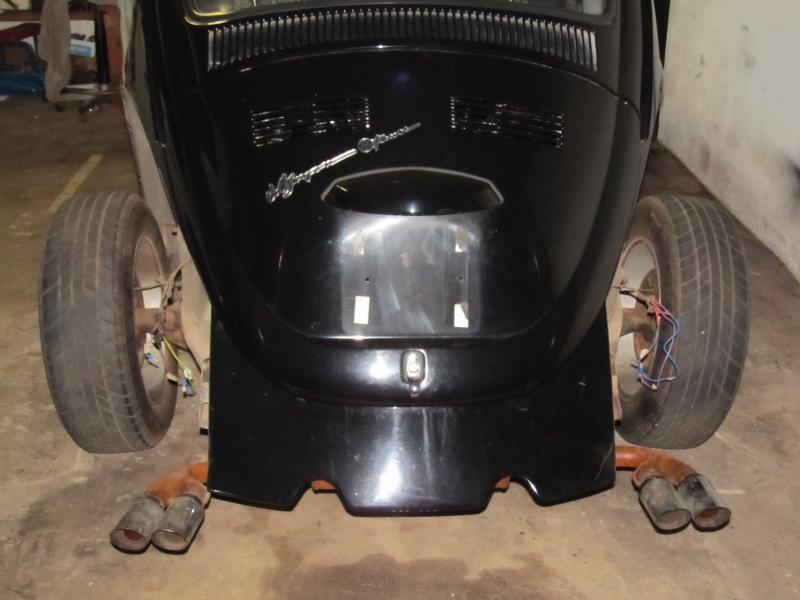
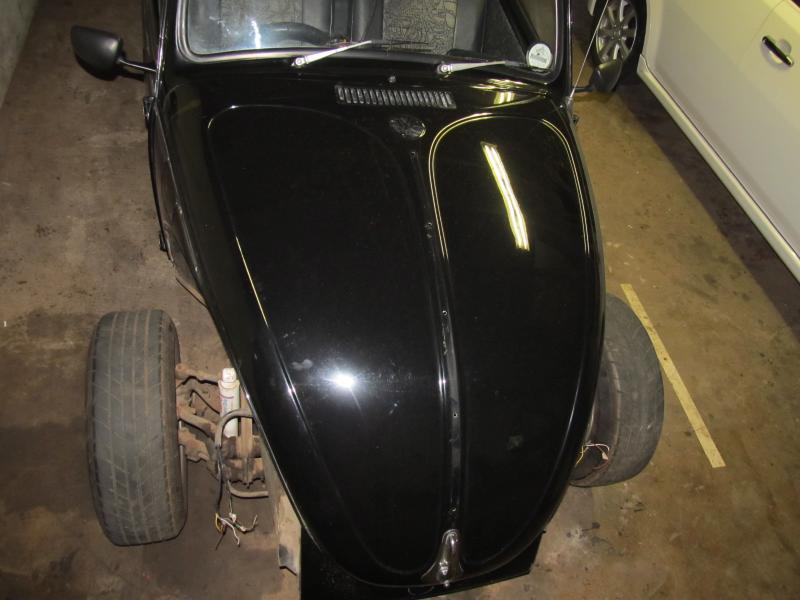
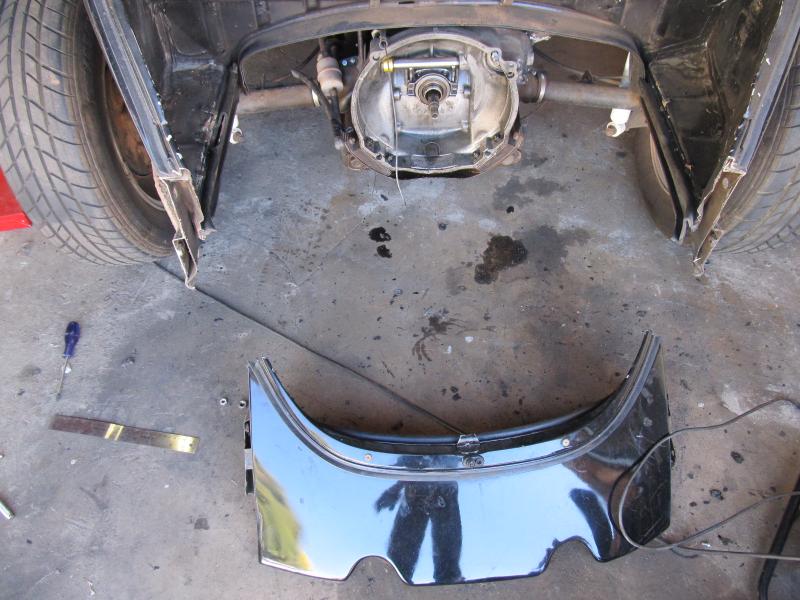
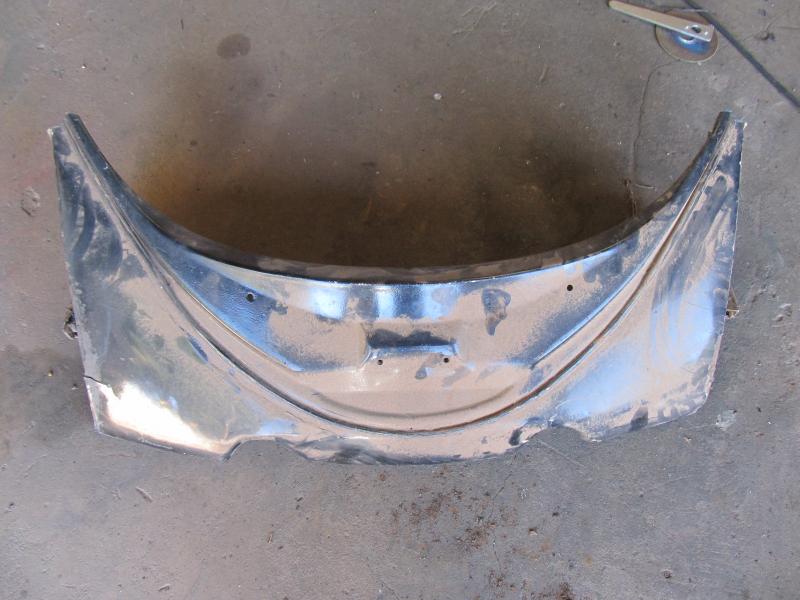
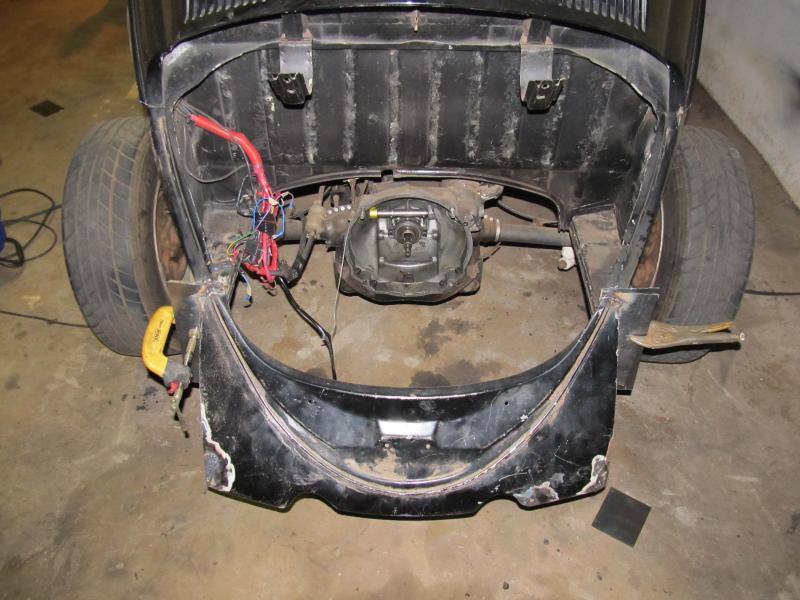
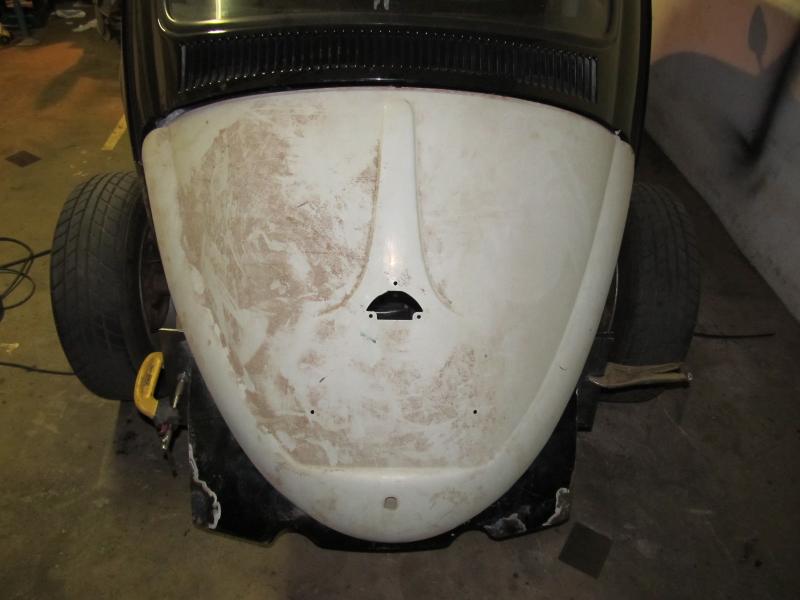
3. Repairs to body will be done as well as changing fenders to early style as well as Engine Deck lid, rear Valance will also be made removable. Early style bumpers. All trim and bumpers to be re chromed.
4. Full refinish of interior, with Mini Cooper front seats, "Leather" will be used.

Colour will be black and interior will be black leather and red leather.

The ideas is to get the new pan all done and do body work on the current pan, remove old pan and drop body onto new pan before final paint work is done.

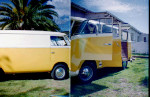
The reason for going a little retro on the restore is that the car has had some work done already and I am just taking it that one step further to what I have envisioned it could look like.

I will be posting pics as the build starts, plan is for the coming weekend to start the stripping ect. First priority is to get the new pan sorted as I think most of the work will be on the pan, Body is pretty sound but needs a little TLC.

Will keep you guys posted.

:mrgreen:


merlinpta
Oil Stain
Posts: 158
Joined: Mon Oct 22, 2007 9:47 pm
What model do you have?: 1969 Type 1
Location: Centurion
Has thanked: 1 time

Re: The Rebuild of "Stoffel" - 1969 Bug

Post by merlinpta »

So today I received some packages :D

A nice couple of bits and bobs to start the build with:

2 x floor pan half's:
Image

2 x Boxes:
Image

New Pistons and Barrels : 1680 cc
Image

Assorted Spares:
Image
Image
Image
Image

So now we can begin to have some fun, plan is to fully strip the new pan this weekend and weld in the replacement panels. :mrgreen:
User avatar
Sambabus
Short Block
Posts: 2648
Joined: Fri Aug 15, 2008 10:42 am
What model do you have?: Classic campers
Location: East Rand.
Has thanked: 39 times
Been thanked: 14 times

Re: The Rebuild of "Stoffel" - 1969 Bug

Post by Sambabus »

Awesome. Keep us posted
"ALL THAT LIVES IS BORNE TO DIE........NOTHING REALLY MATTERS." Robert Plant-Led Zeppelin.

"Crime is still goverments priority." SA Police spokesperson


RESPECT,EVERYONE SEEMS TO BE LOSING IT!!!
User avatar
Tony Z
Donor
Donor
Posts: 14994
Joined: Wed Sep 14, 2005 8:33 am
What model do you have?: 2.3L 69; 1302; P/Van
Location: Klipheuwel (near Durbanville), Cape Town or working at sea
Has thanked: 192 times
Been thanked: 487 times
South Africa

Re: The Rebuild of "Stoffel" - 1969 Bug

Post by Tony Z »

I love it when parts arrive, feels like Christmas....enjoy them
merlinpta
Oil Stain
Posts: 158
Joined: Mon Oct 22, 2007 9:47 pm
What model do you have?: 1969 Type 1
Location: Centurion
Has thanked: 1 time

Re: The Rebuild of "Stoffel" - 1969 Bug

Post by merlinpta »

So today is the day of all days, the resurrection of the old pan has begun:

Pan just after a bit of a clean up, now I can see what needs to be done:
Image

Rear right panel is totally gone:
Image

Left not bad, just surface rust:
Image

Got stuck in a cut some rot out, now the reason for the specific cut is that the pan half I purchased is not the same shave, me thinks it was made in Mexico.
So I had to make it fit, also as this is the 1st time I will be using a Mig welder "New Toy" and I still had to learn how to weld with the new welder I decided to not go to big:
Image

And the new replacement panel, with all the nice angles not so easy to get it spot on:
Image

No more hole, some gentle taps here and there and some mild cussing I got the panel in and welded up, welding does not look all the great but hey, I am doing it all my self. :hangloose:
Needs to be cleaned up and then flip over so that I can just check the welds from the bottom side as well.
Image

I also got some rust converter on the rest of the pan, and I could se the colour change as it started working. Rest of the pan is in very good nick and does not seem like a lot of work to get it done.

I also picked up some new goodies today, new Master break cylinder, new Rear break wheel cylinders as well as new break pipes all around. I now have all the spares required to fully rebuild the pan.
merlinpta
Oil Stain
Posts: 158
Joined: Mon Oct 22, 2007 9:47 pm
What model do you have?: 1969 Type 1
Location: Centurion
Has thanked: 1 time

Re: The Rebuild of "Stoffel" - 1969 Bug

Post by merlinpta »

Today I finished up most of the work on the replacement panel, lots and lots of work.... Who knew that replacing a panel will be such a lot of work. And not to mention trying the get a nice finish when you weld.. "And I am not the worlds best welder :lol: "

A couple of months ago I invested in a Electrical Winch, am I glad I did, the winch was fastened to 2 crossbeams in the garaged roof and this was used to tip the rolling chasse on its side so that I could get the bottom of the pan to smooth out some of the welds as well. "Voeltjie Poep" :mrgreen: .

I also gave all the welds a nice protective coating of Black Oxide to hold me over to next weekend.

Image

Also received some new pressies for the car, Thx Rui, this is going to work very nicely on the car:

Image

Last couple of items I picked up yesterday is to redo all the brake end lines ect.
Image

During the course of this week I will be stripping my bug so that I can get to the front and rear suspension on my bug. The front suspension is all good I will just replace all the seals and bump stops. Current gearbox is in very good nick and all seals and stop will be replaced as well.
Kaptein
Oil Pump
Posts: 271
Joined: Sat Jun 23, 2012 4:20 pm
What model do you have?: Baywindows & Beetles
Location: West rand,Gauteng
Has thanked: 2 times
Been thanked: 8 times

Re: The Rebuild of "Stoffel" - 1969 Bug

Post by Kaptein »

Welding the pan is a lot of work..I did it last year.Good work!
merlinpta
Oil Stain
Posts: 158
Joined: Mon Oct 22, 2007 9:47 pm
What model do you have?: 1969 Type 1
Location: Centurion
Has thanked: 1 time

Re: The Rebuild of "Stoffel" - 1969 Bug

Post by merlinpta »

So its all coming off....... Started removing Fenders ect.

Image

Now this loos sexy with the exhaust and no fenders, but not the look I am going for.
Image

Nose Job :wink:
Image

So work on the pan will continue over the weekend, I will see about stripping some more out of the car.
I did notice that I will have to redo the King and Link pins as well, as there is a lot of play on them.

Once I pull the motor I will take some nice pics to show you guys what is wrong with the Rear Fork of the floor pan.
User avatar
bugspray
Floorpan
Posts: 3468
Joined: Thu Jun 26, 2008 4:18 pm
What model do you have?: 71 Westy + 74beetle
Facebook: http://m.facebook.com/profile.php?r0d306f00&refid=7
Location: Pretoria- beetle / Benoni - Bus
Has thanked: 24 times
Been thanked: 16 times
South Africa

Re: The Rebuild of "Stoffel" - 1969 Bug

Post by bugspray »

Well done. Great work so far.
Image
More than meets the eye!
User avatar
JohanSmith
Oil Leak
Posts: 79
Joined: Fri Aug 23, 2013 1:18 pm
What model do you have?: 1600 Kestrel Buggy
Location: Amanzimtoti
Has thanked: 9 times

Re: The Rebuild of "Stoffel" - 1969 Bug

Post by JohanSmith »

Nice!!!
Cheers
Johan
merlinpta
Oil Stain
Posts: 158
Joined: Mon Oct 22, 2007 9:47 pm
What model do you have?: 1969 Type 1
Location: Centurion
Has thanked: 1 time

Re: The Rebuild of "Stoffel" - 1969 Bug

Post by merlinpta »

So tonight striped the carbs off, removed some engine tin, getting ready to pull the motor on the weekend.

The "New" pan will receive a good clean up, power wash, so that I can prep the pan for paint, once this is done need to stone chip the bottom of the pan as well.

Rest of the body will also be stripped to ready it to be separated from the current pan so that I can get to the gearbox and front suspension on the cars current pan. Lots of work to be done this weekend but fun will be had :lol:
merlinpta
Oil Stain
Posts: 158
Joined: Mon Oct 22, 2007 9:47 pm
What model do you have?: 1969 Type 1
Location: Centurion
Has thanked: 1 time

Re: The Rebuild of "Stoffel" - 1969 Bug

Post by merlinpta »

All prep on the pan is done, now just the final clean up and we will be good for paint. Hope to be able to complete the clean tomorrow and then put a nice coat of Black Oxide on.

I had to cut out and weld in a replacement piece were the Brake Master cylinder mounts. The inside of the mount of the pan was totally torn out and destroyed, lucky I have a donor pan that I could cut out to weld back into the pan I am busy fixing up.

Current state of pan with some rust converter on:
Image

Also when and collected a set of King and Link pins so that I can get the front suspension done, now just need to find a shop or person that can do the King and Link pins for me, any suggestions and contact details will be appreciated.
Image

Will be pulling the motor on the bug tomorrow so that I can start getting ready to split the body of the old pan.
merlinpta
Oil Stain
Posts: 158
Joined: Mon Oct 22, 2007 9:47 pm
What model do you have?: 1969 Type 1
Location: Centurion
Has thanked: 1 time

Re: The Rebuild of "Stoffel" - 1969 Bug

Post by merlinpta »

So today did not touch the new pan, did remove the motor and then......... hmmmm :cry:

Image

The grinder slipped... :shock:
Image

Oh wow what now, I will be adding a removable rear valance, I do have a earlier rear valance that I will be putting onto the car
Image

This is what I will be doing, need to get some 1.6 mm plate to make the flanges, not a bad idea and very neat and tidy:
http://forums.aussieveedubbers.com/view ... ?tid=80457

Will make it way easier to remove and install the motor especially with the twin carb setup
merlinpta
Oil Stain
Posts: 158
Joined: Mon Oct 22, 2007 9:47 pm
What model do you have?: 1969 Type 1
Location: Centurion
Has thanked: 1 time

Re: The Rebuild of "Stoffel" - 1969 Bug

Post by merlinpta »

:puterwork: So tonight I was able to "TAC" on the start of the flanges for the removable rear valance:

Trial fitment:
Image

Not to bad:
Image

With replacement engine bay cover:
Image

I would have finished the welding but my work light decided to have a nervous breakdown and I am not a good enough welder to be doing welding without proper light. This is going to work out very nice, lots of finishing and blending to do but that will be all done with lots of passion :drunks:
merlinpta
Oil Stain
Posts: 158
Joined: Mon Oct 22, 2007 9:47 pm
What model do you have?: 1969 Type 1
Location: Centurion
Has thanked: 1 time

Re: The Rebuild of "Stoffel" - 1969 Bug

Post by merlinpta »

Did some more work on the flanges tonight, touched up some of the welding after I bought a nice set of flood lights on a stand:

Image

Still need to do a lot of finishing but at least I can start seeing the results now:
Image

I will be welding the bumper mounts back on again as soon as I have completed the fitting of the flanges and finishing off some of the edges ect.

Very happy with the current progress. :hangloose:
Post Reply