My 1972 1600

Give details and pictures of your ACVW projects here.
Mister Paterson
Drip
Posts: 39
Joined: Wed Aug 12, 2009 11:13 am
What model do you have?: 1972
Location: Wirral UK

Re: My 1972 1600

Post by Mister Paterson »

Not much to add again as I've had to move my attentions to the girlfriends golf...bloody MOT work..:mad:

anyway, I've been cleaning up all the patchwork inside by the lugage compartment and although not ideal or what you'd call "resto" work with some seam sealer and a lick of paint it will be fine. I'm realising that the moto for this build is "if it aint broke..." you know the rest! :lol:

the only photo I have is from this eve as I've started to tack in the new metal at the top of the front quarter.. I'll hopefully get this finished tomorrow along with some other welding jobs...

Image

I also went out and bought a load of stuff to get cracking on the bodywork so i'll get some proper progress pics up asap!
Mister Paterson
Drip
Posts: 39
Joined: Wed Aug 12, 2009 11:13 am
What model do you have?: 1972
Location: Wirral UK

Re: My 1972 1600

Post by Mister Paterson »

bit more progress..

started off today by finishing off the two repairs on the top of the front quarter and then started making up the tricky rolled edge section. I ended up hammering the metal over a screwdriver shaft to get the right profile and then trimming to fit...

waiting to be tacked in...

Image

trimmed welded and ground back... far from perfect but then this whole quarter looks like a bears arse..:lol:

Image

I then cut out round a trim hole as it was shot and cut a new piece to be fitted, you can see it tacked in in the last pic...

Image

this was then fully welded and cleaned up plus I marked out and drilled the trim hole again.. it looks too big but it's just dark as the steel got a little hot..lord knows I have my work cut out getting this section ready for paint!

Image

Next I turned my attentions to the door mounting plates, I started by welding on proper nuts to the broken holes and giving it a lick of red ox..

Image

I also put on a coat of red ox inside the a post simply because I have access whilst it's cut open..

Image

got loads to do tomorrow so more pics then! :)
Mister Paterson
Drip
Posts: 39
Joined: Wed Aug 12, 2009 11:13 am
What model do you have?: 1972
Location: Wirral UK

Re: My 1972 1600

Post by Mister Paterson »

Just a couple of pics tonight.. finished up the drivers side a post repair, and re-fitted the broken plate. It was fiddly to attatch the thin strip wich holds the plate in place. Then after a quick blast with a flap disc I gave the whole quarter a coat of rust converter..

Image

then once that had cured I used some seam sealer and coated the inner wing area with the first coat of red ox. It was a small thing and it hardly looks great but just to see a section start to take shape felt good! I wont be touching that section now until it's time for the dreaded filler.

Image

I then moved to the back of the car and made up the pass side engine tray repair, but I'll get pics of that for you tomorrow.
Mister Paterson
Drip
Posts: 39
Joined: Wed Aug 12, 2009 11:13 am
What model do you have?: 1972
Location: Wirral UK

Re: My 1972 1600

Post by Mister Paterson »

Bit more progress from today..

more rust converter applied to the inner wings and bulkhead/framehead..

Image

Image

Image

also the underside of the luggage compartment...

Image

then some seam sealer...

Image

then the first coat of red ox..

Image

Image

Image

despite the pigeon poop welding and patchwork quilt metal they dont look too shabby, certainly fine for a daily hack!
Mister Paterson
Drip
Posts: 39
Joined: Wed Aug 12, 2009 11:13 am
What model do you have?: 1972
Location: Wirral UK

Re: My 1972 1600

Post by Mister Paterson »

Update time again...

first off I finished giving the rear end under the luggage compartment a coat of red ox..really fiddly job to get all the nooks...

Image

then I started to tidy up the door bottoms. The drivers side was good needing a small repair to the outer skin but two pence piece size, sadly I forgot to get before photos so here it is in red ox waiting for some bodywork..

Image

the passenger door was another story, on first inspection I thought it was solid bout turned out to be rotten on the bottom skin..

Image

aside from having no cash for a new door I like a challenge so set about repairing it. I did the repair in two halves so as not to completely release the outer skin. I removed the rotten sections inner and outer on one half then made up a new inner skin with the bottom lip, then made up the outer skin part and drilled holes so I could puddle weld the outer skin to the new inner. It worked ok so I did the other half...excuse my messy welding..

Image

I then repaired the corner (lock side)...

Image

and tomorrow I'll have to repair the hinge corner and grind down all the welds...

Image

I'm pretty pleased as it's solid and I learnt to control the welding temp to avoid distortion. A thin skim of filler and it should be all good.
Some other jobs included painting the bulkhead and framehead areas...

Image

Image

:)
Mister Paterson
Drip
Posts: 39
Joined: Wed Aug 12, 2009 11:13 am
What model do you have?: 1972
Location: Wirral UK

Re: My 1972 1600

Post by Mister Paterson »

More work from today...

Finished off welding the new corner on the door and coated it in red ox to keep the bare metal safe until I'm ready to prep the door bottoms. Obviously all the red ox on show will be rubbed back ready for proper paint when the time comes... I still need to shape the lip a little but it's ok for now..

Image

I also hoovered out the flaky bits from inside the doors and treated them to rust converter and a coat of red ox..

Image

I then turned my attentions to the interior floor. Again I ground back the bumpy welds and treated to rc and seam sealer. It looks better but I didnt go overboard on trying to make this look tidy as "you cant polish a turd" :lol: I also bought one of those grinding tips for the drill and sorted out the welds at the bottom of the a posts and rear quarters..

went from this...

Image

Image

to this with a coat of yup....red ox..

Image

Image

the plan is to get all the bodywork done then once the white has been painted probably on the luggage compartment and heater channels etc, I'll neatly gloss black the floor after a rub down. Should look better than the cargo ship red! :D

I also finished up the first coat on the last inner wing by re-fitting the fixed door plate, rc, seam sealer and paint.....

Image

Got to paint under the car tomorrow from the pans to the framehead, then hopefully get the filler out and start prepping.
Mister Paterson
Drip
Posts: 39
Joined: Wed Aug 12, 2009 11:13 am
What model do you have?: 1972
Location: Wirral UK

Re: My 1972 1600

Post by Mister Paterson »

Here we go again..

started off by painting all the floor under the car, the only bits I didnt do are the frame horns but these will get painted when I clean the gearbox and paint up the suspension components as they all need a good clean and rub down..

Image

Image

Image

going to let it dry for a few days...then do it all again...

After some thought I've decided to start the bodywork by sorting out the doors. I'm going to do the a posts too as I want to make sure the doors go back on ok after having the hinge plates out. I'd hate to do the bodywork and then have to cut it open again if theres a problem! Anyway, I started off simply by seeing how well some of the og paint cleans up. I started by cleaning up the inside of the drivers door...

from this...

Image

to this..

Image

this was just a quick effort with t-cut and white spirit. I'm happy that although scratched and worn the paint should come up a treat with some decent products. This leads me on to my next dilema..

If you've been paying attention :D..you'll know I plan on blending in my repairs and keep the paint looking as og as possible. After making a start on prepping a door bottom I now face the challenge of what to repair. At the time of typing I simply want to repair sections I've had to rub back so using the drivers door as an example I plan on keeping the dents that were there and aging the new paint to match, possibly adding some minor scuffs as I go so as not to make the repairs look too new.

You can see in the next pic a previous dent and where I have started giving a skim of filler..

Image

I'm hoping if I blend the paint up the door, let it harden for a couple of weeks then flat the whole door using 1500/2000 grit, then compound polish and wax I should get good results, obviously doing the same to the whole car..fingers crossed. so essay over... some more pics of my door repair so far..

Image

Image

Image

Theres a small dent in the door bottom that I didnt fill, but I do want to work the door lock corner a bit more as the profile isnt right yet..

more tomorrow!
Mister Paterson
Drip
Posts: 39
Joined: Wed Aug 12, 2009 11:13 am
What model do you have?: 1972
Location: Wirral UK

Re: My 1972 1600

Post by Mister Paterson »

Heres todays news...

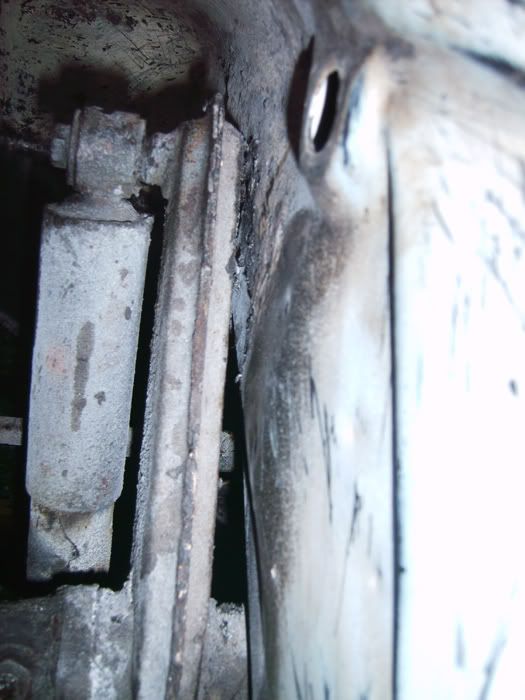
so I wanted to get the doors back on but when I looked at the drivers side a post bottom I realised there was a bit of a problem. It seems as though the previous owner had trouble getting the repair panel to line up? so I'm left with a good 3/4mm short on the drip rail. Luckily its only the drivers side thats like that.

Image

now I know the car will need filler but I wasnt happy about creating a drip rail out of it! :rolleyes: so I decided to take the long and annoying task of making a piece to extend it. First up I took some sheet metal and created a v shape..

Image

Then it was squeezed shut to form a rounded profile in the vice..

Image

I then spent what felt like forever cutting it down to fit and then tacked it in place..sorry about the pics, my cameras crap.

Image

I then chopped it to length at the bottom, seam welded it front and back and ground it down. I then started the filler work. This was the first skim but you can see that the drip rail edge is now a lot better..

Image

after many hours, and still needing some final work I threw on a coat of primer. I'm quite pleased with it considering..

Image

Next up was to get the door hung, I ordered some stainless but philip head door screws (unlike the hex ones off ebay) from machine 7. Not exactly cheap for screws but I hate those hex type.

Image

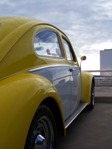
It's a fiddly job but the door went on ok and the hinge plates now work and tighten as they should. I still have slight sag in the door but there is play in the top hinge pin so I may take the time to fix that in the next few weeks. The door opens and closes ok though, just need to adjust the striker plates to get it uber smooth. Heres how it looks this eve with the door back on..

Image

last but not least I trial fitted the front wing so I could scribe round it... as I'm sure you've noticed the front quarter is a mess so I wanted a line to start the bodywork from.

Image

I'm going to get busy with the hammer in the morning and see if I can gently tap some of the dents out so I dont have to use quite as much filler..I'll no doubt update tomorrow night
Mister Paterson
Drip
Posts: 39
Joined: Wed Aug 12, 2009 11:13 am
What model do you have?: 1972
Location: Wirral UK

Re: My 1972 1600

Post by Mister Paterson »

Update time...

so over the last 2 days I made a start on the bodywork.. I started off on the front quarter which was a right mess, I used a hammer to take out some small dents but in all honesty it still needed a shameful amount of filler..

Image

after many hours it's starting to take shape, it still need finishing but i'm going to go over the whole car at the end, for now I just want to get the bulk of the sanding out the way..

Image

Image

Image

I put the wing on again to check for the fit and it's not bad..

Image

I also couldnt resist having a little day dream..

Image

next up was the rear quarter repair..

Image

Image

again still a work in progress but considering what I've had to repair, not looking too bad.. last but not least started some work on the front valance. It's nice to use white primer on a white car as it gives you some idea of how it will look.

Image

Image
Mister Paterson
Drip
Posts: 39
Joined: Wed Aug 12, 2009 11:13 am
What model do you have?: 1972
Location: Wirral UK

Re: My 1972 1600

Post by Mister Paterson »

Started work under the bonnet today..

I want to prep the spare wheel well for paint but had a few jobs to do first so I made a start on sorting out the wiring. For now I shifted some wires, grouped the two main parts for the headlights etc and cleaned up under the dash inc cleaning all the connectors. I still have loads to do and need to find some nice new black cable housing to finish up but it was a start..looked like this..

Image

looks like this now..

Image

the main job of the day was to sort out the steering box inspection plate. By that I mean make one as whoever put on the new front clip must of used a left hooker panel :rolleyes: I started by cutting out a hole, then I drilled a hole at the top and welded a nut to the back of the panel..

Image

then I cut some sheet to size, rounded the corners, drilled a hole and made a mounting lip for the bottom edge similar to VW's own design..

Image

I need to get a more factory looking screw but here it is with a bolt in place to hold it..

Image

It needs some cleaning up and prep before paint but I put a little primer on it for good measure.

Image

I figured since I'm going narrow and low that being able to adjust or access the steering box would probably be handy. I'll no doubt be back to bodywork duties tomorrow! :)
Mister Paterson
Drip
Posts: 39
Joined: Wed Aug 12, 2009 11:13 am
What model do you have?: 1972
Location: Wirral UK

Re: My 1972 1600

Post by Mister Paterson »

Blitzkrieg wrote:
Mister Paterson wrote:I meant to post this which is my updated "if only" concept rendering! :D
I LOVE IT!! 8) 8)

Nice thread, keep us updated on the progress of the car :mrgreen:
Thanks :D appreciate it!

As you can see this project has been going on for a while so I've posted up everything thats happened so far. I'll update it regularly from here. I look forward to being a part of the forum. :hangloose:
User avatar
bienie
Oil Pump
Posts: 279
Joined: Tue Jan 27, 2009 9:15 am
What model do you have?: 1961 beetle, Wizzard
Location: pretoria

Re: My 1972 1600

Post by bienie »

Looks like a lot of work has been done.
Good to see so much love going into the Beetle!!!

Keep it up. :hangloose:
One VW at a time
Chris
ACVWSA Junkie
Posts: 11732
Joined: Sun Jun 10, 2007 11:02 pm
What model do you have?: Beach Buggy
Location: Port Elizabeth
Been thanked: 1 time

Re: My 1972 1600

Post by Chris »

Wow,there is some awesome workmanship that went into this.

Great work!
Damn,I'm good!
Beach Buggy (Running and now Aircooled!)
VW TDi DC
Jetta V TDi
calooker
Donor
Donor
Posts: 4973
Joined: Wed Sep 14, 2005 9:24 am
What model do you have?: 77 SP
Location: Johannesburg
Has thanked: 5 times
Been thanked: 98 times
Contact:
Portugal

Re: My 1972 1600

Post by calooker »

:D WOW :D Great work going on there.
For what it's worth, ignorance has no limits ......
User avatar
1972
Exhaust Pipe
Posts: 1670
Joined: Tue Aug 26, 2008 7:40 pm
What model do you have?: Beetle
Location: Pretoria_Gauteng
Been thanked: 1 time
South Africa

Re: My 1972 1600

Post by 1972 »

Mister Paterson wrote:
Also.... After having a quick look at the beam I'm wondering if a 2" narrowed jobie will actually fit? I know the towers are recessed but I'm not sure if it will be enough. I have an inch of clearance at the bottom where the top tube of the beam is, but prob half an inch at the top where the shocks bolt on....grrr.... It looks like the new front clip is welded on exactly behind the shock towers causing a bit of a bump..

Image

Image

This puts me in a dilemma.. Aside from the cost issues, I'm not sure even if I scraped the money together if I'd be happy with inner wing mods just for a 2" beam. I'm contemplating a standard width beam but unsure if it will just annoy me...I guess this is what comes of early pans and late bodies! If it's close would anyone advise some "gentle persuasion" of the inner wings?

If anyone has any knowledge of or has a 2" beam I'd appreciate some advice...pretty please! :)

Ok you have to drill and plate the inside of the shock tower to get it to fit, Give me some time computer crashed will try and find you some pics of what i mean
John Jones wrote: Stock sucks!!!
Image
"Toy 1" 1968 Vw Beetle
"Toy 2" The dead Bus

Image
Post Reply