Hi Bugger,
I think you are referring to “am I going to degree the cam”
In a word no….
I purchased a very mild Webcam grind #73. This is not a split duration cam. I also purchased a Scat cam gear; this is a “fixed” gear. (Meaning the bolt holes are not slotted to accommodate degreeing the cam, cam gears designed for degreeing the cam are available if you want to go that far, normally I would)
However, remember my engine is only going to rev to +- 3500 Rpm. Well built, with reasonable HP and good torque are my goals, not maximum HP.
Cheers.
Galley Plug instructions - Type 4 aero conversion
-
Tony Z

- Donor

- Posts: 15010
- Joined: Wed Sep 14, 2005 8:33 am
- What model do you have?: 2.3L 69; 1302; P/Van
- Location: Klipheuwel (near Durbanville), Cape Town or working at sea
- Has thanked: 192 times
- Been thanked: 488 times

Re: Galley Plug instructions - Type 4 aero conversion
One thing that I think you have failed to mention regarding the tapping of the holes for the plugs....
As the tread is tapered, the more you tap, the further in the grub screw will go. If its anything like a T1 case, you will have some spots where the material isnt very thick, say 10mm. If you tap too deeply here, the grub screw will only start to grip and seal with 1 or 2 threads left, leading to the likelyhood of you suppling the threads out and killing the case or needing to tap to a new bigger size.
Once you have drilled the hole, start tapping about 5 turns. Pull out the tap completely and check to see how the thread looks. Has it cone all the way thru the material you have available? Put in the grub screw and check how far in it goes before it starts to bite. Hopefully it will barely bite at all at this stage.
Tap another turn and fit the grub screw again.
If you can measure the material thickness, do so. If it is thicker than the grub screw is wide, then its easy, if not, then you need to get things exactly right.
Basically tap until the grub screw starts to grab just before it is flush to the surface.
This is when I put on some loctite PTFE fluid - thread sealant, not thread lock.
Insert grub screw and turn until it bites. Now use a bit of common sense and tighten it a bit further. You'll prob get a half to a full turn extra. Dont force it, the case is a soft material that will bend out the way of the threads if it needs to and then when you remove the grub screw, the threads will likely come out with it.
If you are not sure, get yourself a piece of aluminium thats about 8mm thick and practice on that first. Try to get the grub screw to sit perfectly inside that plate once it is tight. Then move onto the case.
ANGRRR
http://www.aircooledvwsa.co.za/viewtopi ... 23&t=14775
1302S
http://www.aircooledvwsa.co.za/viewtopi ... 23&t=33521
Panel Van
http://www.aircooledvwsa.co.za/viewtopic.php?p=288723
http://www.aircooledvwsa.co.za/viewtopi ... 23&t=14775
1302S
http://www.aircooledvwsa.co.za/viewtopi ... 23&t=33521
Panel Van
http://www.aircooledvwsa.co.za/viewtopic.php?p=288723
vader wrote: The Force is strong with you young Sith Lord Z!
-
T4Flyer
- Drip
- Posts: 31
- Joined: Mon Nov 24, 2008 2:58 pm
- What model do you have?: T4 engine
- Location: Johannesburg
Re: Galley Plug instructions - Type 4 aero conversion
Hi Tony,
Thanks for the comments.
On the t4, case there is plenty of “meat” around the oil gallery plugs (except for the very big one at the front, that one I haven’t figured out how to successfully tap, as the walls are very thin. Although I don’t like it, up to know I just leave that one untouched) and the case material is normally good old aluminum, not magnesium.
I use the first tap to start the thread, once the tap has reached the desired depth I test the fit of the plug, it will typically only go in about ½ way. That’s when I use the second “cut down” tap, the start of this taps taper is +- slightly smaller than the beginning of the threads left by the first tap. This second tap does all the work in getting the plug to seat at the right depth. I aim for 1 1/2 - 2 threads protruding when the plug is fully seated.
With a plate, one tape will do the whole job as you continue to tap through the material until the tapered hole is wide enough to seat the plug fully. However, most of the oil galleries need to be treated as blind holes, so the only way is to use a short cut down tap and take your time.
I did try and take some photos of a threaded gallery but I need daylight to get a decent close up, just doesn’t work well with the flash and its to dark when I get home from work. I will try again this weekend. Promise...
Cheers.
-
T4Flyer
- Drip
- Posts: 31
- Joined: Mon Nov 24, 2008 2:58 pm
- What model do you have?: T4 engine
- Location: Johannesburg
Re: Galley Plug instructions - Type 4 aero conversion
Hi Guys,
What to do
I will post some more photos on the subject of "Oil gallery plugs" just to sort of close off the discussion (of course I will still try to answer questions) However I wanted to move on to balancing rods, as it is an issue I see a lot of builders either don't understand, believe they cant do themselves or just ignore.
I see this post has become Galley ? Plug Instructions. should I just continue with this tread or start another one.
Cheers.
-
eben
- Site Admin
- Posts: 6449
- Joined: Tue Sep 13, 2005 3:40 pm
- What model do you have?: None
- Facebook: www.facebook.com/ebenve
- Location: Fintice, Slovakia
- Has thanked: 91 times
- Been thanked: 54 times
- Contact:


-
ZeroAxe
- Drive Train
- Posts: 3004
- Joined: Tue Feb 21, 2006 12:07 am
- What model do you have?: FUmobile
- Location: It doesn't matter.
- Been thanked: 1 time
Re: Galley Plug instructions - Type 4 aero conversion
Hmmm, cool. I would like to see your take on balancing the rods. Done mine, but like to see how you have gone about it 
VW Enthusiast


-
T4Flyer
- Drip
- Posts: 31
- Joined: Mon Nov 24, 2008 2:58 pm
- What model do you have?: T4 engine
- Location: Johannesburg
Re: Galley Plug instructions - Type 4 aero conversion
Hi Guys,
As promised, some more pictures,
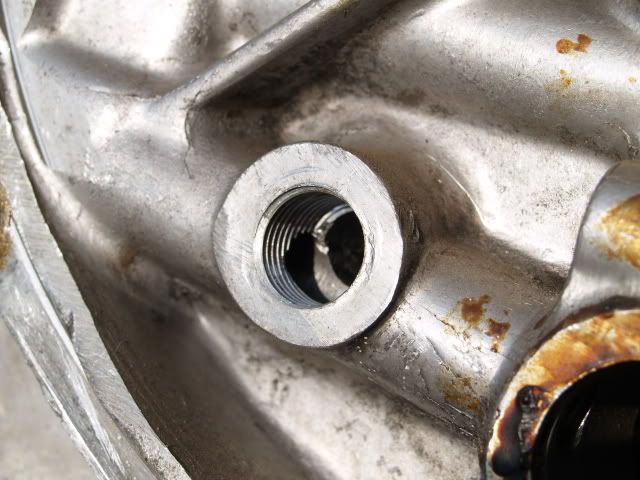
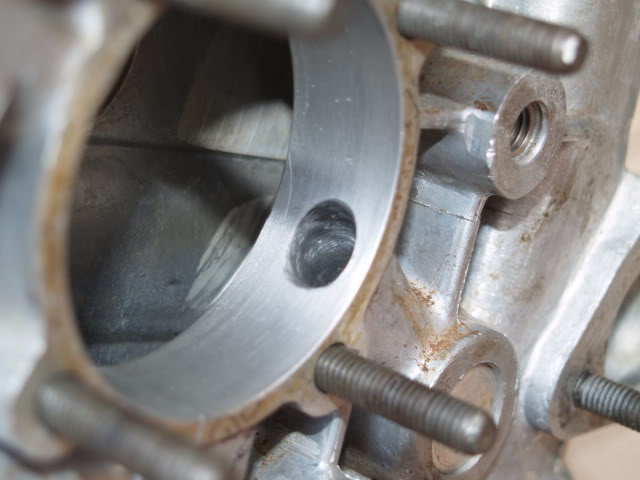
In this one, you can see that once you remove the bronze fuel pump guide there is plenty of “meat” to tap into the oil gallery plug.
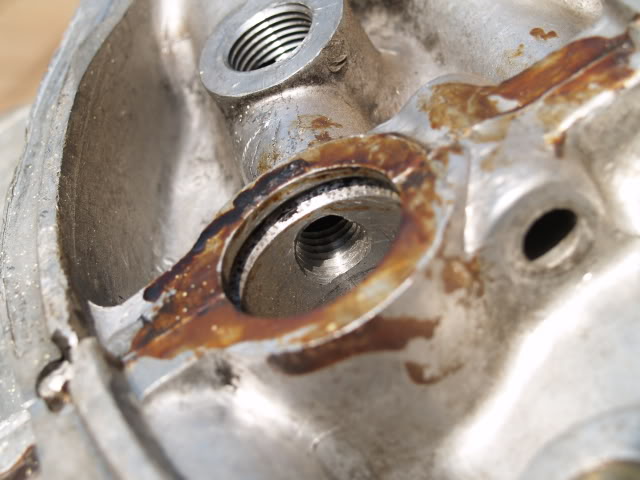
In this one you can see from the camshaft side where I have taped (M12) into the channel left after removing the bronze guide. I also taped in from the fuel pump side, thus blocking off both ends of the channel.
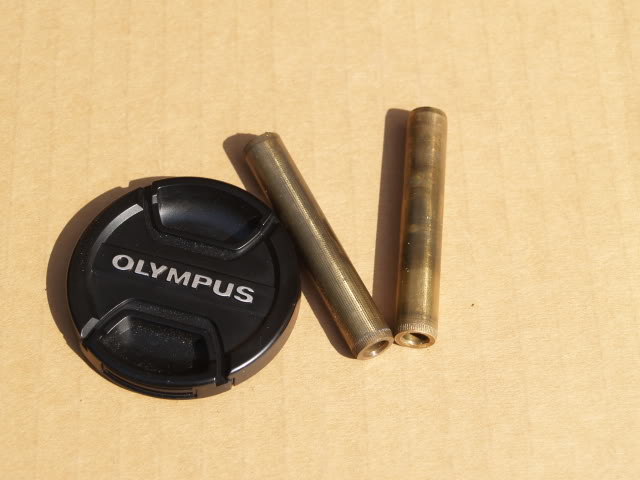
A couple of the offending bronze guides.
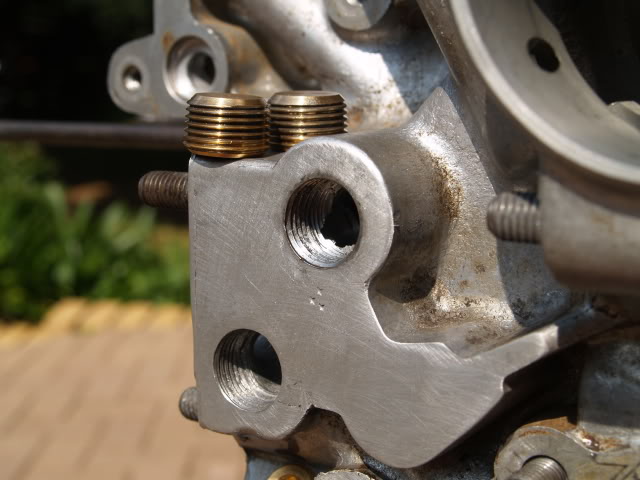
Close up of the front oil gallery plugs after they have been taped.
Oil pump with the 2mm spacer I mentioned in an early post.
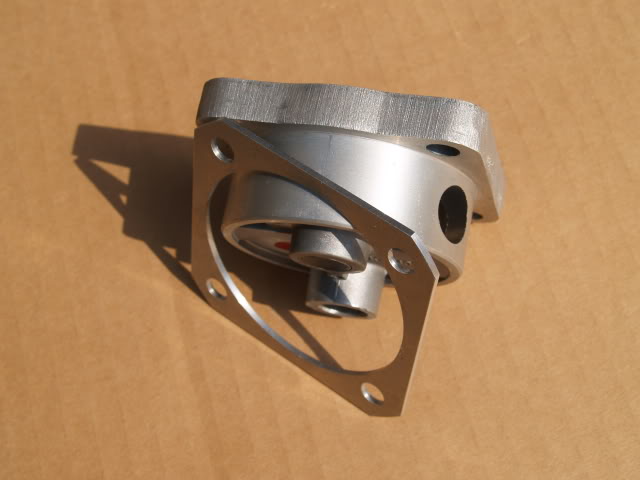
Oil pump port in the case after matching to the new oil pump. You can see if you matched the ports without the spacer the opened up port would be very close to the rear of the case. There is not a lot of “meat” to play around with in this area. (Of course, you don’t have to blue print the pump to the case, but every little improvement leads to a better engine)
Cheers,
T4Flyer.
As promised, some more pictures,
In this one, you can see that once you remove the bronze fuel pump guide there is plenty of “meat” to tap into the oil gallery plug.
In this one you can see from the camshaft side where I have taped (M12) into the channel left after removing the bronze guide. I also taped in from the fuel pump side, thus blocking off both ends of the channel.
A couple of the offending bronze guides.
Close up of the front oil gallery plugs after they have been taped.
Oil pump with the 2mm spacer I mentioned in an early post.
Oil pump port in the case after matching to the new oil pump. You can see if you matched the ports without the spacer the opened up port would be very close to the rear of the case. There is not a lot of “meat” to play around with in this area. (Of course, you don’t have to blue print the pump to the case, but every little improvement leads to a better engine)
Cheers,
T4Flyer.
-
ZeroAxe
- Drive Train
- Posts: 3004
- Joined: Tue Feb 21, 2006 12:07 am
- What model do you have?: FUmobile
- Location: It doesn't matter.
- Been thanked: 1 time
Re: Galley Plug instructions - Type 4 aero conversion
Good stuff! Keep 'em coming 
So when are you doing the valve train-thingy?

So when are you doing the valve train-thingy?
VW Enthusiast

-
70Turbobug
- Drip
- Posts: 18
- Joined: Tue Aug 03, 2010 2:09 pm
- What model do you have?: 1970 Bug
- Location: Himmelpforten,Germany
Re: Galley Plug instructions - Type 4 aero conversion
Very nice engine! Great work on the plugs,also! Where did you source the Mahle aluminum cylinders?
-
Les
- Drip
- Posts: 24
- Joined: Fri Aug 06, 2010 9:57 pm
- What model do you have?: VW Fastback type 3
- Facebook: les.williams@aeronet.co.za
- Location: Nelspruit
Re: Galley Plug instructions - Type 4 aero conversion
Hello T4Flyer,
Great stuff, see a good project coming along with your engine!
Do you perhaps have or know where I can find a complete Type 3 or 4 engine? I do have a Fastback and i'm looking for aan enige for it.
Good luck with your project!
Regards
Les
Great stuff, see a good project coming along with your engine!
Do you perhaps have or know where I can find a complete Type 3 or 4 engine? I do have a Fastback and i'm looking for aan enige for it.
Good luck with your project!
Regards
Les
-
Jetstream
- Drip
- Posts: 1
- Joined: Wed Aug 16, 2017 8:21 pm
- What model do you have?: Beetle 1976
- Location: Cape town
Re: Galley Plug instructions - Type 4 aero conversion
have i missed it, but in what type of aircraft is this motor to be fitted ?
will u be running leaded , LRP, or 100LL ? ..keeping your deck height and comp ratio in mind.
what oil will be used for run inn and normal use ?
i run a type 4 in a motor glider,managed by a gotech system, good from sea level to 13000 Ft, 6.5 L/Hr @2550 RPM.
absolutely fascinated by your posts ... thank you for shearing