Page 4 of 10
Posted: Thu Oct 25, 2007 1:53 pm
by Blitzkrieg
Thanks for the update!!
IS that a very rare, 1969 only Type 4 200mm clutch?
Posted: Thu Oct 25, 2007 8:41 pm
by IMPI
Be aware that those 200mm flywheels are cast and thus not the best idea for mega horsepower engines
the late vanagon type 4 engines had a forged flywheel
A
Posted: Thu Oct 25, 2007 9:06 pm
by vader
Fasbyt boet!
Posted: Mon Oct 29, 2007 4:29 pm
by AirPower
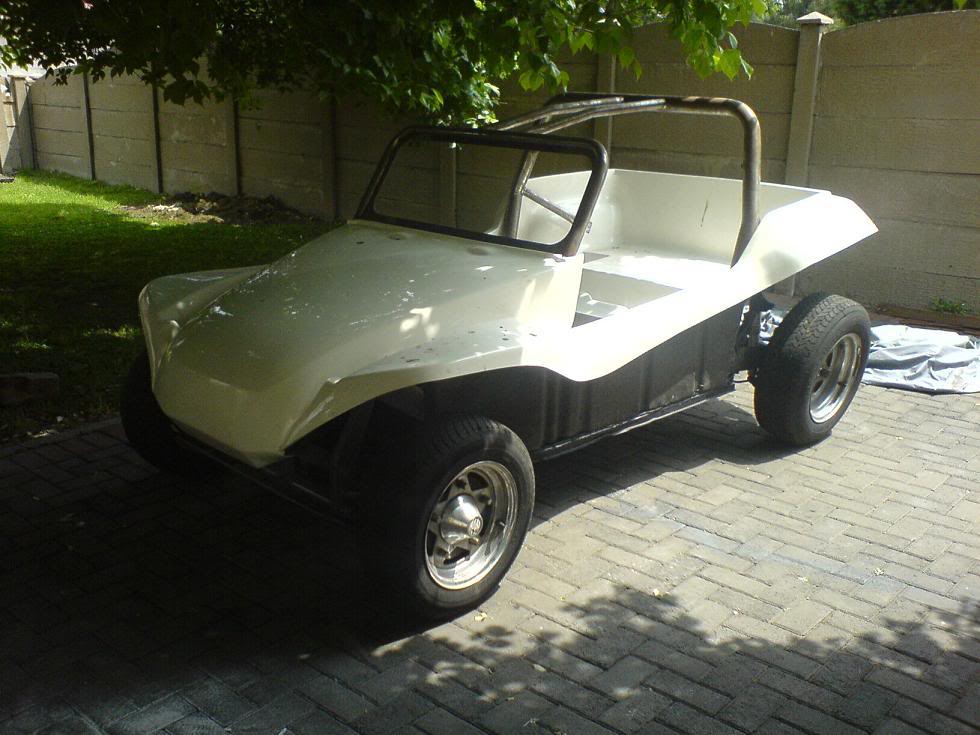
Raait - so this is where we are now - body has been fitted. The roll-bars still need to be powder coated as well as the mag wheels - maybe a dark grey or black ( almost gun metal )
Will post more as work progresses.
Posted: Mon Oct 29, 2007 4:33 pm
by Blitzkrieg
Thanks for the update!!
Posted: Sun Nov 04, 2007 9:26 am
by SUZIE
nice , what colour you going to make the buggy?
Posted: Mon Nov 05, 2007 4:10 am
by AirPower
It's gonna stay white. I'm hoping to powder coat the wheels and rollbars etc with a dark grey colour and black seats and interior, white gauges and install a middle console around the gear lever that runs upto the dash.
Still wondering what type of speedo to put in - that speedo in the 4age project (turbo project) is very nice but waaayy to expensive for me.
I see yours is also white - you did a very good job of refurbishing it!
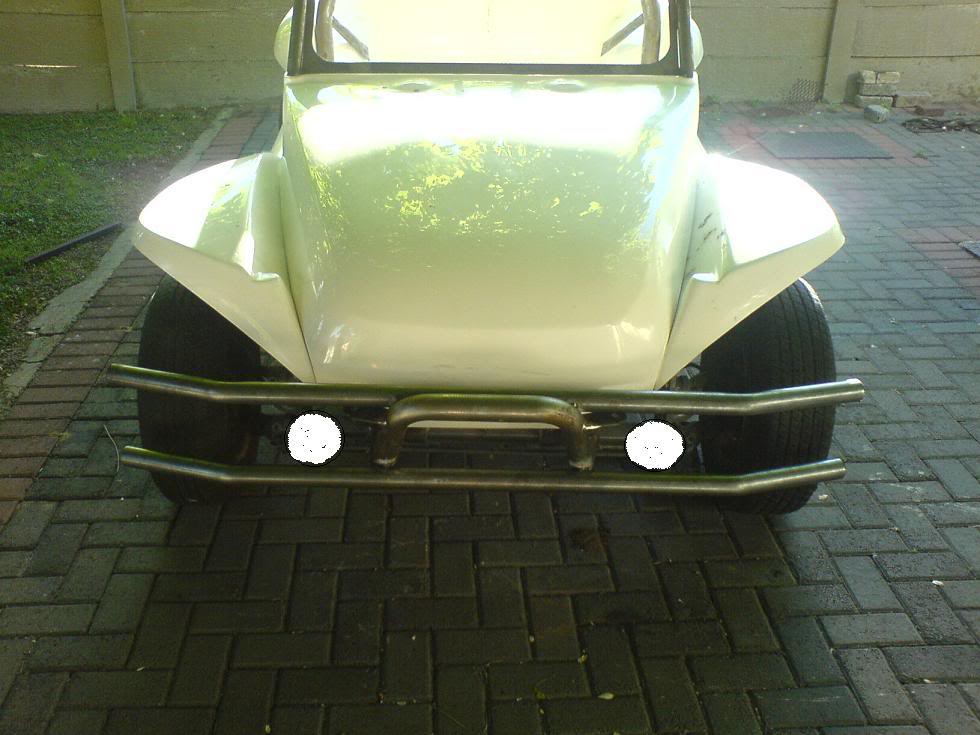
I'll be starting the wiring today (Monday) and weld up a different front bumperbar for it, if all goes well. That accident that Pine was involved in made me reconsider the extent to what the bumper bars and roll bars are fastened to the body. I'm going to try and fasten most, if not all to the chassis. (not that I'm saying that in his case it would have made a difference - you can't stop a truck) but in a minor accident they should be up to the task of protecting the car better. You kow in our cases there's only a thin piece of fiberglass between us and the other guy's 4x4.
Enjoy the week!
Mario
Posted: Mon Nov 05, 2007 9:29 pm
by AirPower
Front bumpers modified
Finally got the rollcage to fit properly. You pay a lot of money and then it doesn't fit - grind off the studs re-weld and try and bend it then the OEM weld breaks loose, then re-weld again. Man what a hassle!
O jah - the kids drawing is just to show a friend where the bottom spots are going to be fitted.
Posted: Tue Nov 06, 2007 6:14 am
by SUZIE
hi Airpower, You were asking about were dos the battery sits, look under my buugy projeck, the last pics i uploaded this morning shows were it comes, Your buggy looks cool with that bull bar
Posted: Sat Nov 10, 2007 9:37 pm
by Aircooledwannabee
Lookin good swaer we did a great job on daai front bumper

Posted: Mon Nov 19, 2007 9:27 pm
by AirPower
Posted: Mon Nov 19, 2007 9:48 pm
by Bugger
Posted: Thu Nov 22, 2007 1:44 pm
by AirPower
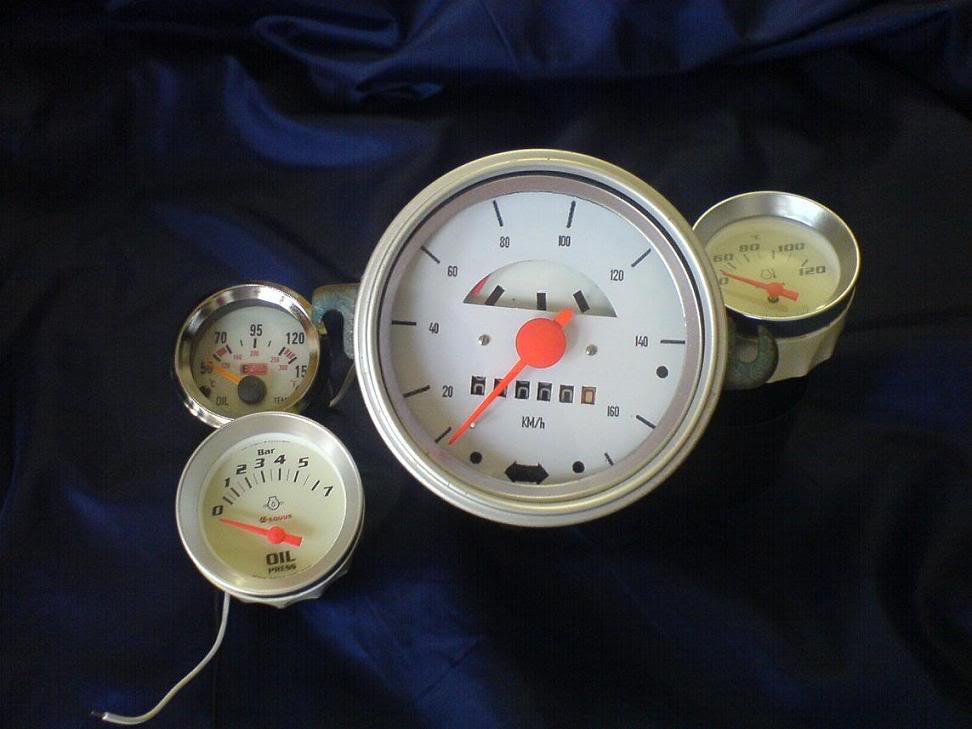
These are the gauges that will go into the buggy - that speedo took me about 2 weeks to change (broke the first one)
Posted: Thu Nov 22, 2007 8:25 pm
by Chris
Those gauges are nice.I have the fuel gauge of that make in my DC.
Posted: Thu Nov 22, 2007 8:32 pm
by AirPower
Thanks Chris.
How difficult is it to fit the fuel gauge? I was looking at it at the shop, but decided against it because I didn't know how the sender unit fits into the tank.