In the past I had a few issues with oil pressure dropping off at higher RPM. So after this happening a few times and twice at 6000rpm, an oil change was needed. Not surprisingly the old oil had a few shiney bits in it. So yea, well, guess what that means.... rebuild time
So while back at work last time, I ordered a few items for the rebuild (bearings and some extra toys and tools).
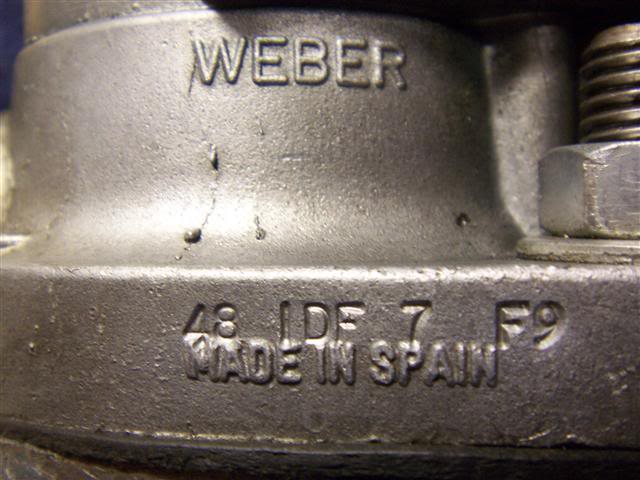
Let the fun and photos begin....
Engine apart
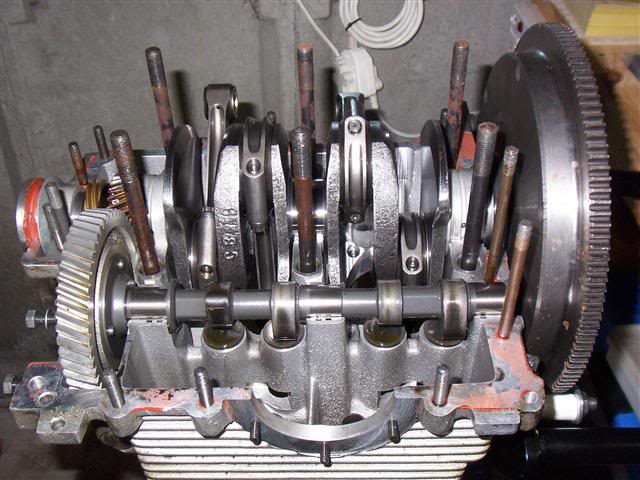
Seems the cam and followers are in nearly perfect condition. All the bearings are also in pretty good condition.
So yea, no idea where the shiney bits came from, but hey, engine is apart now, time to get on with it.
From what I can make out, the 30mm oil pump and 10W60 oil combo wasnt such a good idea. It looks as if the oil was being pumped out of the sump quicker than it could return.
I found 2 high spots on the crank which had picked up. So I polished these off.
Also did a few minor mods to my crankcase to help oil to drain back to the sump quicker.
Cleaned everything in paraffin then cleaned again with acetone before assembling.
Got all my new parts out and ready to go.
Downsized from a 30mm modified full-flow pump back down to 26mm. I am also now using 15W40 oil.
Time for some pictures and explanations
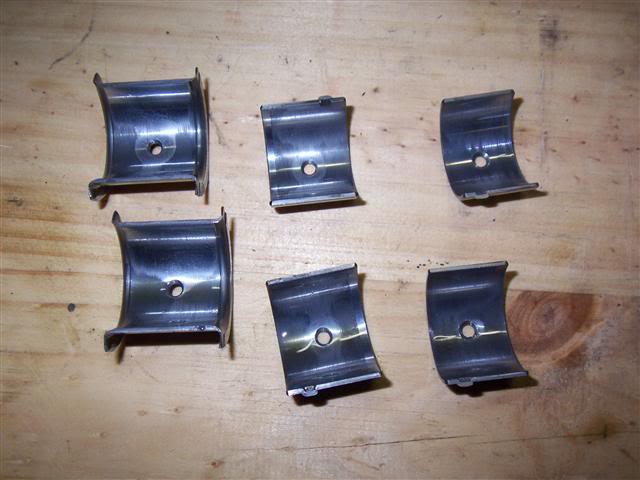
cam bearings
These look in pretty good condition. I probably could have used them again, but decided to upgrade my cam to a 310deg unit for the hell of it, so went with new bearings.
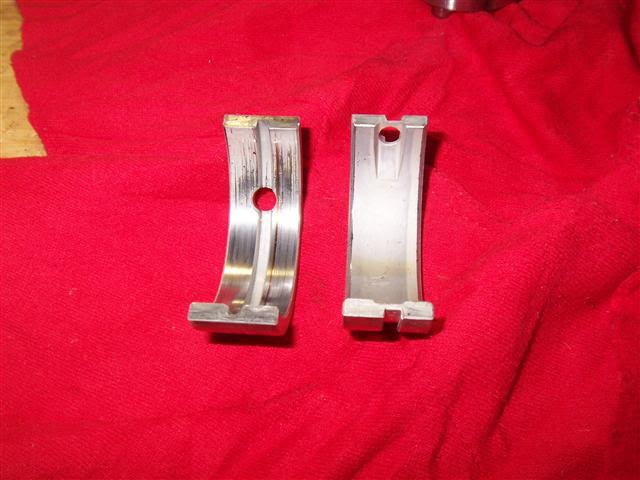
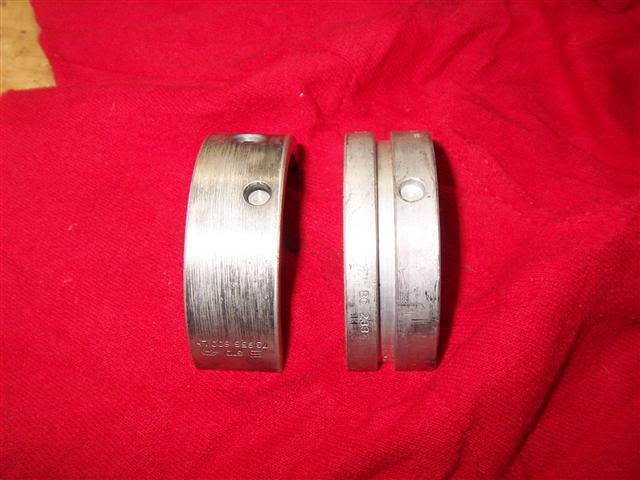
Then on to my new main bearings...
I ordered these as they were advertised as steel backed bearings. Well, not only are they stronger than the aluminium backed bearings, they also have a few changes to them. The oil groove which runs around the bearing is now at the back of the bearing, thus making the bearing surface larger and thereby reducing load (pressure) on the bearing. Also gives the oil a better chance to work. The groove is at the back of the bearing with 2 entry points near the case split.
You can also see the old bearing in comparison (KS).
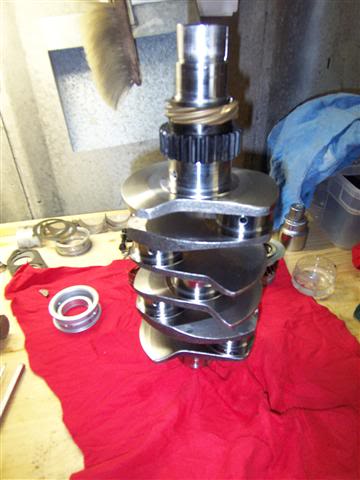
Then as an added bonus, the #3 bearing which requires removal of the timing pulley to change is now a two piece unit in this bearing kit. So no removing the timing gears next time.... you can see this in the pic of the crank to follow.
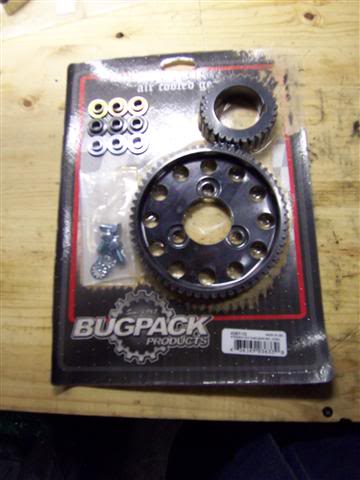
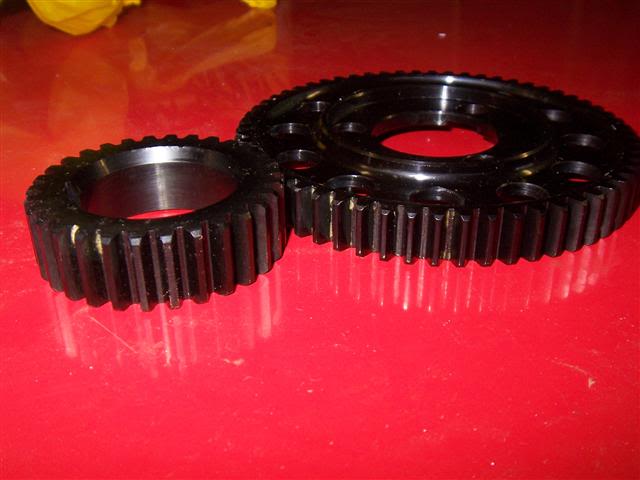
Previously I used a fancy pants timing gear of which only about 180 were made. This was a helical gear with a lower angle than stock, putting the angle between stock and straight cut. This was supposed to reduce side loads (thrust) while keeping the cam quiet. It worked, but the cam gear itself is pitted pretty badly (all the shiney bits maybe?). No option here but to suck it up and go for the straight cut timing gears. This is the one item I didnt want to buy as they are loud. Count your blessings if you have not heard a set.
So yea, no option but to fly in a set.
You can see all the washers.... these are for cam timing adjustments. I installed mine straight up at zero as the cam was ground within 1 degree of the manufacturers spec, and I think he knows best which is why it was designed like that. I can always play around later if I so desire.
And the crank (without the #3 bearing)
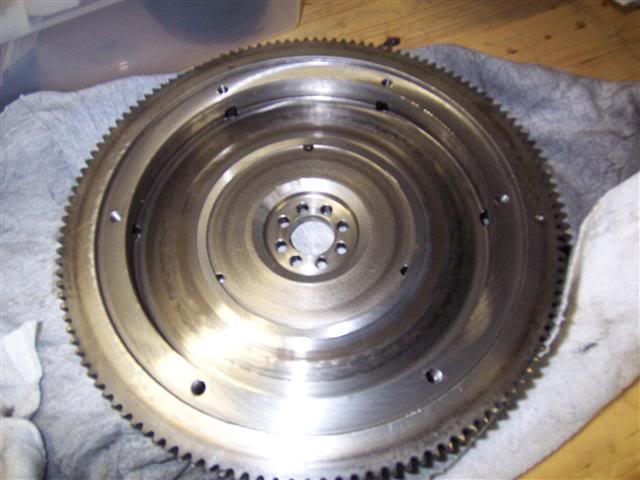
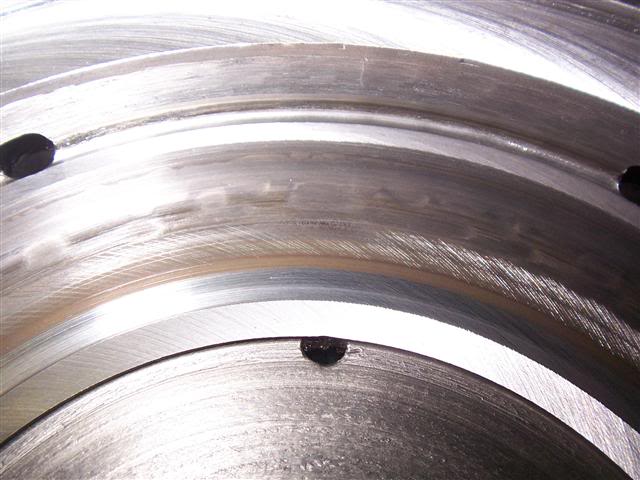
Then onto the flywheel. It appears to have lost the fight against my 4 puck copper clutch and was a bit scarred and warped.
Had it skimmed flat again and then had to have the crank and flywheel re-balanced. It was about 30g out of balance after the skimming.
Decided to get my hands on a 36hp style fan housing to free up a little bit of space in the engine bay for the carbs and anything else that needs space. Then modified the fan housing to suit my needs.
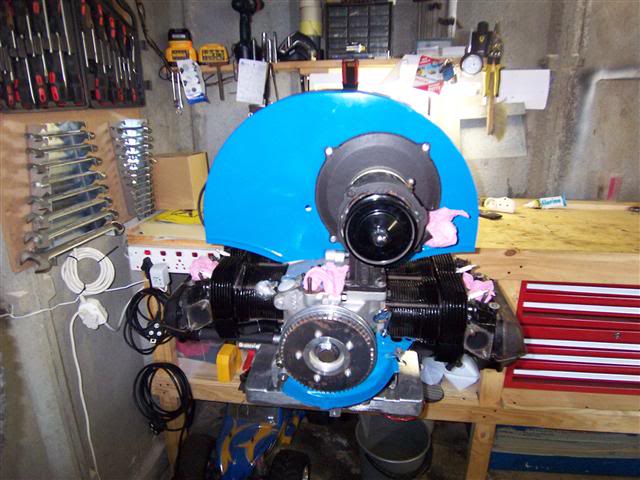

And then the engine came together...
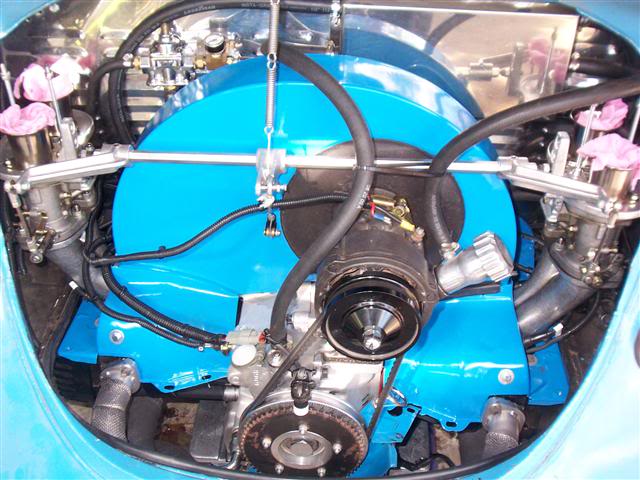
and for the heck of it (bragging rights)
The initial startup went fairly well, but right at the end of the cam break-in I had a nice drip starting that was coming out of the case where the #2 barrel slots in.
Out with the engine again.
Tear down to the short-block. Found that one of my barrel shims had folded over on itself and this caused the leak.
Put is all back together again.
Yesterday was the startup and test. Vader was on site to help out looking for oil leaks and such.
All went well.
After startup and checking for oil leaks, we went for a test drive. 20km at 120km/h.... all well.
Did have a small issue with my linkage which needs tweaking, but otherwise all went well.
The 310 deg cam definitely comes alive around 4000rpm, but with the engine being a 2332, it isnt difficult to drive at lower rpm. To be honest, it feels fine even when putting your foot down at lower rpm, but you definitely notice everything starting to work together properly at 4000rpm.
I think I have a bit of detonation above 5000rpm when putting my foot on the floor. Fuel ratio seems good (I have an AFR gauge) so it must be timing. I'll get around to that in the near future.
Still a few more bits to report on when I take photos. (Yes Wentzel, it works, will do the write-up in a few days)
If I get a chance before I go back to work, I'll be neatening up some wiring and doing some tuning. Baby steps.... I am in no rush (which is why it is progressing so slowly ( - and spending time on Vader's engine for the Tie-Fighter isnt making my projects go any faster).